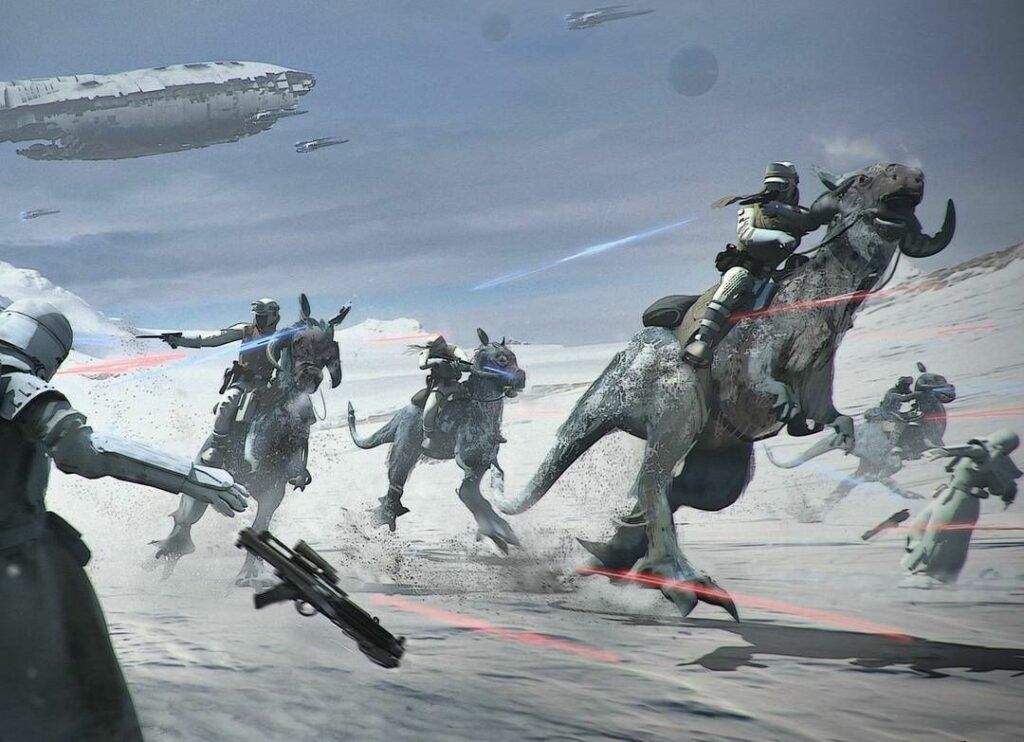
Yep, I’m writing about this, just in case you weren’t sold on them being amazing yet, or if you weren’t tired of hearing me talk about them on Notorious Scoundrels. This article should get you up to speed about what Tauntauns are, how to build them into your list and how to move them around the table.
Part 1: What Are Tauntauns?

Tauntauns are fast cavalry with solid melee and ranged damage. They come as two models on a small notched base, with 4 wounds per model, and move at Speed 3. These stats, combined with numerous powerful keywords, make Tauntauns the meanest snow lizards this side of the galactic core.
Tauntauns are loaded with keywords that grant them free actions. The Relentless keyword allows them to make a ranged or melee attack after moving. Their Agile keyword allows them to gain a dodge after performing a standard move. They are also have Reposition, allowing them to make a free pivot before or after they move.
In a game where action economy is normally at a premium, a unit of Tauntauns can perform seven actions if they are not suppressed, and even if they are suppressed, they can do four. The combination of Relentless and Reposition allows them to do their full movement with any two pivots they want, and still attack. Since Tauntauns are part of the Creature Trooper subtype, they have additional special rules when it comes to movement, which include being able to leave melee without having to withdraw, something essential to the way they are played. Specific maneuvers with Tauntauns will be covered later.
While they are performing said moves and pivots, as long as they are doing standard moves, Agile grants them dodge tokens, which can excuse them from having to roll their weak defense dice. Thankfully, each Tauntaun comes with four wounds, and since the unit comes with two models, it’s possible to cohere them in such a way to give them heavy cover. If you combine heavy cover and smart engagements with Agile and dodges from other sources, Tauntauns are extremely annoying to take down.
Tauntauns are very threatening thanks to consistent, powerful offense. Each Tauntaun is armed with DL-44 blasters which shoot two red dice. Tauntauns also surge to hit, which means these dice are extremely accurate. It’s quite rare that any one shot from a full unit will produce less than three hits, and common that it produces four hits. This accurate shooting means that you hardly ever need to take the aim action, further enhancing your economy. Tauntauns have Sharpshooter 1 as well, reducing the effect of cover, but often they are mobile enough to deny cover to their enemies anyway.
Next, we’ll look at melee. At first glance, Tauntauns do not have the greatest melee dice, with each model rolling 2 black and one white. A full unit of Tauntauns is looking to produce roughly 3.25 hits on average. In addition, Tauntauns have the Ram keyword. As long as the Tauntauns have performed a standard move action at maximum speed during their activation, they can change a dice in the attack pool to a critical hit for each point of Ram. Two models, two additional crits! The net result is offense that’s above the curve – it’s not uncommon to end up with 5 or 6 results after Ram. Tauntauns can also take Tenacity to boost their damage further.
Quite powerful, but far from invincible
For all their strengths, it’s important to remember that Tauntauns still have white defense dice. While they can produce two dodges on their own, they don’t hold onto them like Nimble units do. Additionally, Creature Troopers do not gain the benefit of cover from suppression tokens.
Tauntauns still suffer from a problem common to the Rebel faction: critical hits from any source go straight through dodges and cover, which are their favorite defensive tools. Stay away from Rotary RTs, E-webs, or basically anything with Surge: Crit. Snipers are also dangerous because High Velocity shuts off dodge tokens. Bossk and Palpatine take their Tauntauns well-done with extra sauce (Bossk with his poison and Palpatine with his piercing crit lightning spam).
It is extremely unwise to leave a Tauntaun where it can be shot at repeatedly or punched by multiple enemy units. Keep this in mind when deciding to how to move.
Part 2: Tauntaun List Building and Battle Cards
Now that you know what makes Tauntauns so awesome, lets talk about putting them in a list. Tauntauns ideally want high activation counts and a bid to choose good terrain and eliminate their worst Battle Cards. Utilize your bid to get rid of all the cards Tauntauns dislike the most. These are Vaporators, Hostile Environment and The Long March. As of the time of writing, I would recommend at least a 3 point bid, but a real commitment would be 7 points or more. You’re going to have to cut out all the fat if you want this list to really sing.
If you want three Tauntauns in your list, it can put some restraints on list building – you generally have to choose between what is, in the era of Shoretroopers, considered a “weak” gunline (5 or less Z-6 Rebel Troopers and 2 snipers) or take the minimum number of corps units and add a hero like Luke or Sabine. Now let’s look at how to equip them:
Leia and Tauntaun Riders

This is the “fundamental” Tauntaun build that a lot of players settled on when the unit was released and is foundation upon which many Tauntaun lists have been built since. Leia and Tauntauns are a power pair.
Leia Organa (Strict Orders)
Tauntaun Riders (Tenacity, HQ Uplink)
Tauntaun Riders (Tenacity, Comms Jammer)
Tauntaun Riders (Tenacity, Comms Jammer)
Total cost: 385/800 (415 points remaining)
Leia Organa with Strict Orders – There is a ton of synergy between Leia and Tauntauns. Her Inspire and Take Cover keywords, her ability to take Strict Orders, and her No Time for Sorrows command card are all very good for them. If you have five points to spare, you could also include Commanding Presence in the second Command slot to get a larger conrol radius – this helps Leia stay safe while controlling the Tauntauns from afar, but it’s not required; If you’re planning on shooting with her at any point, you need to move her up anyway.
HQ Uplink – It’s vital to keep control of your Tauntauns for as long as possible and Uplink helps, especially on 2 pip turns. Don’t be afraid to recover with this unit if it’s safe. Uplink turns any 1-pip card into an Ambush for that unit. If you take a different commander (Luke, for example) you might consider 2 uplinks to compensate.
Comms Jammer – Tauntauns are the perfect vessel for this upgrade. They are fast, they often fight within Range 1 or less of an enemy, and there are two miniatures that spread the jam radius wider. Jammers are amazing at messing up Shoretrooper mortar shenanigans, shutting down B1 coordinate and denying Fire Support for clones. Definitely an A+ upgrade for this unit, especially now that it’s five points!
Tenacity – While this makes a strong attack from a full unit even stronger, this upgrade really shines when Tauntauns are reduced to 1 miniature – it increases their maximum damage by 25% and a red dice with surge is awfully consistent (7/8ths). Adding offensive longevity is never bad – the unit remains a threat until both models are removed.
I mentioned high activation count earlier – most Tauntaun lists want 11 activations or more. The reason you want that many activations has to do with stalling and keeping your Tauntauns safe from harm. You don’t get shot if most or all enemy list acts before yours.
How do you get that high? Three sniper strike teams, of course! Three Tauntauns, three snipers and three naked corps units and Leia puts you at ten already. Some are even going to 12 with R2-D2, but that’s “future talk.” For now, I would stick with 11 – there is a point of diminishing returns when it comes to activation count.
Part 3: A Few Maneuvers
So far, we’ve covered what Tauntauns are and how to work them into your list. Now we’ll talk about how to move them around the board. Playing Tauntauns “correctly” boils down to a few general principles, some obvious, some not so much. Let’s talk about the basic order of operations for Leia and Tauntauns, then we’ll look at a few useful facts that apply to any list with Tauntauns in them.

During the opening round, you’ll want to deploy your Tauntauns out of sight and use Assault to place face-up order tokens on all three of them. The purpose of this is to wait until the last possible moment to activate them. During their moves this turn, you should be looking for ways to set up their charge move for the second turn.
If you can do it without taking return fire, you’ll want to finish setting up for a charge within Range 2 of a vulnerable enemy unit to deliver a blast from your Relentless pistols. Smart players will often use Standby to try and deter this shot, but with some careful measuring you can usually eat the Standby on the unit closest to the final position of your Tauntauns and then get follow-up shots with the other Tauntaun units. If they bring Overwatch or if it’s not possible to find a gap, don’t get greedy – simply wait until the Standbys are removed at the start of the next round. Of course, you may have to do both this and the following step together if the opponent has Krennic with Deploy the Garrison. If you can’t get it on the second turn, get it on the third – Tauntauns are usually the strongest or second strongest piece in every list they’re in, so protect them!
Once setup is complete, play Leia’s No Time for Sorrows to put orders to the two Jammer Tauns and the third uses its HQ Uplink, causing all three to make a free speed-1 move and gain a dodge from Agile. This maneuver works because of the way No Time For Sorrows is worded: it affects all units that are issued orders, not just those that Leia orders. Look for ways that you can use this speed 1 move to set up your Tauntauns in heavy cover or out of sight but still remain in charge range of the enemy (slightly under range 3).
Now things get a little tricky – you want to stall until a unit in charge range has finished their activation. You want to end your Tauntauns in melee with this activated enemy unit before the rest of your opponent’s army has had a chance to shoot to minimize the amount of damage the Tauntauns take. Until then, your Tauntauns will be vulnerable – but since you equipped Tenacity, the couple wounds they take on the way in are a slight benefit.
Rules of Thumb
Tauntaun Ranges So That Everyone Can Know:
Speed 3 move = 6.9″
Speed 3 move + base = 8.5″
Speed 3 move + base x2 = 17″ (1 inch short of Range 3!)
NTFS + Speed 3 move + base x2 = 21.5″ (Range 3 and a half!)
- Utilize line of sight blocking terrain as much as possible to maintain heavy cover. Tauntauns are actually fairly weak defensively without cover and their dodges.
- Avoid ending your activation in melee with a vehicle as much as possible – you are not engaged and can therefore be shot by other units.
- Moving forward is your best action because you get more stuff for free. The only exception is if you want to keep a unit that’s better at shooting than melee engaged with you to trap them.
- Troopers cannot withdraw through your base to get to objectives, so use your bases to block them off.
- You get two chances to reposition, so you can do a U-turn by pivoting 90, then making a 90 degree move.
- It’s better to reposition at the end of a move to set up for the following turn – for example, ramming an enemy unit and then using reposition and facing perpendicular to the angle of the charge to prepare to escape with a forward move on the following turn. This can help you avoid displacing a unit leader, or being blocked by something you can’t move through, like ground vehicles or other creature troopers.
- You can’t re-enter melee with the same unit during the same activation.
- If you wish to Ram, it’s best to go Speed 3 on the first move to activate Ram. Your second move can be whatever is necessary to get the best set of moves on the following turn. This is more optimal than doing a slow move first, and then a fast move to activate ram and connect with an opponent’s unit at the same time.
- Don’t forget that you can reverse! Tauntauns reverse at Speed 2, and can shoot their Relentless pistols off this move. They don’t get Agile to trigger because reversing is not a standard move, and they can’t Ram for the same reason. You can also Ram a unit behind you by reversing at a 45 degree angle, repositioning 90 degrees in the opposite direction and then making a 90 degree turn in the same direction as the pivot.
- Agile always triggers off a Standard move, even a Force Push.
More Tactics
If your opponent is really paying attention and not leaving any good openings for you to charge, or you don’t have a good approach angle to set up for a charge, you can try this maneuver. The Scoundrels and I call it “Skirmishing,” but it’s more accurately a Caracole, a tactic from actual 16th century warfare. In brief, Spanish cavalry were getting wrecked by pikes, so they started riding in a spiral formation just outside the reach of the enemy pikes while shooting them with pistols. Pretty neat, huh?
Instead of rushing headlong into your opponent’s wall of pikes (aka Royal Guards, Vader, or anything that will wreck you in melee), you can move into and out of Range 2 and use your Relentless keyword to shoot in between, similar to how a Snowtrooper unit plays ‘peekaboo’ with an enemy. At the end of your activation you’ll ideally be out of sight, or in heavy cover with two dodges and prepared to try again the following round. This is great for keeping your Tauntauns alive if there’s just too much heat up close.