Welcome back to Outer Rim Tactics, where we dive in-depth on specific strategies, fundamentals, and corner cases! Last month, we discussed melee charge ranges and terrain scoping, and now we turn our attention to Turn Zero and Objective Play.
What is Turn Zero? Simply put, it is the period of the game before the first turn is begun, where battle cards are determined, objectives are placed, and units are deployed. For today’s purposes, we will be focusing on objective placements and unit deployments; both broadly speaking and using some specific examples. To begin with, let’s look at the deployment setups and some basic tips and pointers for where to and where not to deploy your objectives, most commonly Moisture Vaporators and Supply Boxes.
For a more indepth look into bidding and reasons to choose blue or red player, I did explore this topic here.
Deployments
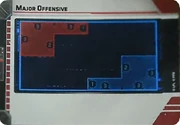
Fortunately, Major Offensive tends to be rather straightforward for objective deployments, as it also seems to be present in every single battle deck in Legion. If you look at the zone, it can be split into two zones, the box and the panhandle.
Simply put, attempt to place your objectives above the box or in-between the box and panhandle, as leaving them to the left of the panhandle results in them being exposed, and more in reach of your opponents army than your own.
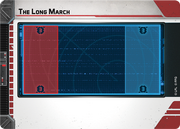
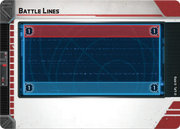
Long March and Battle Lines share some similarities in that both deployments involve the opposing armies looking directly across from each other. In these cases, it is best to survey the terrain, pick a side that looks more favorable for you, and cluster your objective placements to that side.
For example, if you were to draw battle lines and place one vaporator on the far left and one on the far right, your opponent has a significant advantage because they can cluster theirs towards whichever of your vaporators is more exposed, allowing them to focus on one small section while you spread out to control your own areas.
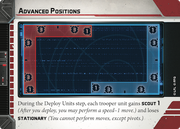
Advanced Positons is the simplest deployment for objective placements, as the eligible battlefield size is much larger and tends to be further away from your opponents deployment zone. If you imagine a hypotenuse that stretches from top right to bottom left of your zone, placing objectives within this triangle zone will generally result in safe, easily scored objectives for you. There’s no need to get fancy here.
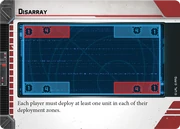
Disarray is where things get interesting. Because of the spread out nature of the deployment zones and the randomness of table construction, there are no “hard and fast” rules for objective placement. However, there are some deployment strategies to keep in mind, two of them in fact.
The first is dropping a “sacrifice” unit in one corner, and keeping the rest of your forces together in another corner, effectively creating a ball. This is useful when you have a gunline list or a Palpatine list. The other option is creating a “pincer” and splitting your forces between the two zones in order to converge on the weaker enemy corner. Lists with double commanders, such as Luke/Leia and Krennic/Veers excel at this concept.
Real Life Example
Deployment cards are great, but there’s nothing like looking at an actual table and discussing the merits of deployment locations. Let’s look at one now from the 2019 Northeast Open.
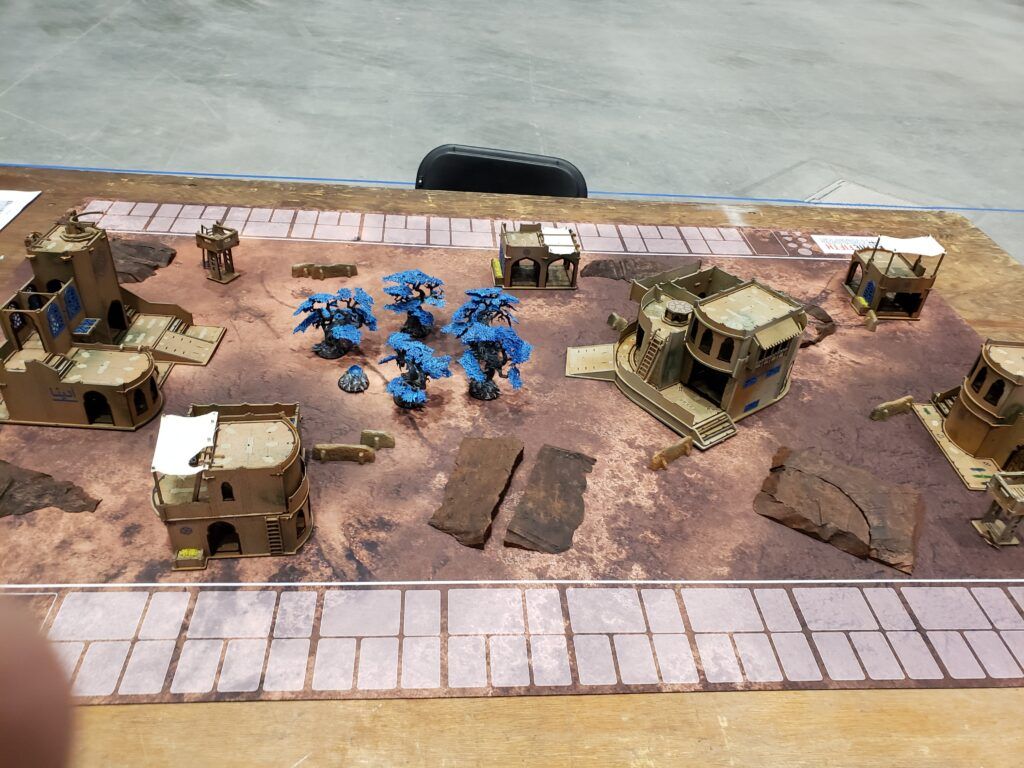
In this scenario, we have Sabotage the Moisture Vaporators, Major Offensive, and we’re the blue player, so we’re beginning in the bottom right corner. Harkening back to the quick discussion about the major offensive deployment, it’s often best to avoid placing objectives in the panhandle, and this table illustrates why. The portion of the table between the blue trees in the center and the right sided complex is quite open, and any objectives placed there would be heavily exposed to enemy fire.
Let’s instead focus on the main 3×3 box of the deployment zone. The complex on the right offers an abundance of line of sight blocking safety for objective deployments, and also provides access routes to either side of the table, from both the north and south. If you have Boba or Sabine, you could even go over it!
This same objective deployment logic also applies to recover the supplies box placements as well.
Objective Play
I’d next like to examine some strategies for each objective card, as there are a number of established methods for winning each objective.
Intercept The Transmissions
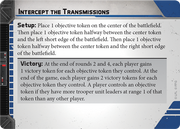
There are two main schools of thought when approaching Intercept. The first is to attempt to rush the objectives early, scoring as many points as possible on turns two and four and creating a deficit too large for the opponent to overcome. This seems straightforward enough, but spreading out your forces and having enough firepower to challenge on three fronts is quite difficult for a standard army.
Fortunately for the Rebellion, the Tauntaun cavalry has arrived, and David goes more in depth about them here. On the Imperial side, the GAV Tank and ATST can assist in spreading your firepower to a longer range, while the CIS have their double threat of Grievous and Dooku to contest multiple objectives.
The second option is generally more suited to gunline play. It involves holding back over the first few rounds and focusing on attrition; allowing your opponent to take an early lead, but eliminating so many of their forces that they cannot hold onto their positions by the end of the game. This strategy frequently involves Victory Point ties, with the gunline player winning on points destroyed.
A final point to keep in mind here, if your opponent scores all four VPs over the course of rounds two and four, you will have to score all three transmission points on the final round while winning on points destroyed. It is often best to attempt to score at least one point on round four to make your victory easier at the end of the game.
Key Positions
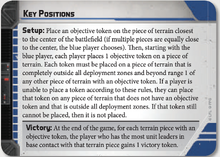
We’ve arrived at everyone’s favorite reason to bid. Oh wait, wasn’t there an errata…
Key Positions is a game of attrition and patience. The first four turns frequently play out as a deathmatch, with both armies attempting to eliminate minis and activations. As a forward thinking player yourself, your focus should be ensuring that you have more activations remaining than your opponent by the end of turn four. Turn five can be used to position and wipe out stragglers, and turn six is when the chickens come home, and you have to scramble onto your positions.
Key Positions happens to be the lowest number of VPs that can be scored on an objective card, and that makes it particularly vulnerable to units with Bounty and Secret Mission, which both grant “free” VPs. If an enemy Bossk, Boba, or R2 is on the table, be aware that they can easily swing the game with their card effects.
If Luke has a bounty token on him, resist the bloodlust and play it safe.
Sabotage the Moisture Vaporators
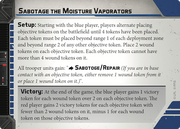
Contrary to the joke above, Sabotage may be the most compelling objective to bid towards for a gunline style list. The most common, and effective, strategy for this objective is to hide your vaporators in a safe location, preferably behind some line of sight blocking terrain, and force the opponent to come to you. If you recall, the blue player wins both points and objective ties, so creating a defensive position (as discussed by the Notorious Scoundrels) creates a very favorable battlefield setup for the blue player.
So you’re stuck as the red player, and Sabotage is about to be forced by your opponent; time to panic, right? Wrong. There are a few strategies you can utilize to combat this position, and we’re going to review two of them here.
The first is forcing a deployment such as Disarray or Battle Lines. As we briefly discussed above, both of these deployment zones are “wide” and create more exposed objective placements, giving you an opportunity to exploit an open vaporator placement for your opponent in order to go up on points destroyed or even score a VP on their vaporator.
The other tactic is more list-related. Using units such as Luke, Sabine, or Bossk (all of whom possess area control abilities), you can effectively shift your objective focus onto one of your vaporators as well as an exposed opponent’s position. This idea is combined with one of two methods: you can either quickly tap your own vaporators as you rush towards your opponent’s, or you can score one of your own and focus on scoring your opponent’s while winning on points destroyed.
Recover the Supplies
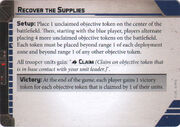
Across no other objective does your gameplan change as drastically based upon your list as it does on Recover the Supplies. Recover is slightly unique in that the “middle/neutral” objective moves across the battlefield. Because of this, there are three main play methods to discuss: an early box grab, a last second grab, and a slow but steady attrition wave.
The box grab is a trick that has underwent a number of iterations, from the early Jyn/Pathfinder infiltrate trick to the Boba/Sabine with recon intel tech. Let’s examine the Sabine version, especially in today’s meta. The basic premise includes Sabine deploying as close as possible to the middle box, then scouting directly towards the box, thereby being in a position to make a speed-3 move-claim turn. With Sabine commonly being run in an 11 activation list these days, being able to keep her safe for a turn while outwaiting your opponent’s forces is not terribly difficult.
The last second grab strategy is as straightforward as it sounds. It is easiest to pull off in a Palpatine list, as you have access to “Pulling the Strings” and the option to perform a double move and claim. This method directly plays into the third.
A slow, steady wave of attrition may seem basic, but sometimes basic is best. This is the gunline style of play, where you whittle away at your opponent’s forces, especially those near the middle box, as you move towards the box to claim it yourself. As mentioned above, this can include a last second grab, but also leaves you in a position to turtle in the middle of the table, creating a shield around the objective for yourself.
Breakthrough

The best strategy for breakthrough varies greatly based on list construction and the drawn deployment, so let’s quickly summarize them. Unfortunately, there are two styles of list for the purposes of breakthrough: those with Tauntauns and R2D2 and those without. As a reminder, R2 has been out on TTS for some time now, but hits the table for real on Jan 24th.
If you don’t have R2 or Tauntauns, the most common strategy is to move to a board position that allows late game moves into the enemy zone and also gives you board control. With R2 and Tauntauns, you are able to send R2 towards the weakest corner of the enemy zone while either skirmishing or diving in with your Tauntauns to slow down the enemy enough that they cannot move units into your zone.
Dialing in on the deployment zones, Advanced Positions, Battle Lines, and Disarray follow a similar pattern of “more movement than shooting.” What I mean by this is that armies often move towards the empty scoring areas of the opponent’s zone instead of engaging the opposition head on. Meanwhile, Major Offensive and Long March create more of a head-on engagement, and finding a free lane to your opponent’s zone is hard to come by.
A final caveat to remember is that Tauntauns warp breakthrough, with their abilities to engage, skirmish, and still score at the end with their speed 3. If your opponent brings some, make sure to focus them down first.
Looking to the Future
With Vital Assets coming on the horizon, ensuring that the current battle cards are second-nature is crucial to a successful Legion experience. There are a multitude of different strategies and tactics for each objective and deployment, so I hope this discussion was useful, and spurs even more new ideas. As always, feel free to reach out on Facebook or Discord if you have ideas of your own or would like to discuss anything further!
To all those coming to LVO, I look forward to meeting you there, you’ll find me in the ridiculous flamingo shirt at the Fifth Trooper streaming table!
Comments are closed.