This is an archived post relevant to Star Wars: Legion in its original iteration. We are keeping it on the site for historical purposes but it should not be used for reference to the current version of the game
My Experience with the Falcon Crew in Competitive Play
Star Wars Legion is a game of dice, chance, and calculations. We can influence the math by utilizing a plethora of different factors. You’ll see a lot of information being published by some really smart people on various websites and forums, and a lot of that will focus around player skill, generally accepted best practices, and various small detail strategies – all of this is designed to help you jump start your career as a Legion player, but today I want to talk about my experience pushing things off of the popular meta. Let’s focus on the Falcon Crew.
I’ve been spending a fair chunk of my Legion playing time by fielding some of my most beloved characters from the Star Wars Universe: Han, Leia, and Chewbacca. Together they form a trinity of dodge multiplication and piercing perfection, hunting for aim efficiencies, and using their powerful command cards and teamwork to amplify rebel synergy to new heights. This list archetype is considered off meta for, at least in my opinion, two primary reasons: it doesn’t include Luke, and it includes Chewie. Luke is definitely a powerful piece, there’s no argument there. Force push is perhaps the single most influential and powerful upgrade available in Legion right now. Articles have been written about it, lists have been dedicated to it, and World’s invites have been won from using it. It’s really great, basically. I’m not using it. And then there’s Chewie. Honestly, I feel it’s difficult to argue a case for using Chewie outside of this list. He’s over costed for what he brings, particularly with Bossk coming out soon, and his command cards don’t offer a lot due to their interactive nature with the other primary rebel commanders. However, when we combine him with two out of three of those commanders, suddenly the force is with us and his cost almost feels too cheap.
The Cast
First billed: the Falcon Crew
Han Solo: By far and large Han’s biggest asset is his command card set. Each of them is uniquely powerful and can often ruin your opponents plans. For me, Han is one of the most difficult Legion commanders to play. You need to really read your opponent and the table well in order to maximize the effects of his command cards, and even Han himself. I won’t say I don’t feel a tiny bit of enjoyment in seeing the frustration on my opponent’s face after a well played Change of Plans, or when I know they needed a unit to go first and I Apologize for the Mess while I shatter their meticulously thought out maneuver. This is a skill this article can’t teach you, you need to play a lot of Legion, read the table, and quite frankly – screw it up a bunch of times until it starts to make sense. His second asset is that big beautiful pistol of his. Pierce 2! What more could you ask for. Oh! It shoots at two different targets, you say? With Sharpshooter 1? This is obviously old news, but using this to maximum effect is critical in this list. All of the heroes need to contribute offensively and at the right time, and Han is the centerpiece to cutting through your opponents red defense dice and corps units. For this reason I love putting upgrades like Environmental Gear on Han so he can be in the right place at the right time.
Leia Organa: Fearless and inventive might have been a bit of a stretch, but not by much. Leia is a big part of the synergy and defensive balance of this list, but she packs an unbelievable punch and is underutilized by a fair margin, in my opinion. When I see people playing Leia behind walls, they’re missing out on her best tools: Sharpshooter 2 and Pierce 1. And three beautiful black attack dice, too. Leia brings more than dodges to this list, and it should be shouted from the highest trees of Endor. Take Cover 2 enables Han and Chewie to push forward and engage in an aggressive way, but she shouldn’t be far behind, and we’ll touch on why later. Leia contributes by helping everyone survive, inspiring suppression, and punishing reduced units in heavy cover.
The Mighty Chewbacca: At 6’7”, I certainly have an affinity and appreciation for other tall creatures. Chewie is no exception. Unlike Han, Chewie’s biggest asset are his keywords. Guardian 3 and Unhindered are my favourite parts, for the purposes of this list in general, but Expert Climber and Enrage have their benefits as well. I also love his command card set – each of them is incredibly powerful and provides some huge synergy bonuses to himself and his friends. Chewie has a different type of role in this list depending on what your opponent has brought to the table, as I usually use him as a character hunter, but he also soaks wounds for your critical units in critical situations. This can be immensely frustrating for your opponent as well.
Stunt Doubles
Every list needs to be filled out with corps, special forces, and support units. As I have been playing this variant across multiple releases, my list structure has changed. I used to use a unit of full commandos, for instance, but have since pulled back from that in the interest of bringing more Specialists into my lists. Let’s dive into units I like to use, and why.
Corps: Z6’s. Typically I was running only three, yes I said it, three corps units. If you’ve ever read anything written by anyone intelligent in the Legion community, this is strongly frowned upon. It hasn’t stopped me from going 3-1 in the YBTL and nearly undefeated in my local area. GengisJon came up and stomped me to the curb at the last RPQ in Vancouver. Thanks Jon. Otherwise I’ve had ridiculous success with only three corps. There’s a few reasons why, though, and the primary one for me is token mix. Having a lower corps count enables me to have a higher chance of pulling a commander or special forces token, and historically I’ve found it beneficial to have what I consider a nearly even pool of 3 token types: Corps, Special Forces, and Falcon Crew (Two Commander tokens and one Operative.) Lately I’ve been switching between 3 and 4 corps, as I occasionally take an FD turret, but more on that later. In this list Improvised Orders is incredibly necessary.
Special Forces: I love Hunter Snipers. And I mean it when I say I love them. Falcon Crew thrives on taking out characters and mopping up the remainder. Murdering Vader at the beginning of turn 3 feels good, let me tell you. I will often run three Hunter Sniper Strike teams, which is considered wildly off meta because of the 18 points of Hunter, just so we’re still on theme here, or two Sniper Strike teams and a single Sniper Commando squad with Hunter. Sniper Commandos are widely considered too fragile, as well, but you have Chewie to help these guys along. Full Commando squads are incredibly fragile, which makes running them very high risk. If you’re going to do it, you need to practice your timing and doing things like popping out or making sure you have higher priority targets available for your opponent, because they can focus fire your Commandos down before you know it. Five black and one white dice with Sharpshooter 1 is no joke, however, so these can pack a serious punch and ruin targets in any type of cover. Use them wisely.
Support: 1.4 FD Laser Cannon Team. It’s a mouthful. I get it. The FD cannon is actually really good, at least in my opinion. Range four and impact two are both things the rebels struggle with, and a naked FD provides all manner of area control and denial if used correctly. I usually run this piece as area control and denial and less so for impact, although having it is very handy if you do run up against some AT-RTs, for instance. It should be common sense that you want this to be behind a barricade or cover of some form, as it will strongly enhance it’s longevity. There’s also an argument to be made for a naked RT as well. Three red dice for using your toes isn’t too bad, but the mobile cover and recent rules changes that allow you to be in base contact with it to negate the cover are great for pieces like Han. Just don’t roam it too far up.
Specialists: Bring those Officers. Two of them, in fact. There’s also evidence that med droids could be beneficial but this list doesn’t seem to want it as badly as it wants Officers. It wants actions, really. Between Leia and the two officers you will have no problems with suppression, typically. You can also leave a suppression on an Officer z6 for that free mobile cover, or heavy if there is enough light cover on the board. To date I have found that most folks are strongly undervaluing Courage two, and the loss of actions from suppression. Death Troopers have the Rebel lists of the world shaking in fear, so ideally you don’t leave home without Officer squads any longer. I have yet to find a good purpose for the Comms Specialist in a Rebel list, unfortunately, and this list is no exception to that.
General Deployment and Tactics
For the most part you want to keep the Falcon Crew together. And the rest of the list, really. Han and Chewie should never really be beyond range two, ever. Just don’t do it. Leia should typically be within range one of Chewie at all times. This configuration allows her to dish out some dodges to both herself and to Han and Chewie via teamwork, or if she’s within range one of both, they can have two dodges each and play more aggressively that turn. You can look to set this up on the turn after Sorry About the Mess, for instance, as Han may be in a vulnerable spot. You want your Officer z6’s nearby Han as well, to control any suppression he may be stacking, be it from Reckless Diversion or otherwise, as well as controlling any on Leia as her having two actions is very important.
Your special forces get a bit more free roaming power, but they should be setting themselves up for shots against characters or multiwound units, at least by turn two. The idea here is we want to maximize Hunter, as the z6’s and the Falcon Crew will start making swift work of any corps coming your way. Typically I look for a Leia bombard shot on characters early, first turn if possible. It’s predictable but we’re looking for results, not surprises, with this move. If we can see any snipers with this, it’s great, but finding ways to terrain scope any valuable units is also good. This should become automatic for you as you play over time, but it’s a good opportunity to bring it up now, so next time you’re playing Leia and planning this, just look for these opportunities. As you’re looking for these things we’re also going to look for opportunities to hide our snipers from other snipers, and give them line of sight to enemy commanders or multiwound units to start getting those Hunter aims. It’s scary being able to roll into two crits occasionally, or two hits in the open, for example.
Your third corps in this list can set up shop wherever he or she pleases, just make sure it’s within command range and the plan is to move them in a way that will keep them there, nearby the Falcon Crew. These can act as objective grabbers, skirmishers, or anything you see fit.
Typically we’d be looking to push the Crew up into combat somewhat early, so they can deal some mean damage to your opponent, with the exception of when someone wielding a lightsaber is coming at you. It’s advisable to stay out of range until they’re far more whittled down. Getting Han into areas to maximize his gunslinger should be very high on your list, basically. Having Chewie shoot at multiwound models or characters is hugely important, one, because he’s a hairy crit monster, and two, because it feeds Han aims. Han doesn’t need aims, but the laws of the random number generators tell us that reds still roll blanks from time to time, so it’s nice to have. Leia can comfortably be giving out dodges and moving up, or shooting and moving, and so forth. If someone is targeting her it just means your other high value pieces are being less harassed and have more freedom to punish your opponent.
Command Card usage and Timing
I can’t write about how to use Change of Plans, you have to understand your opponent’s list and what timing works best on the table in that moment. But we can start to talk about Brains and Brawn. This card can and should wipe a whole unit off the table under the right environmental conditions, minus those with impervious or pierce immunity, or more than six wounds. Don’t rely on rolling more than five hits, typically, though. An aim here is incredibly valuable for this reason. We want to use this when Leia is within range of two different units she can target, preferably without moving, but sometimes the sneak attack is worth it. Keep in mind that Chewie must be within his own range three of the targets, but typically he’ll be further up the field than Leia, so this shouldn’t be an issue for you. I like to consider this card the turning point card for this list. Removing an activation is huge, and it gives you that opportunity. The other reason we want Leia within range of two different targets is twofold: one, as this is a two pip, your opponent could run someone away, and two, Chewie can hopefully either finish them off on his activation or hit the other target if all went well with the first. Use this card to swing the game.
The Change of Plans into Notorious Scoundrels is a classic move, but keep in mind you can return Sorry About the Mess, or Reckless Diversion to your hand also. Both of those cards can be extremely powerful depending on the list you’re playing. Use it to your best advantage as you see fit on the field.
Finally, as discussed above, using Bombard early is a big part of the Strike Teams’ success. Use it wisely and you can really maximize your efficiency on those Hunter upgrades.
My RPQ list from April
Total: 796/800
I went 2-1 with this list, and lost my third game in part to time and a couple of misplays on my end (learn to deploy your moisture Vaps to create a disadvantage for your opponent!) and a well timed play by my opponent. This list can shred opponents when wielded properly. It’s a ton of high powered pierce and offense, that needs to be a bit aggressive to win the day. I also love how the FD cannon looks, and it creates a big field for you to play in.
Final Notes
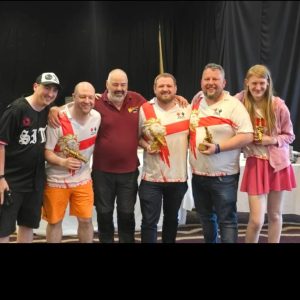
Thank you for taking the time to read this! You can find me on the discord as luunta – Jess, and I’d love to answer your questions about this list or any thoughts that may pop up for you. I really love playing variations of this list and using the non-meta units more than other folks. If you’ve ever seen my comments, you’ll know I have huge love for the wookies. My next RPQ will feature them or Pathfinders, two strongly off meta unit choices.
Hope you all enjoyed this guest piece and it’s something I’m sure we can do again! If you have something you want to talk about to the community, let me know! Every voice should be heard.
– GrandAdmiralThrawn


