
Welcome back to the Jedha Journal! We have something a little different this week for you, a guest writer! As Zach spends some time with important real life decisions, Asyer, my teammate from the Yavin Base Team League, will be joining us for a dive into the ideas and tactics of focus firing. Namely, we want to discuss the concepts of shooting to kill vs. shooting to suppress. Asyer has graciously offered to discuss the concept as a whole as well as explore the Empire’s unique exceptions to the rules. Without further ado, let’s dive in with his debut.
Surviving the Heat
Most of us tend to get caught up in the heat of battle. We lose sight of the objectives and just want to kill as much as possible. It feels really good to watch your opponent remove minis from the board, but this can lead to more game losses that you realize. I want to discuss my thoughts on remembering to focus. There are two parts of this I want to go over: focusing fire and focusing the objective.
Focus firing isn’t just about removing models from the table. Outside of command cards and special abilities, every unit has a maximum of twelve actions it can perform. Twelve, that’s it! So, when you remove an enemy unit from the table, they also lose that unit’s remaining actions. For example, killing a unit before they activate twice takes away ten actions. By removing activations, your opponent is forced to activate key units earlier in the round, giving you more units and more chances to respond to what they are doing.
Lets take a look at Luke Skywalker for example. Luke likes to jump from cover to cover until he can get into melee with a unit and kill it. Luke likes to activate last so that you have less units that can hurt him if he gets stuck in the open. If you remove activations on Luke’s side, you put him in the uncomfortable situation of having to activate before a larger number of your own troops, and the chances Luke gets caught out in the open skyrocket. (Luke tends to die to heavy amounts of fire.)
You can also remove enemy unit actions with suppression and panic. Suppression is a great tool to use and often can win you the game. Lets take Breakthrough as an example. Unit A needs to double move to make it into the enemy deployment zone. You shoot unit A and add a suppression token to them. If unit A doesn’t clear that suppression, they can no longer score. I find it is best to add two suppression to a unit to ensure it stays suppressed. The chances to clear two are significantly lower than only having to clear one. Thanks to some wonderful suppression tables supplied our friend Orkimedes over at The Fifth Trooper, we know that you have a 34% chance to remove one suppression token, but just an 11% chance to remove both. Seems a little tougher doesn’t it?

Panic is amazing, as long as you are the one causing it. If you force a unit to panic, three things happen. First, that unit moves as fast as possible towards the nearest board edge. Second, they lose their second action that turn. Third, that unit isn’t where their player wants them (usually in the open and away from where they need to be.) Units that panic and run even a sliver off the board are instantly dead!
Focusing on the objectives is the most important thing in the game. It’s how you win! This doesn’t just mean making sure you accomplish the mission, but also keeping your opponent from scoring. Ask yourself two questions when you activate a unit: “Does this help me score victory tokens?” and “does this help me prevent my opponent from scoring victory tokens?” If you’re ahead in both victory tokens and activations then it is even more important to stop your opponent from scoring. If they can’t score, you win! However, if you can’t stop them from scoring, you need to be scoring also.
Focus fire units to remove them from the board, or stop them from getting all their actions, and your path to victory becomes much more straightforward. This topic seems pretty basic right? As usual, nuance springs eternal, and we’ll swim a little deeper into a sampling of each faction’s quirks regarding suppression, panic, and their action management, as well as whether or not focusing on eliminating or suppressing units is the better option when dealing with each faction.
-Asyer
An Inspiring Start
Both in canon and in Legion, the Rebellion’s identity comes from its leaders, its heroes, and its sense of purpose. This concept is codified into the Inspire keyword. The Rebels have a large access portal to Inspire, whether that comes from Leia herself, the Rebel Officer unit or upgrades, or a number of command cards from Luke, Jyn, and Sabine. Because the Rebel units, and especially heroes, tend to be less expensive than Imperial or GAR units, fitting in a number of these officers and heroes is extremely common, and very practical. So what does all of this mean? Shoot, shoot the rebels.
Lets take a Flyboys (Luke & Han) list for example. If you are lined up across from this, you can reasonably expect to see Luke and two Officer Z6 squads. This means that in addition to standard rally rolls, there are two individual points of inspire available per turn, and Luke’s 3-pip suppression clearing card, Return of the Jedi. Therefore, the list has a decent chance of ensuring that its units maintain their two actions throughout the turns. Additionally, with the notable exception of Luke, every unit in the list rolls white defense dice. Therefore, if your opponent can manage suppression well but fails defensive saves often, shoot to kill them.
One final caveat to remember is that many of the rebel command cards that grant Inspire and remove suppression are two and three pip cards. This means that many of them are not played turn one, offer decent-to-good order control, and often impact the late game board state. Therefore, as an exception to the above Flyboys example, putting suppression down on the rebel army in the early rounds tends to prove more productive than going for the late game suppressive fire, as you force your opponent to play their command cards out of order, and remove their abilities to keep their unit actions running efficiently later on.
Compelling Aspirations
As always, every rule has an exception. Normally when a unit is suppressed, it loses an action. Today, we’ll look at the Empire’s unique exception to the rule: the keyword Compel. Both Director Orsen Krennic and DT-F16 have this keyword, which reads, “After a trooper unit at range 1–2 of a friendly unit with the compel keyword performs its ‘Rally’ step, if that trooper unit is suppressed but is not panicked, it may gain 1 suppression token to perform a free move action.” A crucial element to remember is that Compel always returns a lost action, but never adds an extra one.
So, by adding a suppression token to your unit, you can take a move action as your first action. Abilities and keywords that trigger off of a move action still take effect, such as relentless and steady. You can then take a 2nd action as normal.
So now you’re thinking, “why not do that every time?” Well, adding too much suppression can lead to panic. And panic isn’t what you want. Making the choice to Compel or not is purely situational. As a general rule of thumb, I compel if it will get me into a better firing position, or to score the objective. Pushing your units that extra step to take the actions you need to win the game is where compel excels. Finding that balance of when to push without breaking them is where the difficulty lies.
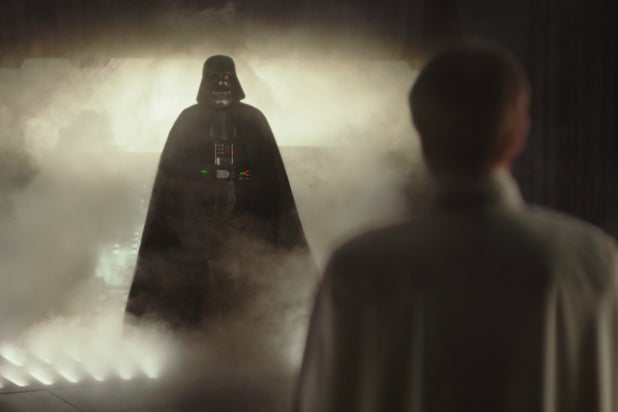
Our second suppression rule breaker is our Dark Lord and Savior, the Balancer of the Force, Darth Vader, specifically the commander version. Vader has a currently unique courage of ” – “ which means he does not take or suffer from suppression. When using his courage bubble for panic tests, this means your units will never panic if they remain in range 3 of Vader. Besides, “Who is more frightening than the Lord of the Sith?” When you combine compel with Darth Vader, you get a nice bubble of “we don’t care about suppression.” This allows you to compel your units way past their normal breaking point. Be careful though, should Lord Vader fall in battle, your units will likely all panic if loaded up on suppression.
-Asyer
Fire Away
If you recall from last week, Zach wrote an excellent piece on using the clone’s Fire Support ability to prevent panic and suppression issues. To avoid repeating ourselves, I will be focusing on the clone’s decision-making process regarding focusing on killing or on suppression.
Here’s a hint, it’s in easy choice.
At least from the outset, most GAR lists are looking at roughly eight activations. This means that there is little-to-no margin for error, and each unit’s actions must be optimized. Therefore, when taking attack actions with your units, you need to be sure that you are evening the numbers or pushing yourself into the green. With the fire support ability, wiping units becomes easier than suppressing them. It must be stated that using fire support to suppress a target is a complete waste, as you are actually dishing out half of the suppression that you would with two separate attacks. However, being able to double your attack pool means that you have a much greater chance at eliminating an enemy unit, especially one that is wounded or one with white dice saves. Finally, keep in mind that using fire support actually reduces the amount of actions that you have during the game. As Asyer mentioned above, each unit typically only has twelve actions to take during the game, and fire supporting too often can almost act as a self suppression pitfall, not allowing your units to move into scoring positions effectively later in the match.
Mechanized Minions
Last but not least, we arrive at the droid army. According to the droid trooper entry in the Rules Reference, droid trooper units do not suffer the effects or benefits of suppression tokens, but still receive them as normal. Crucially however, they can still panic when their threshold is reached. This makes it slightly easier for the CIS to keep their twelve actions, but can prove devastating if the commander is lost. Especially considering the droids do not currently have another unit besides Grievous that has a courage higher than one.
When facing off against the CIS, these unique suppression rules make the decision to focus on removing models vs. suppressing them quite simple. Assuming the CIS have a living commander, shoot to kill. Spending upwards of three attack actions to panic one B1 squad is a colossal waste of resources, and the odds of forcing a droid to panic before it dies are quite minimal. However, if you manage to kill Grievous and remove the courage bubble from the battlefield, looking to panic droid troopers is not the worst idea depending on the circumstance. This holds especially true for the Empire and their litany of suppressive weapons, as a single attack can panic the troops.

At the end of the day, choosing whether to shoot to kill or shoot to suppress seems like a difficult choice, but generally boils down to a straightforward decision: which choice will remove more actions from the opponents unit. As a reminder, if you’d like a high profile chance to test these concepts out, the London Grand Championship runs from September 12th-14thand still has spots available. Come win a World’s invite, and anyone who beats Zach in Chicago will win a beer from me! I hope you enjoyed the insights Asyer provided for us, and look forward to discussing your ideas in the comments. Until next time, enjoy your games of Legion!
-Mike

