Trending Today
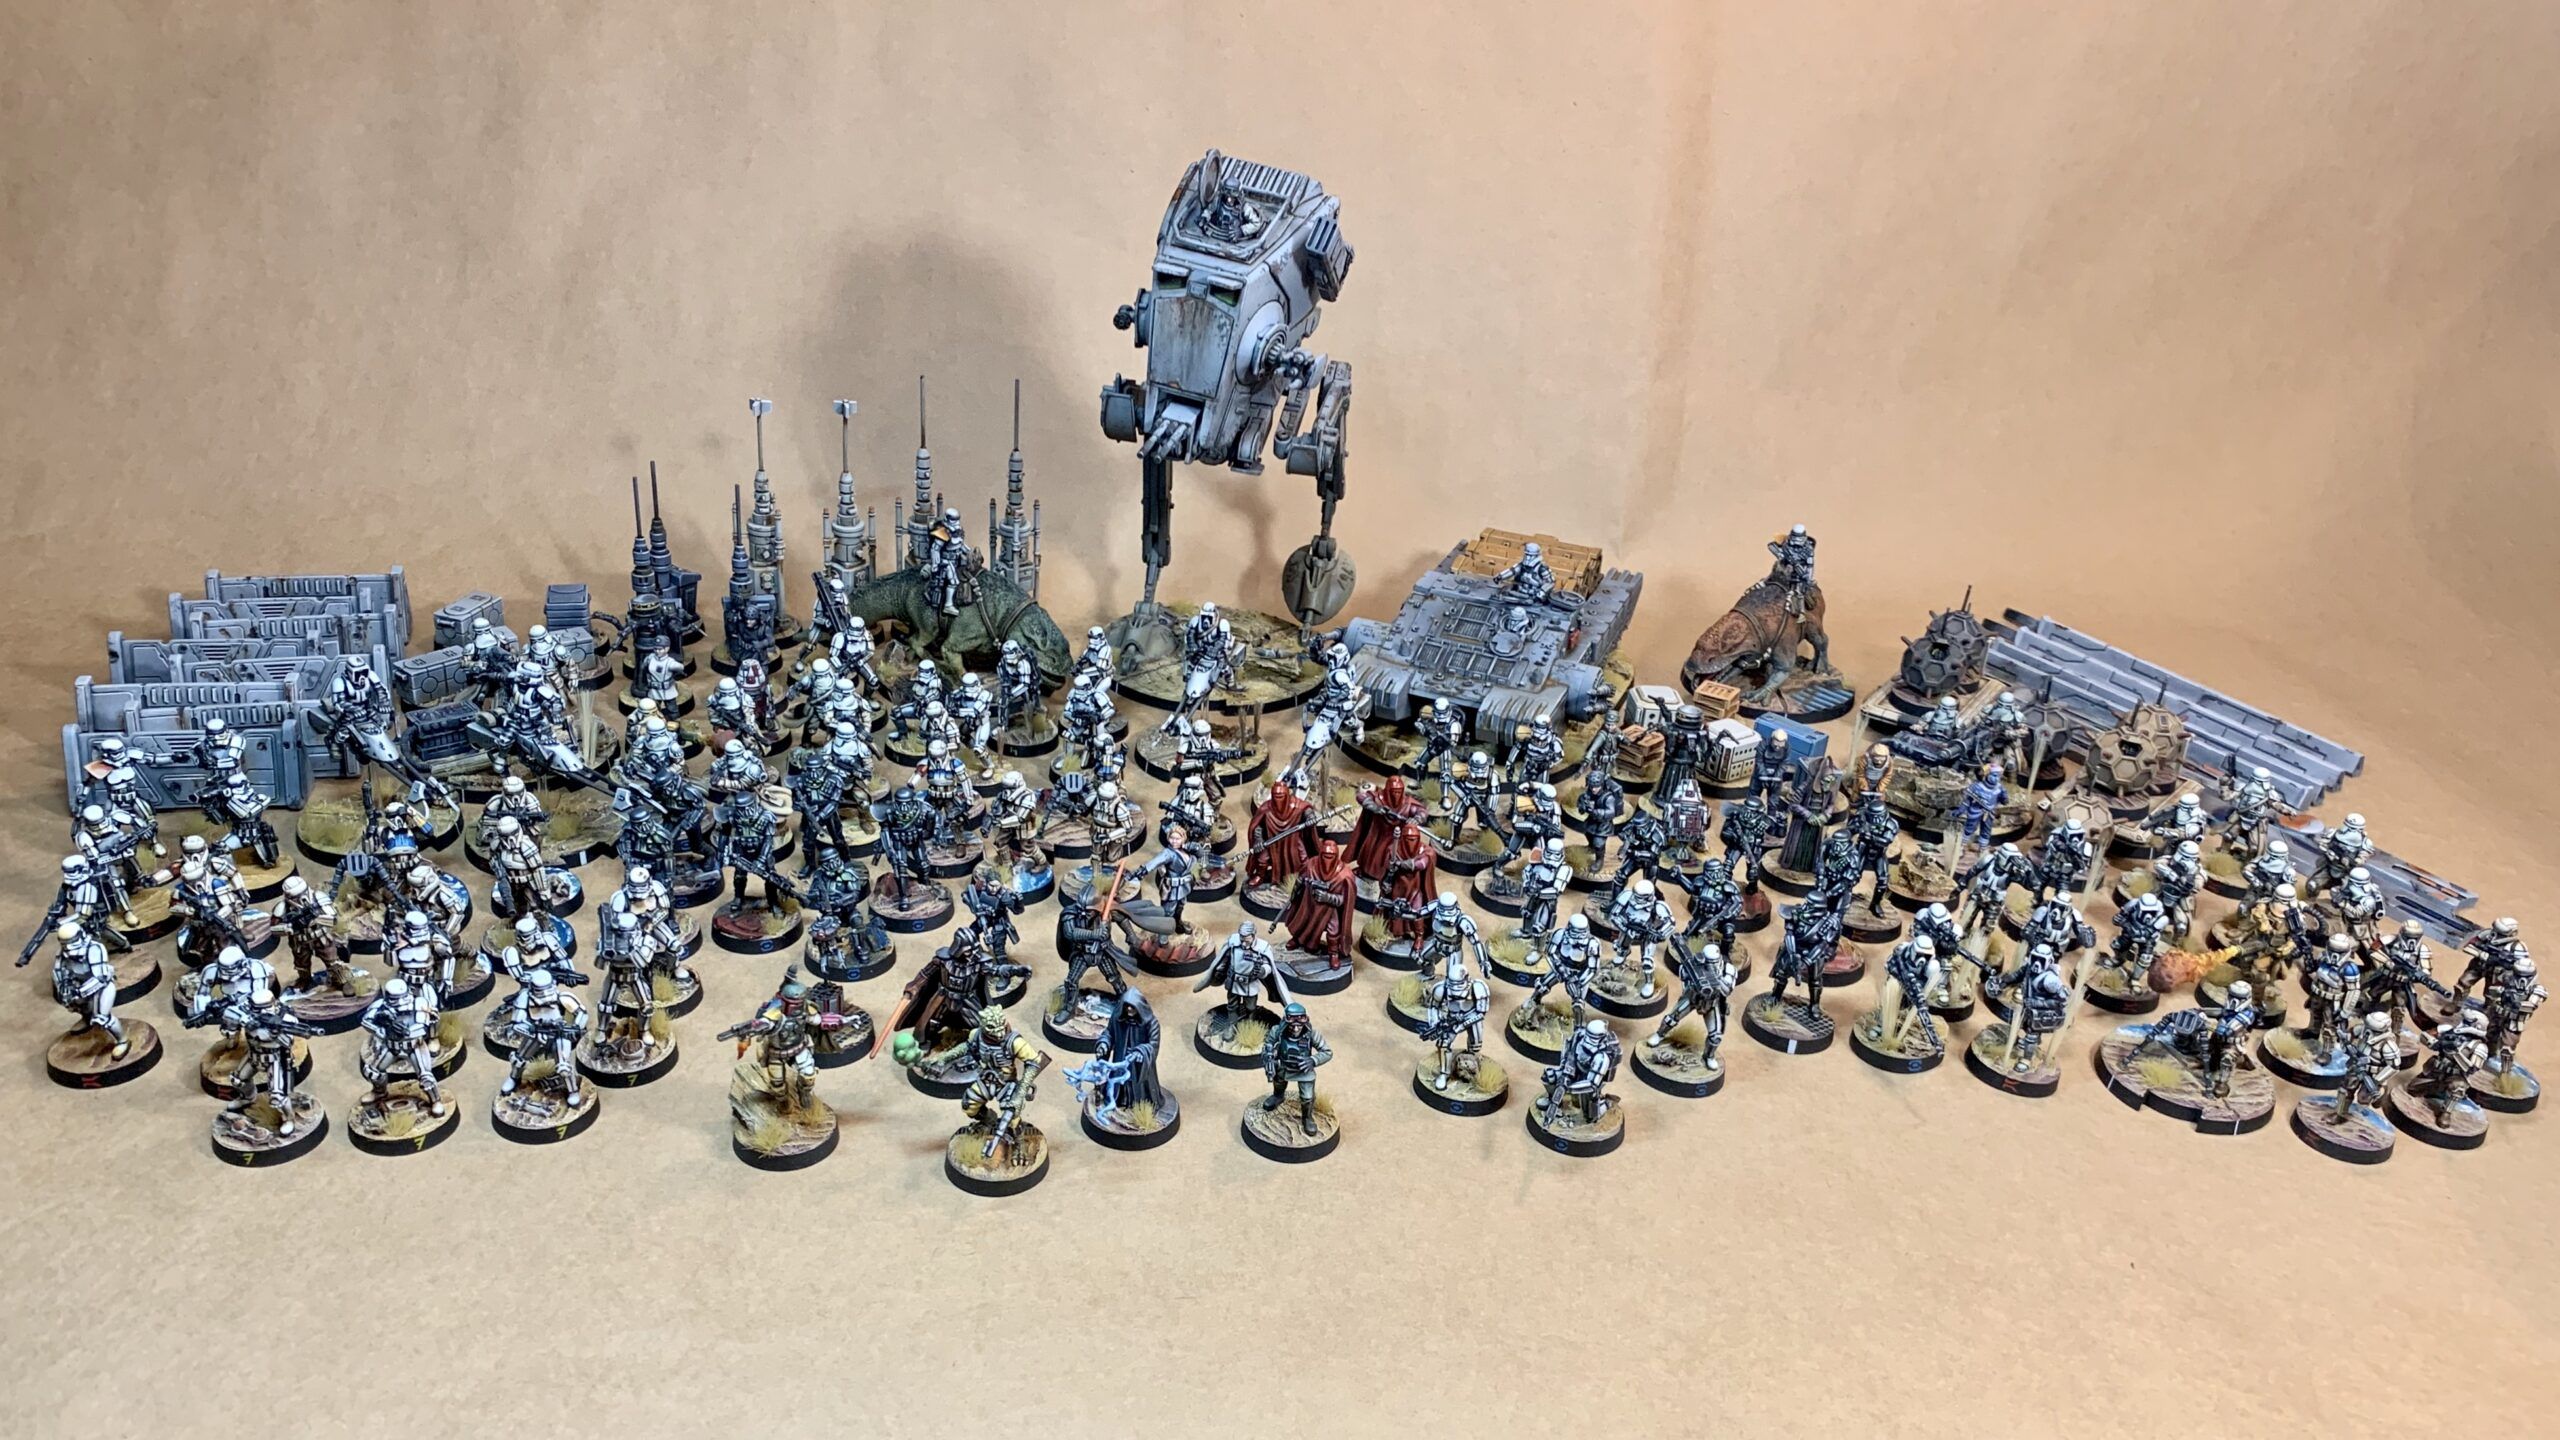
Project Showcase: Radek’s Complete Imperial Army
About the author: Radek “radeczex” Kurkowski is a miniatures painting veteran, who is constantly looking for new painting techniques and ways to improve his craft and enrich his workshop. Apart from being a Star Wars universe enthusiast, he is also a passionate amateur cook, an explorative traveler and a Half-Ironman.”
I am a big fan of sci-fi and miniature painting. I used to paint and play Lord of the Rings around 10 years ago. I tried other GW games, but the aesthetics of those did not appeal to me. A year or so ago I discovered Descent 2nd edition and fell in love with the miniatures. I painted the main game and a few expansions. However, I prefer the sci-fi climate and was about to buy Imperial Assault.
Fortunately, I found out that FFG also has Star Wars: Legion. Nice scale, eye catching models, and wargaming. I am not a fanatic of Star Wars, but it checked all the boxes. Therefore, I decided to get a starter set for Christmas. I always preferred the bad guys, so I was choosing between CIS and Empire. The first one seemed not to be that much of a painting challenge, so I decided on the faction with the best-looking miniatures. The decisive factor was that my favorites among the Star Wars universe were Rogue One, The Mandalorian and Battlefront II.
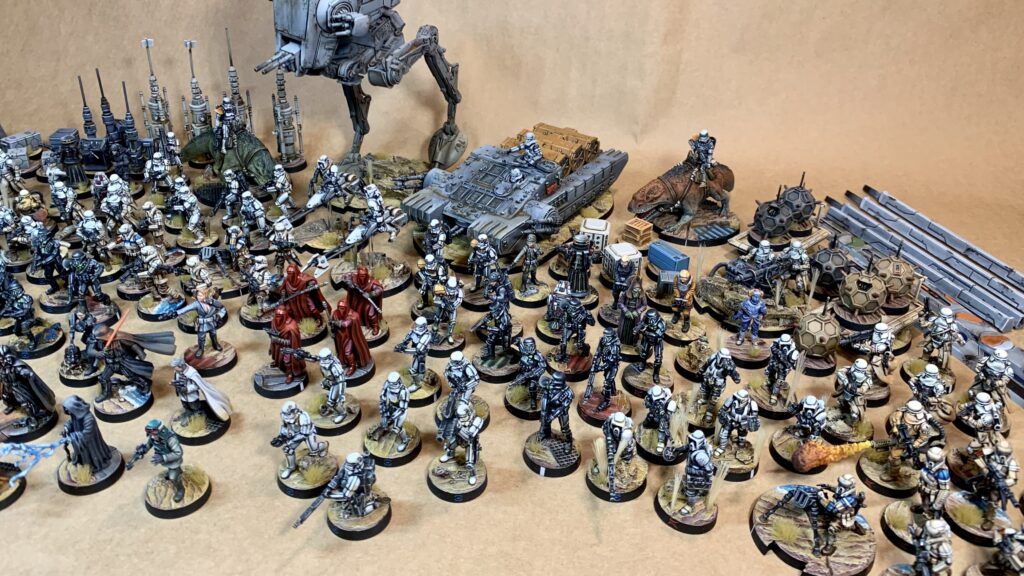
When I started, I gave myself some prerequisites. I do not like an army of Clones (sorry GAR), so I decided that every model in the army will be different. Therefore, almost all the models are converted. In addition, I assumed that the army on the battlefield shall have unified basing. I thought that a desert theme with mutual characteristics would look well (black rims, sand, yellowed grass), but to add some variation, each unit has their own unique elements (stones, scrap parts, water, scorched earth etc.) matching their purpose (Shoretroopers on the beach, Scouts hidden in tall grass). To distinguish the units, I painted colored Aurebesh letters on their base rims (A-red, B-blue, C-green, D-yellow), marked unit leaders for ease of identification (white straps) and put magnets on all of them. I also wanted to have an army with full WYSIWIG, so the possibility of changing weapons/upgrades was another important aspect. Last but not the least, I am planning to play in tournaments, so having every Imperial model (with a decent unit count) was also important to have most of the options available.
So, knowing what I want, I set my goal for:
“The best painted, complete Imperial army in a galaxy far, far away”.
For some models I drew inspiration from other miniature painters. Some ideas are my own and I hope that they can be used by others.
Now, after little over half a year, I am glad to present my Empire showcase. I will go by the ranks, for the ease of description.
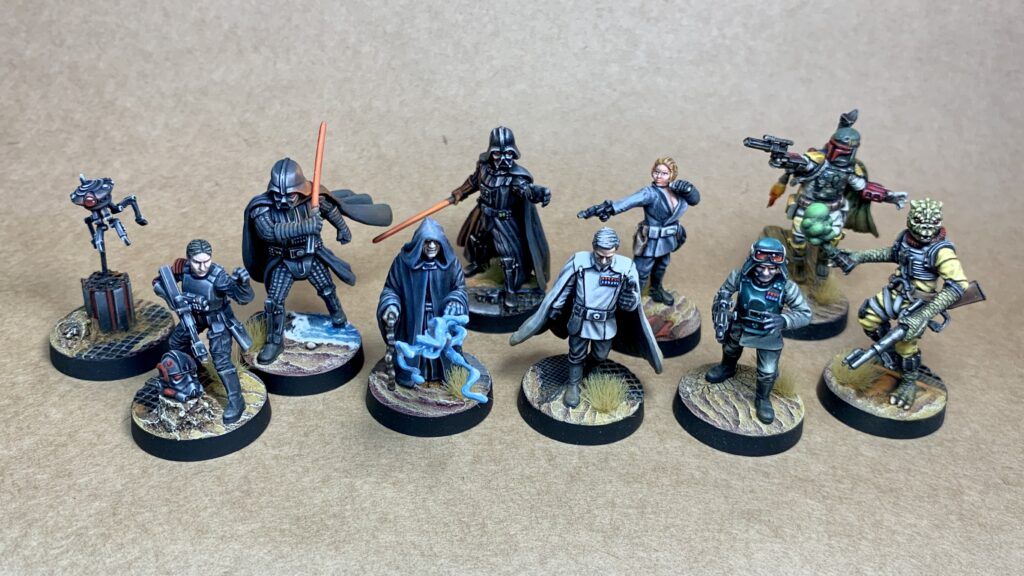
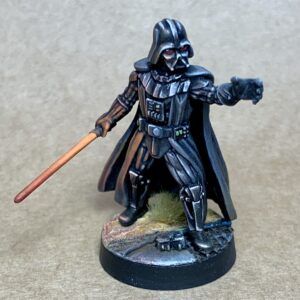
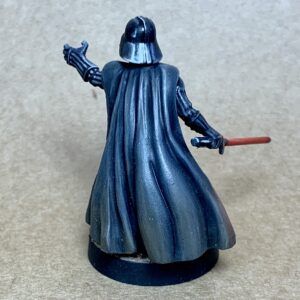
Darth Vader
This was the first hero painted. I am quite satisfied with his cartoony look as it was quite hard to get proper reflections on the helmet and Object Source Lighting (OSL) being on proper level. I feel that he looked better as a WIP; maybe it is because of the Gloss Varnish put on the armor.
Emperor Palpatine
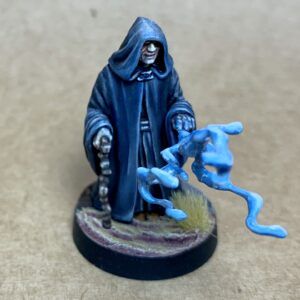
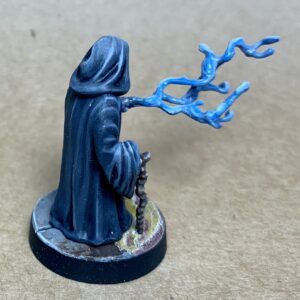
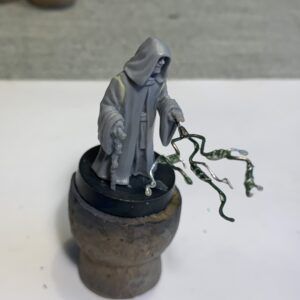
Despite being out of scale, I enjoyed painting him. The lightning was a tricky part, but I think it added him some character. I bent his fingers in warm water and drilled a hole in the palm. Then, I tangled a paper clip with some floral wire and used a two-part epoxy glue to secure the connection and shape the lightning. I used some carton packaging for the concrete on the base.
Director Orson Krennic
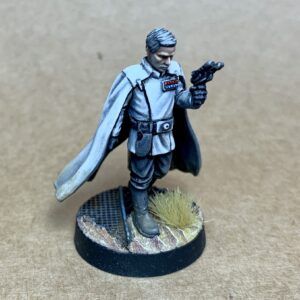
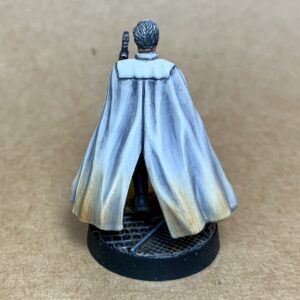
The Director sculpt has a great dynamic pose. I am particularly satisfied with the face, but I must admit that white on the cape was a challenge. Only after I painted it, I realized that his cape should be snow-white without dirt. For basing I used floral wire and mosquito mesh.
General Veers
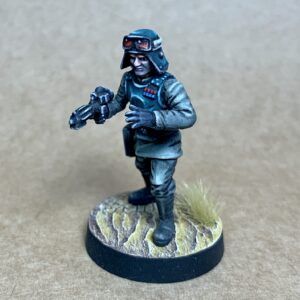
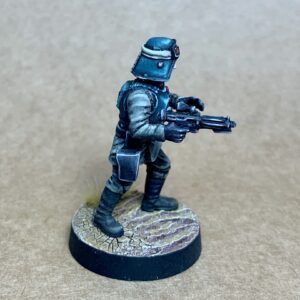
He is quite unique with his armor, so it was tricky to paint reflections properly. The pose that he had looked weird, so I decided to convert him a little bit with a Stormtrooper blaster. I am glad how the face and goggles turned out.
Iden Versio
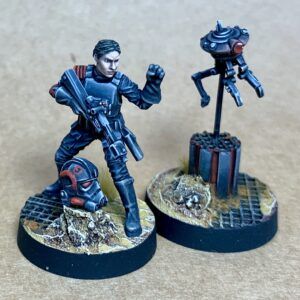
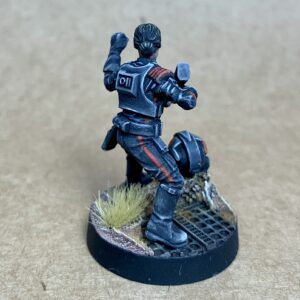
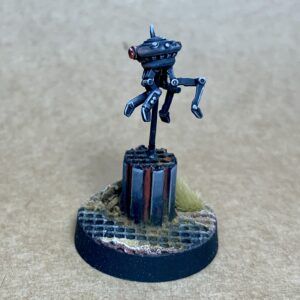
The first model for the Empire that was released on a sprue. I was surprised with the quality of the sculpt and options available. I did not want to get rid of the helmet, but I enjoyed Iden without it in the BF2 campaign. Therefore, I decided to put it next to her. The panel was cut from the tubes and put on the chest plate. Luckily, her weapon options are easy to swap, but I had to remove her left hand from the rifle and blaster. I think that there are better options than a transparent stick for ID10, so I used a cap from the glue as a column and mosquito mesh on the top. The droid was mounted on a paper clip. I tried adding a 3d resin printed energy shield but it did not look right.
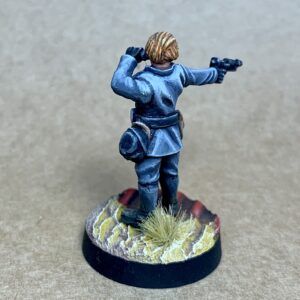
lmperial Officer
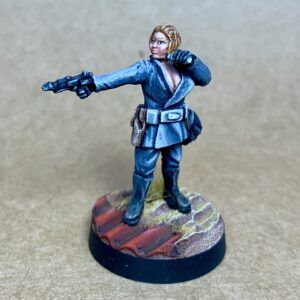
Having a separate card for her in the box meant for me that I can have an additional model. Therefore, I did a copy using Blue Stuff and Milliput and sculpted some more visible attributes. I am aware that this kind of suit would be a violation of the Empire dress code. Unfortunately, when I decided to remove her hat and sculp her hair, I did not think about her eyebrows.
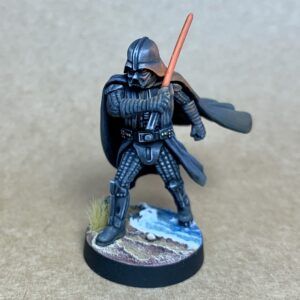
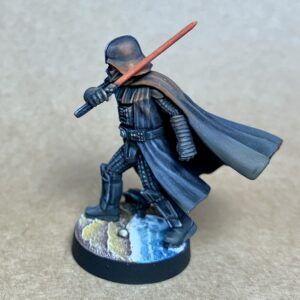
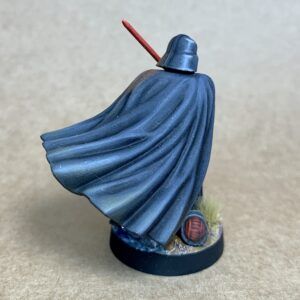
Darth Vader Operative
This character shows the way that FFG went from the first releases to the recent ones. With a way better sculpt than the original one, he gave me a great headache to paint him properly. There is always a fine point when the OSL is not overdone and I believe I met it. Vader was placed on the beach, for a nice contrast with his dark colors.
Boba Fett
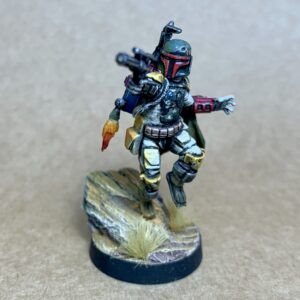
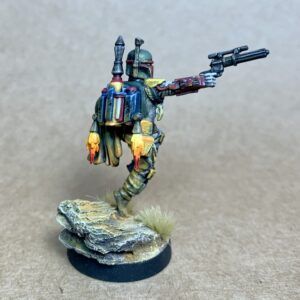
Inspired by others, I decided to put him on a rock, not on the transparent stick. It was a challenge because I wanted to maintain his height (it was before the introduction of the silhouettes). I like how the flame reflections turned out but the insignia on his Mandalorian armor were too small to paint. Maybe I will print decals in the future and place them on the designated spots.
Bossk
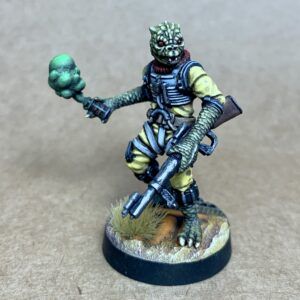
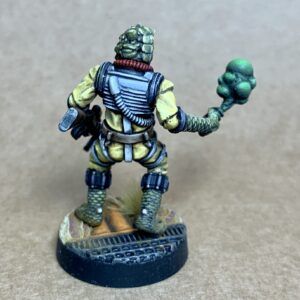
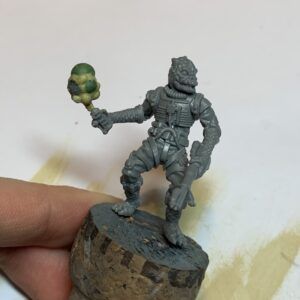
One of my favorite minis got poison fumes from his dioxis charge. Those were made from small balls of Green Stuff and Milliput, then cut and mounted on a paper clip that was pinned to the grenade. His skin and face are beautifully sculpted, so it was a pleasure to give him proper treatment.
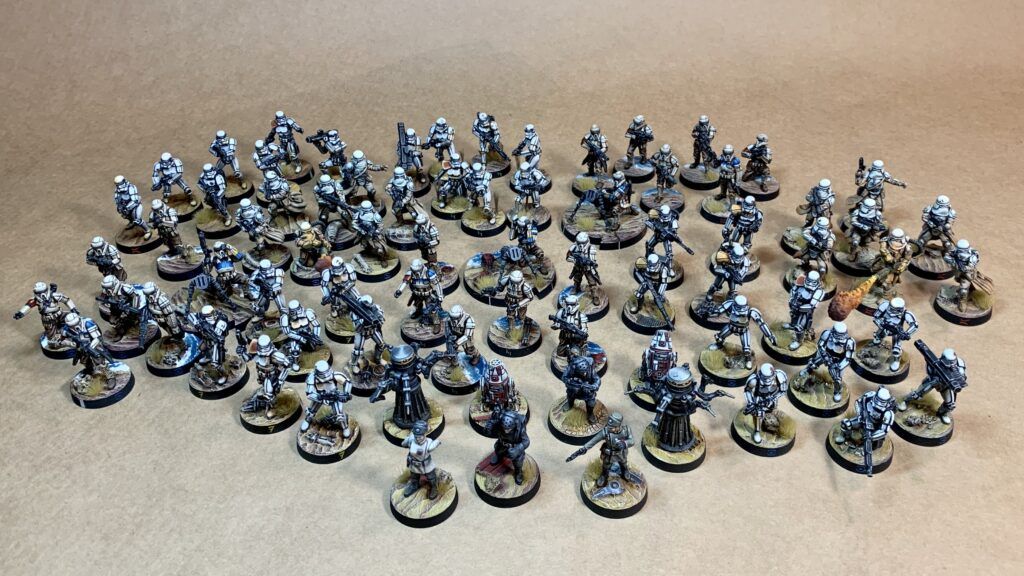
Stormtrooper (4x + Upgrade Pack)
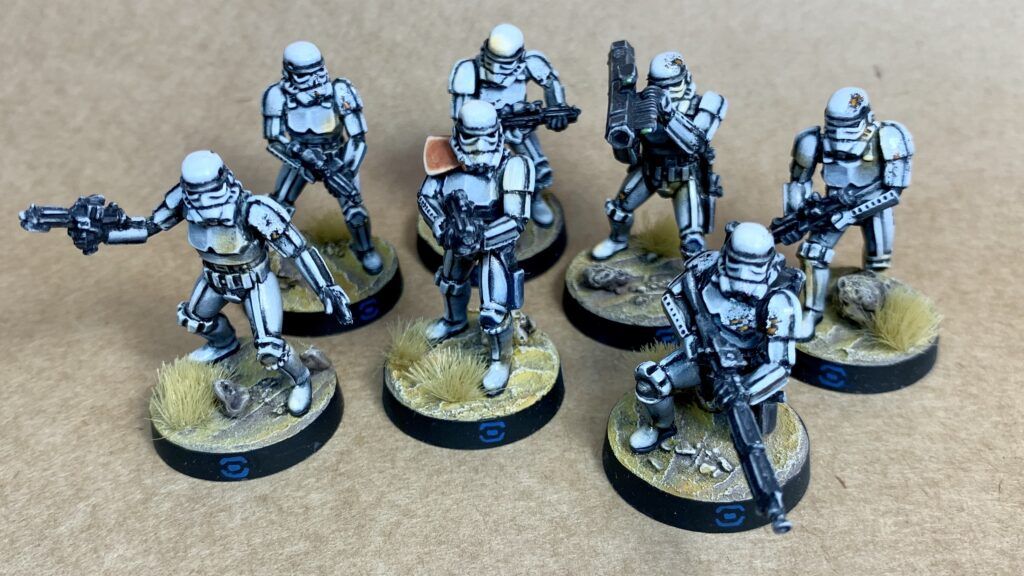
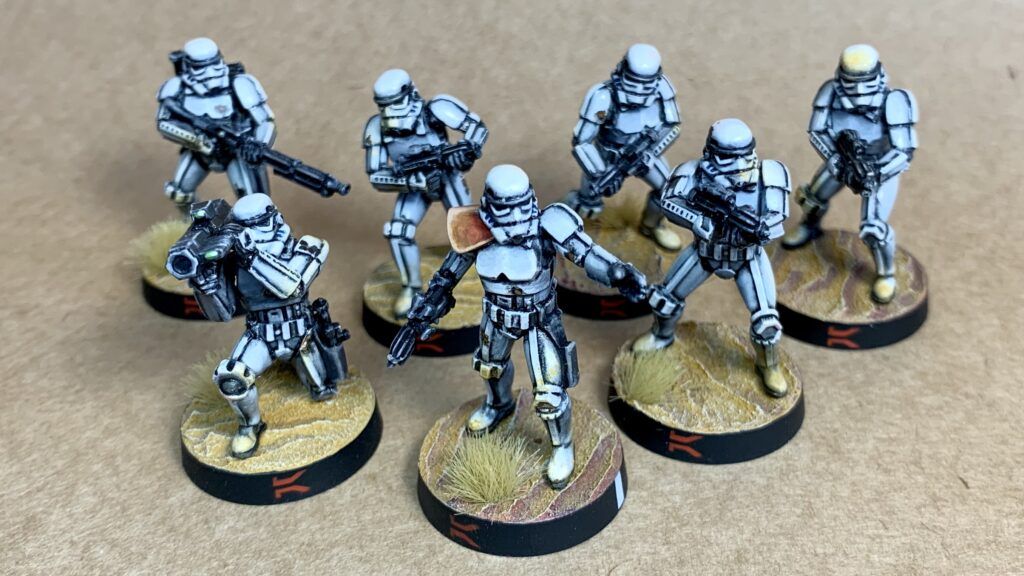
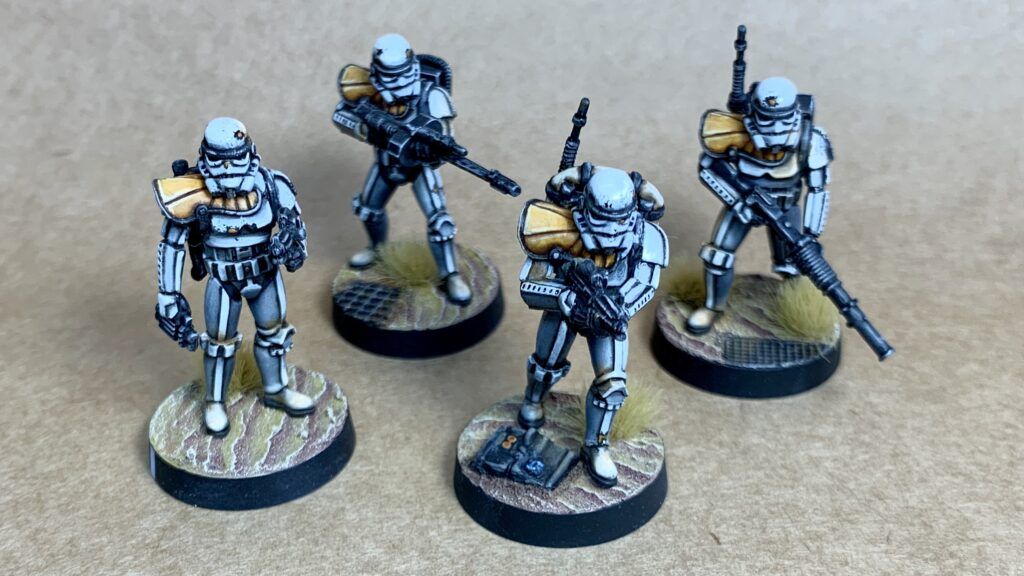
When I was looking for a fast and effective way to paint a large batch of models, I looked into zenithal highlighting and oil washes. I primed minis with off-black, grey and white ink and then applied mix of black, blue and brown oil wash. After adding highlights, it gave the strong contrast that I wanted, but now I would go with contrast paints for the white armor. I did heavy battle damage on Stormies, maybe too heavy from today’s perspective. When I finished the first unit, I realized that I wanted every mini to be different. It poses a challenge, but with some ideas and Milliput I made it work. The first unit got a standard base, the second got rocks, the third scorched earth and the fourth some Rebel Scum scraps. It was fun to figure out how it can work out. I am particularly glad how heavy weapons and leaders turned out. Upgrade Pack Stormtroopers have way better sculpts and after completing 4 units of standard ones it was a nice exercise to paint them.
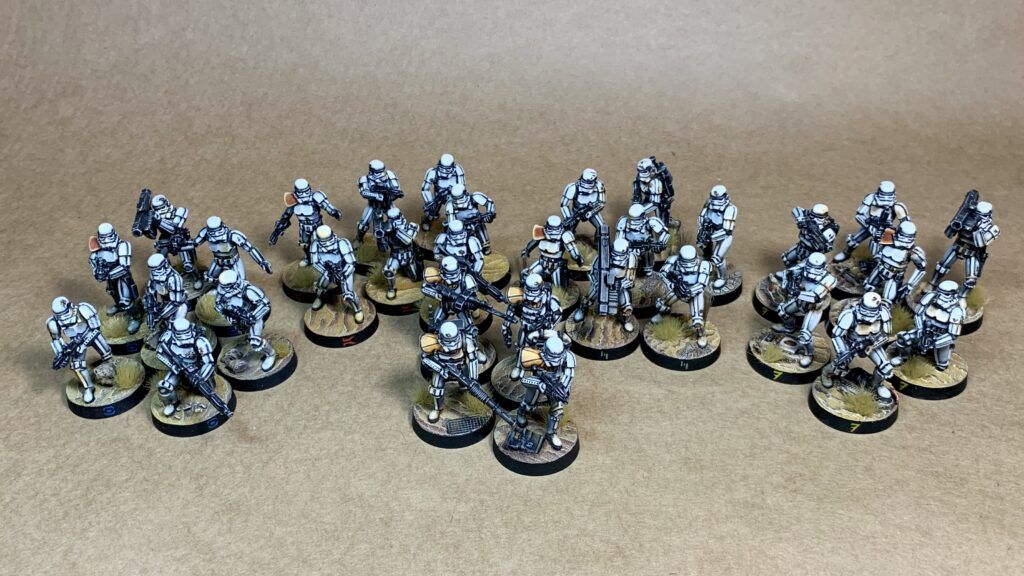
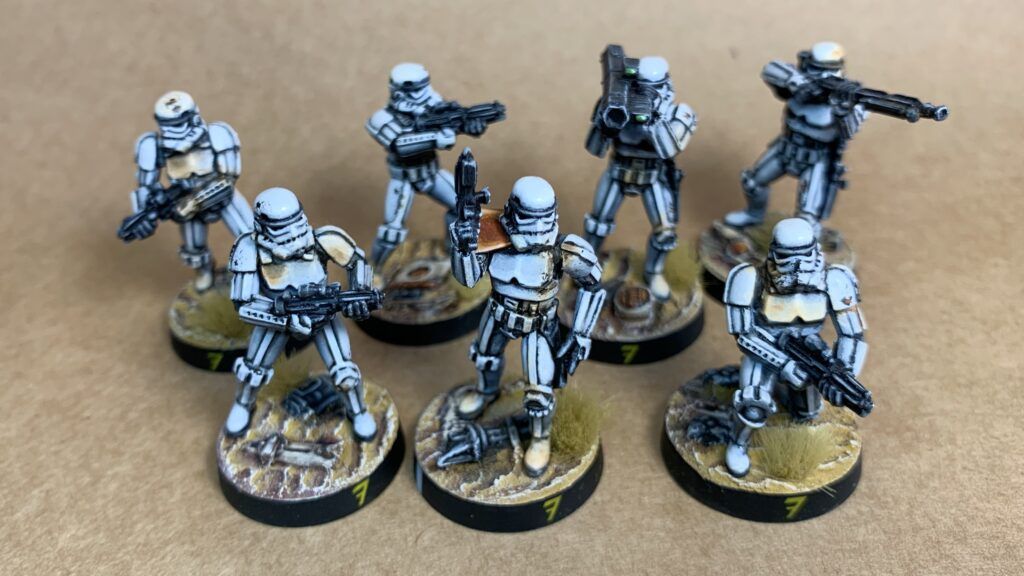
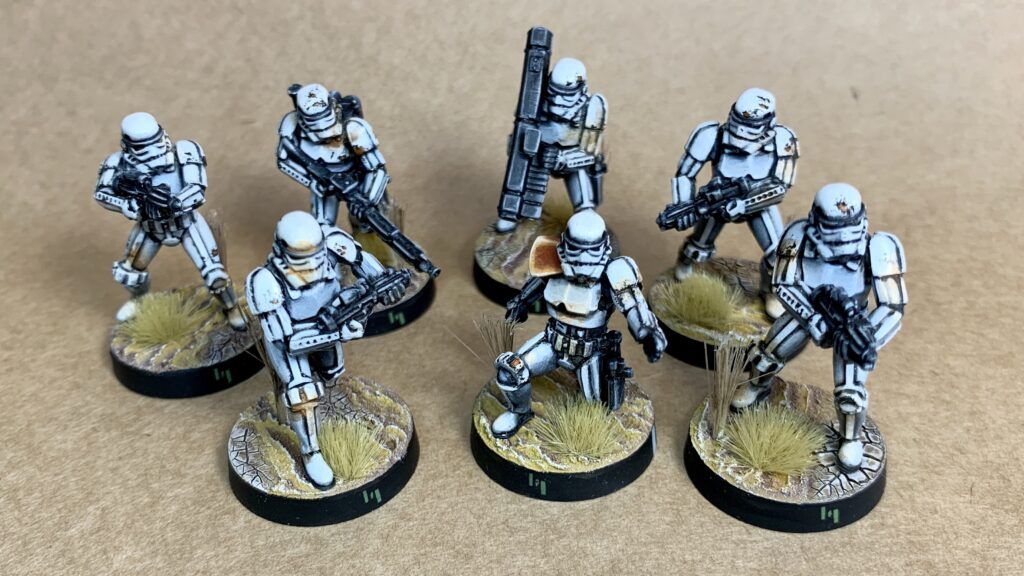
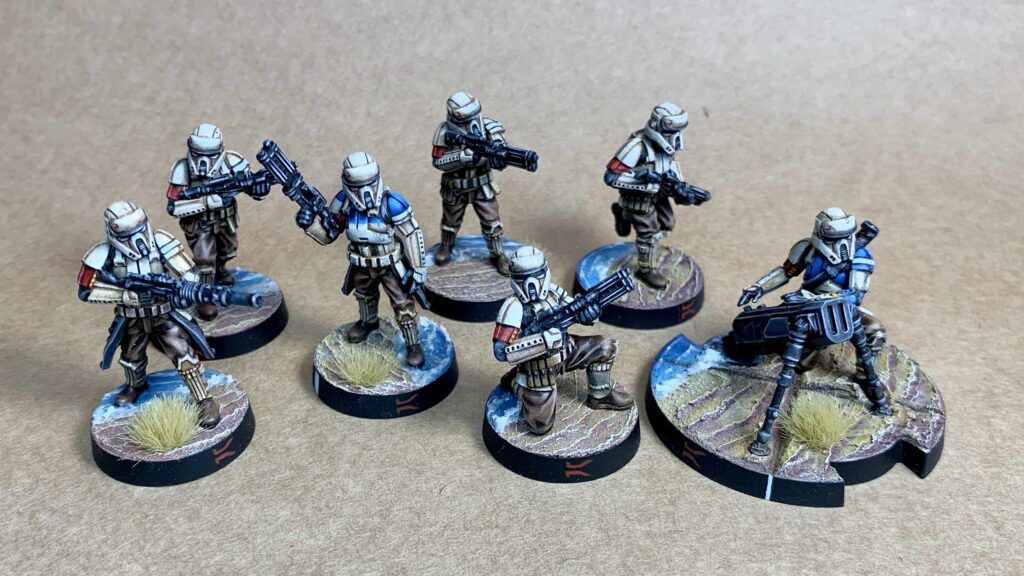
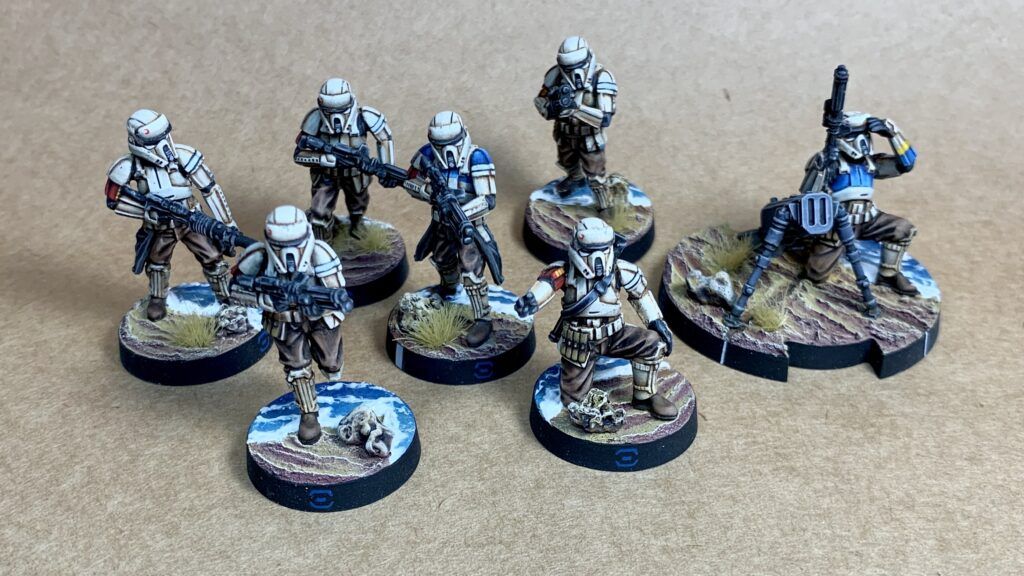
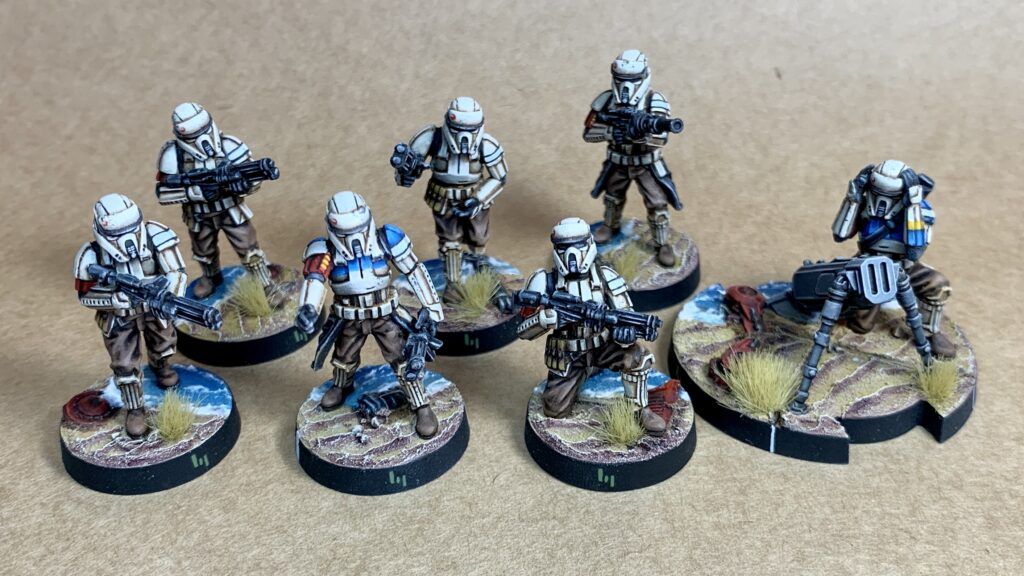
Shoretroopers (3x)
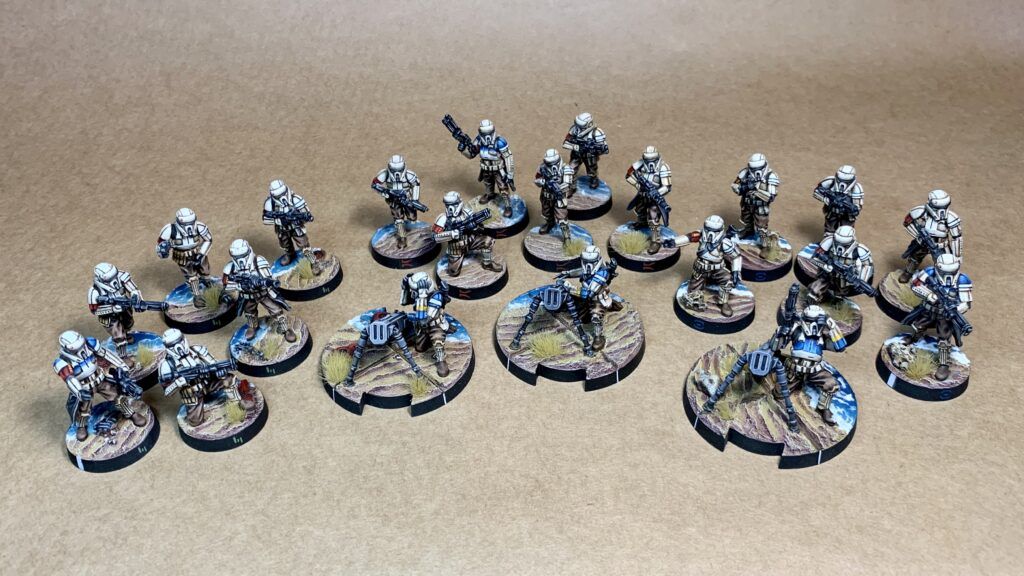
Those bad boys are my favorite core unit. It was a pleasant challenge to paint them. A similar technique as for Stormtroopers was used with 3 shades of brown/beige and brown oil wash. To meet the scheme, I decided that the leaders will be painted with squad leaders’ ranks and the mortars with captains’ rank. Conversions of the mortars were quite fun. I wanted to match one of them with the picture on the card. For the bases I tried three times to get the right water effect and I think that only the last unit has water as I imagined. I used Vallejo Transparent Water effect.
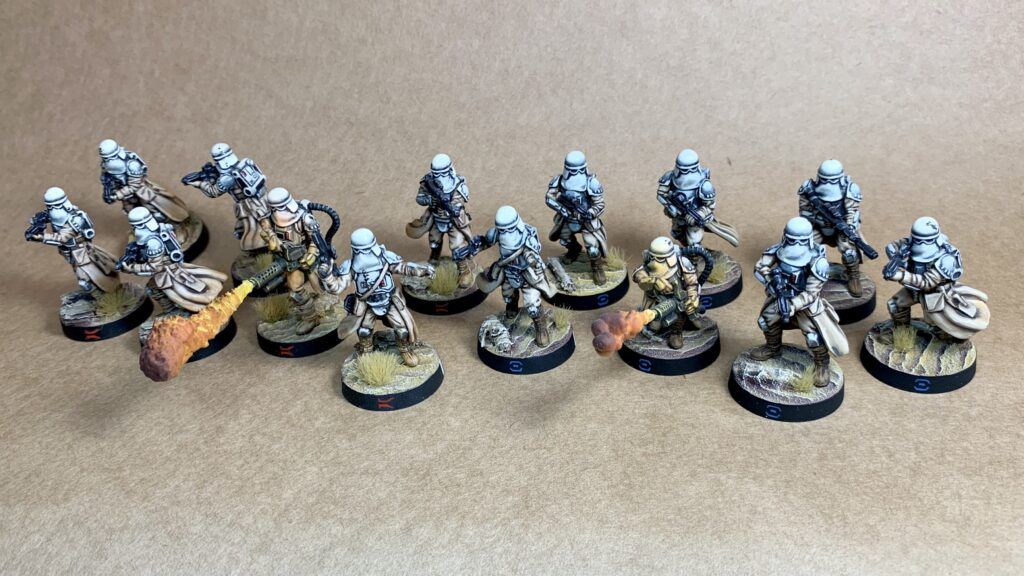
Snowtroopers (2x)
Having them in the desert-based army was kind of awkward. Models themselves were also not great. The second unit was the last one from the army that I have painted. Converting them was difficult but I was able to use some minis from the E-Web team. The flame thrower trooper was particularly hard as he does not give many options with his hands on the weapon. Flames were 3d resin printed and pinned to the barrel.
Imperial Specialists (2x)
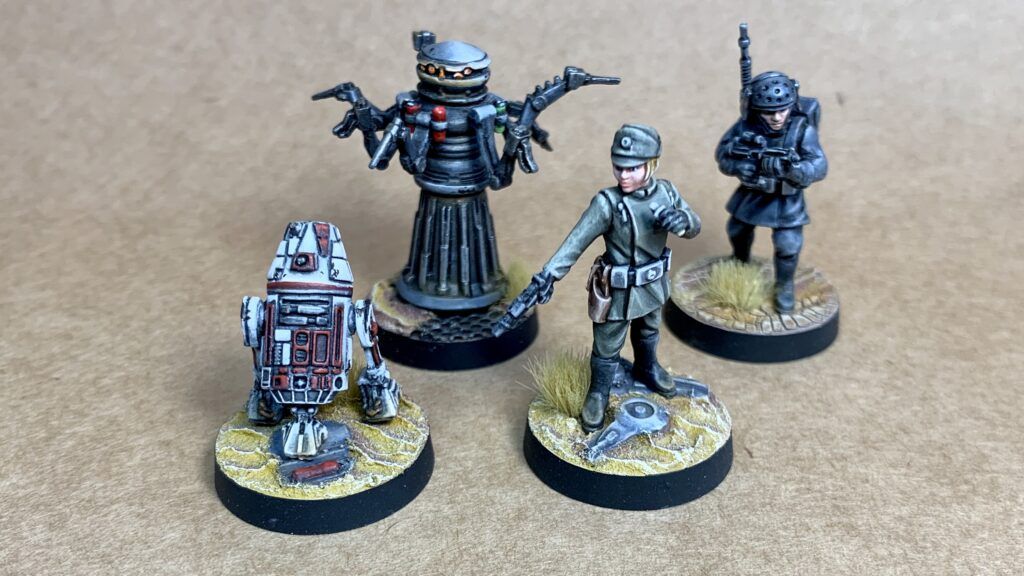
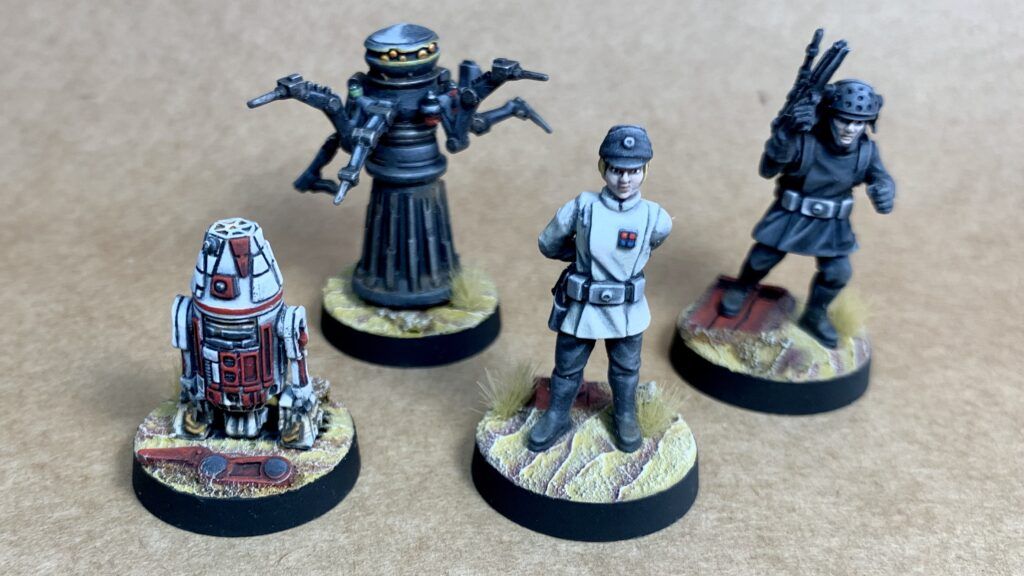
I love how detailed those additional miniatures are. Converting the second set posed some challenges. Comms Specialist and Imperial officer were doable with their poses, although the officer with her hands on her back was not that easy. I am glad how she turned out with alternative ISB uniform colors. I faced major problems with the Medical Droid and the Astromech. The only viable option was to rearrange their arms. They are not much different, but it is good enough.
Scout Troopers (1x with 2x Sniper Strike Teams)
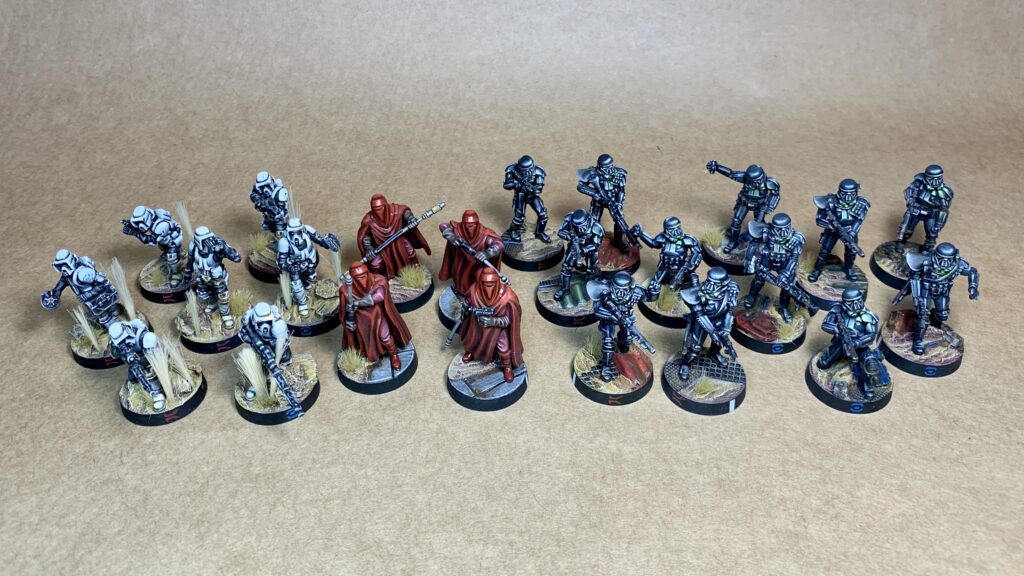
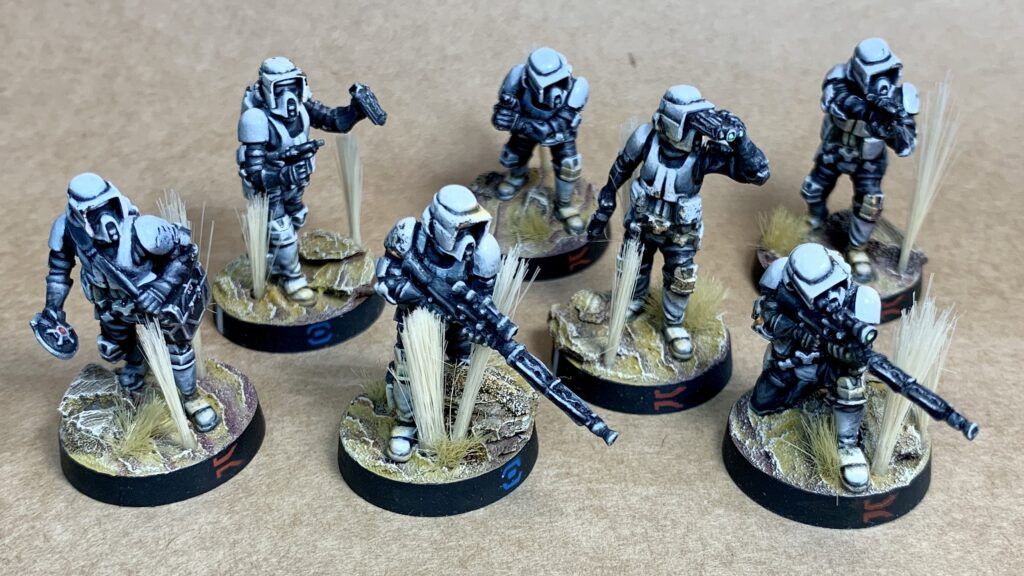
I knew that I wanted to have an option to use double Strike Teams in the army. I suspected that I will be able to make a conversion from the main team, but I will be lacking cards. Fortunately, I ordered and English/French version of the box, so I have card duplicates. The blue leader got copied binoculars and the sniper’s leg was chopped and put on the rock, so he can aim properly with his scoped rifle.
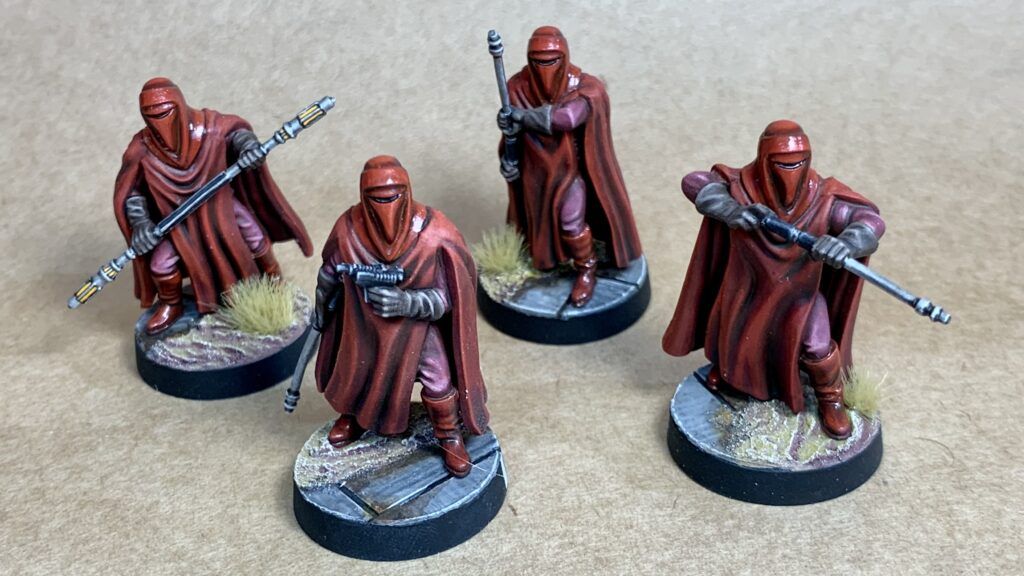
Imperial Royal Guards (1x)
Lovely sculpts with a monochromatic look. I enjoy painting red and they gave me the opportunity to do so. They stand out from the ocean of white and black. I referenced their look with some pictures and a few of them showed only one shade of red on all parts. I wanted to avoid that and gave them some variation. I think that their inner robes are slightly too pinkish, but with the Gloss Varnish on their helmets they are a jewel in the crown. They look great next to the Emperor with their matching bases.
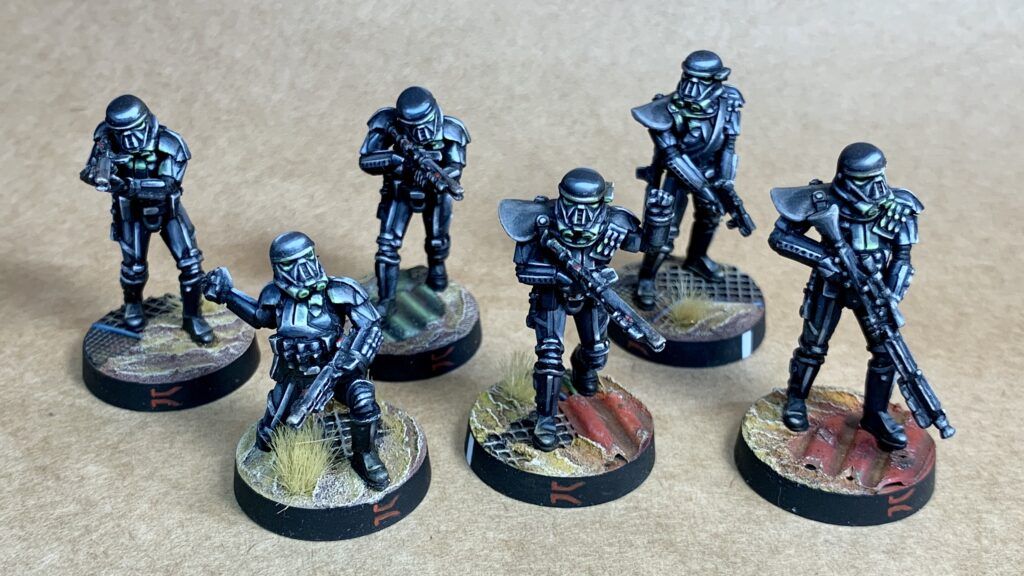
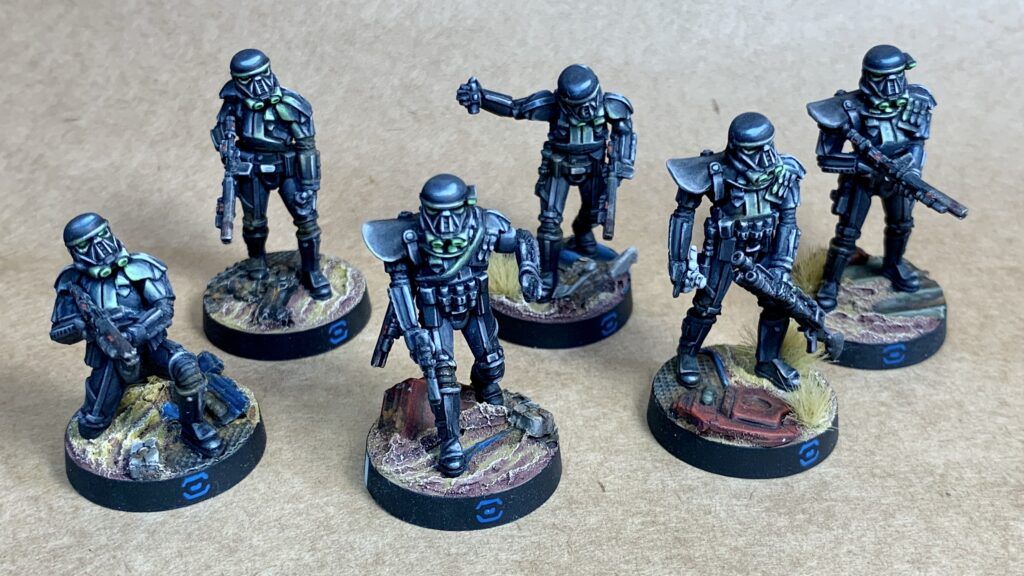
Imperial Death Troopers (2x)
My absolute favorite foot unit. They have dynamic poses and they look completely different thanks to the black armor. I knew that shading would be difficult, and I had to do swift transitions to achieve the shiny look. Green OSL was fun to do. I am particularly proud with the conversions of the Blue team. It wasn’t so easy and required some cutting and sculpting. The Death Trooper with Jyn Erso’s doll is iconic, so I wanted to have him in the army. The Stormtrooper doll was a tough one to sculpt and I put his hanging hand and leg on the opposite side. I considered doing it again or re-sculpting, but I dropped it.
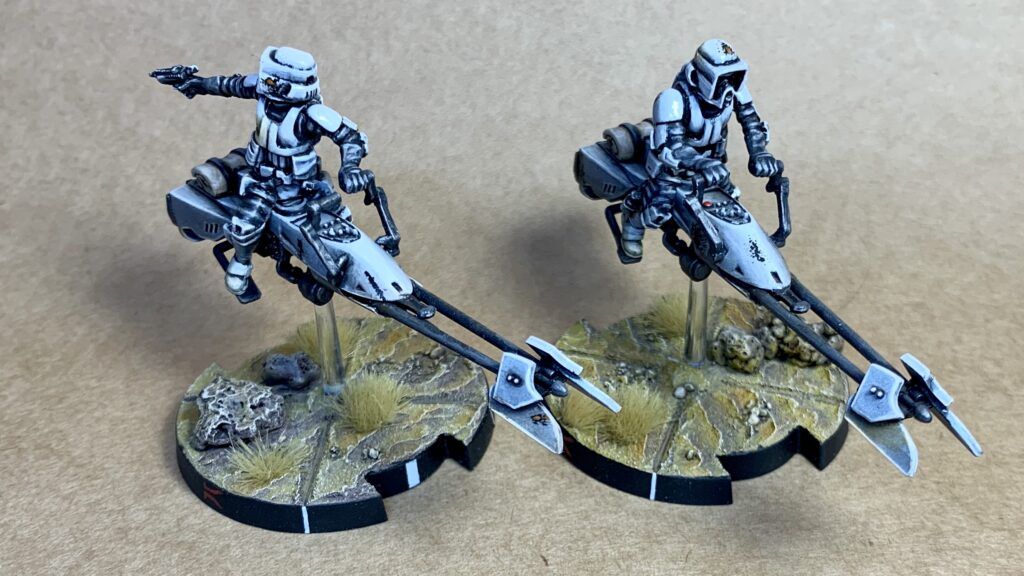
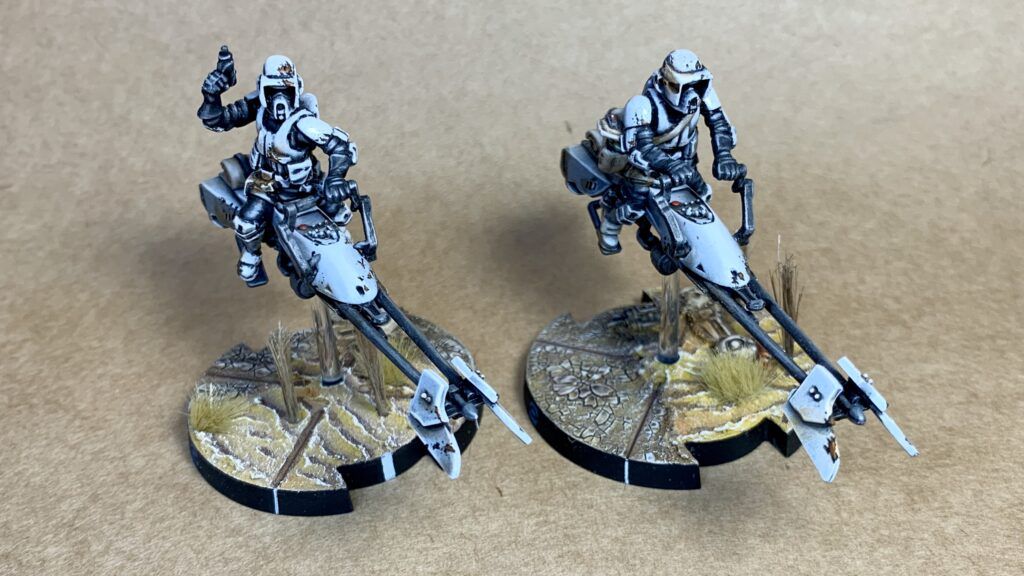
74-Z Speeder Bikes (2x)
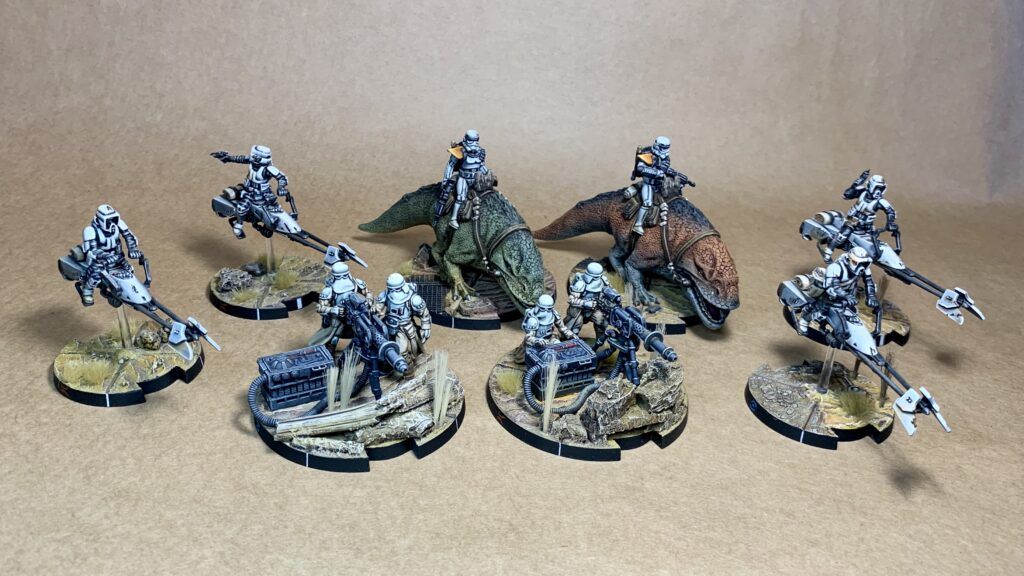
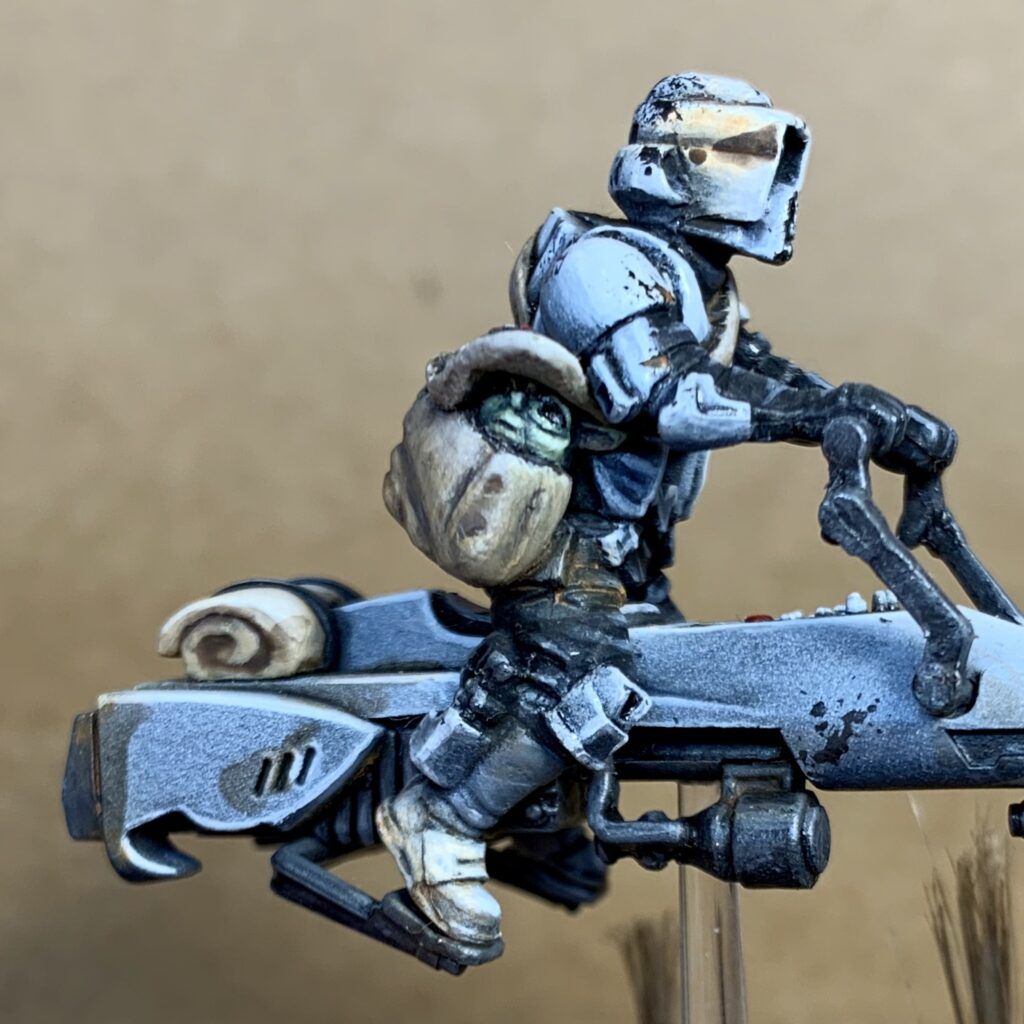
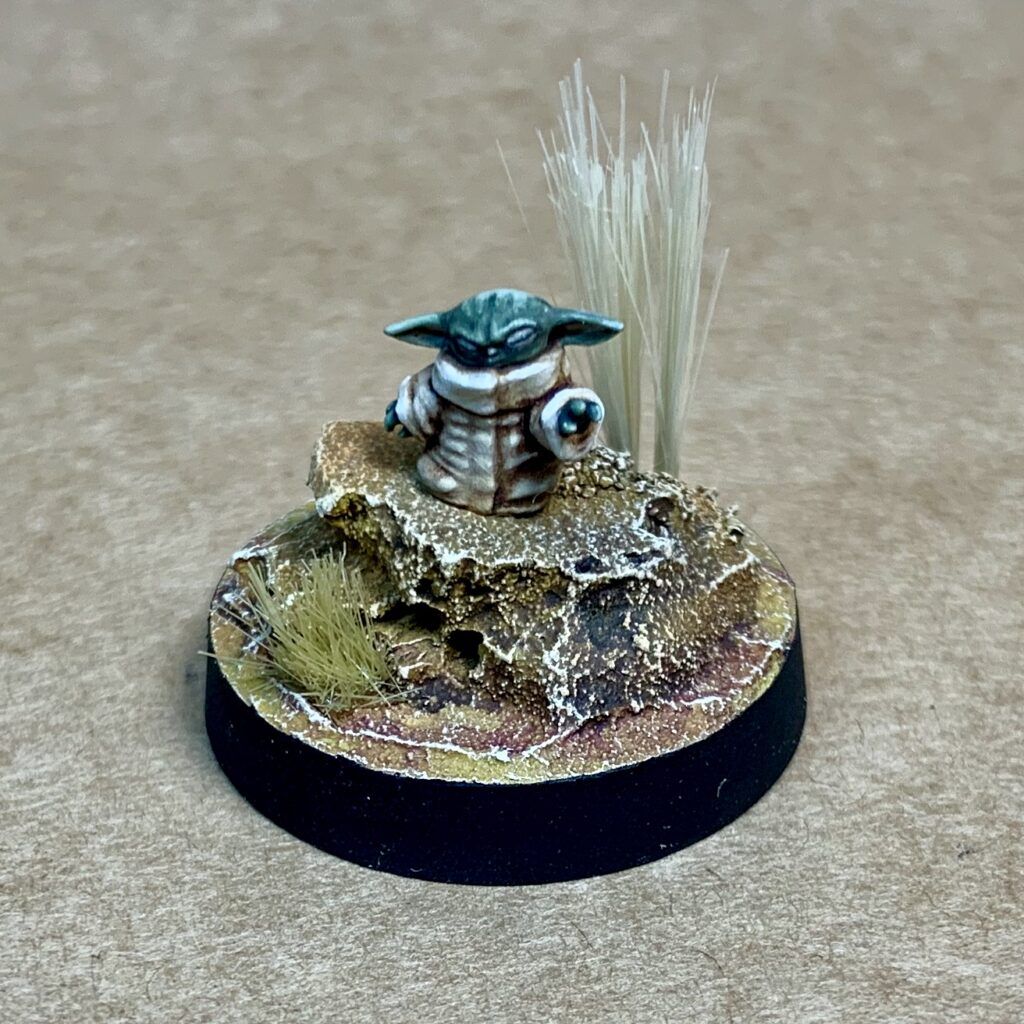
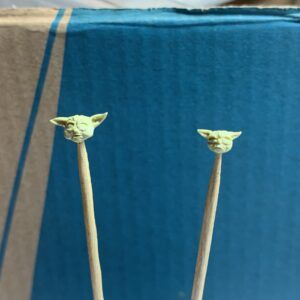
After the last episode of the Mandalorian I knew what I had to do. Firstly, I decided on the white instead of brown bike scheme. I think they match the army better. Secondly, I knew that one of the Blue team members shall have my favorite character in the whole SW universe – the Child, in his bag. It wasn’t easy to sculpt such a tiny creature, so at a first try it turned out as Yoda with its size. The second attempt was way better and gave me the option to put his little head in the bag. It is a tight fit, but I think the proportions are right. In contrast, the Blue leader conversion was simple but also effective.
Dewback Rider (2x)
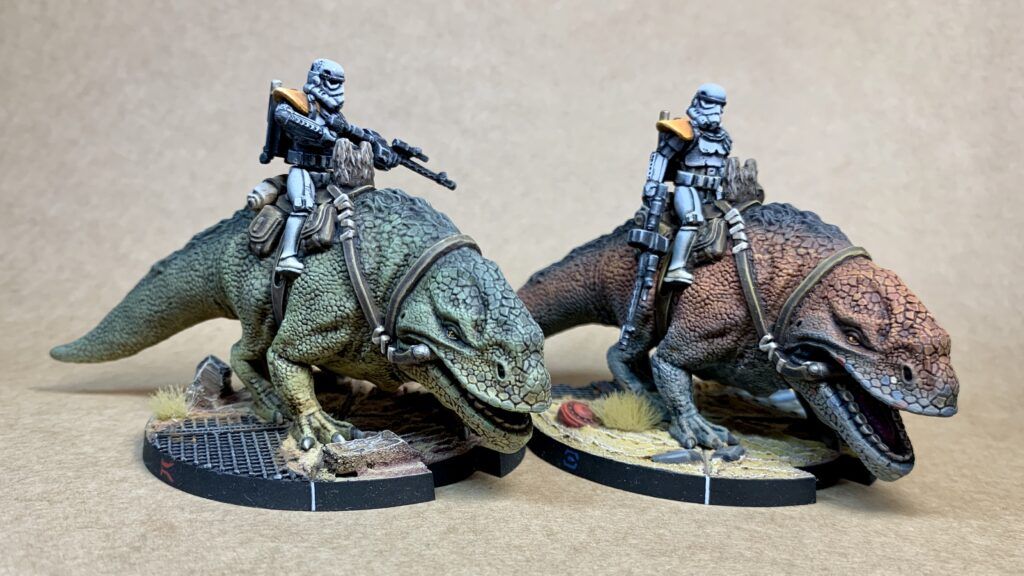
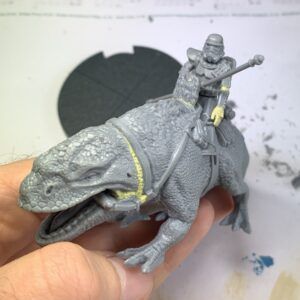
Dewbacks turned out to be my favorite miniatures. The first one was painted with typical green color scheme and the second one with reddish-grey alternate coloration. I tried different tones and washes on the skin for it to look natural. I intended their heads with those shiny eyes to be eye-catching elements of the miniatures. The second Dewback was converted by widening his mouth and alternating poses of the riders. Gaps in the head of the lizard were filled in with Milliput, an additional set of teeth and missing part of harness had to be sculpted. Stormtroopers weapons were changed, which required replacing hands with heavy weapons and attaching a Shoretrooper palm to the left arm. For both Dewbacks, riders and weapons are changeable.
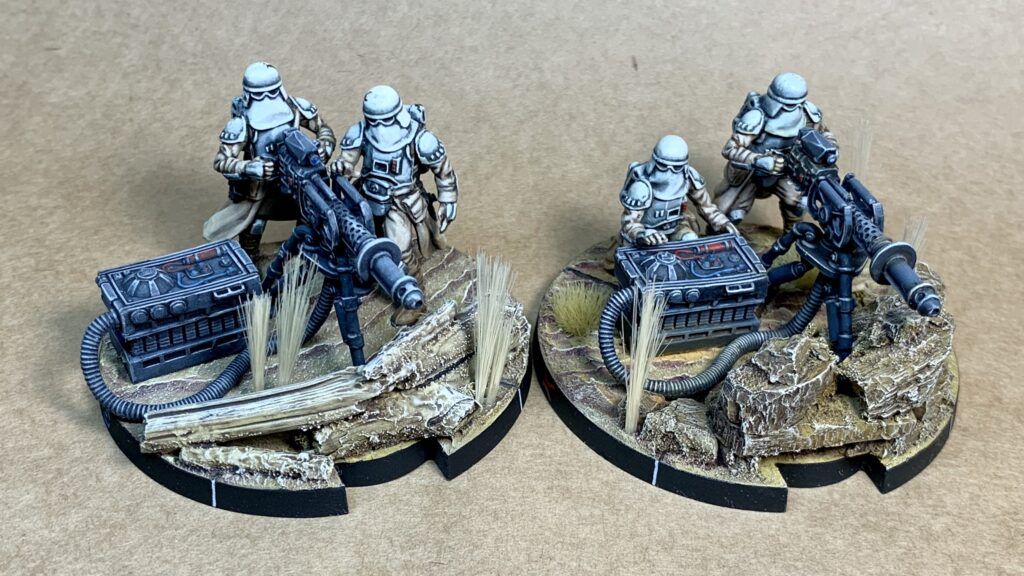
E-Web Heavy Blaster Team (2x)
Despite the fact that Snowtroopers are not the best sculpts, E-Web Team minis are nice to paint. With huge base they gave me a nice opportunity to do some storytelling. I decided to put them behind a cover. Blue team was converted from the Snowtrooper unit and I like how they turned out. Painting black on the blaster itself with so many edges was a lot of fun.
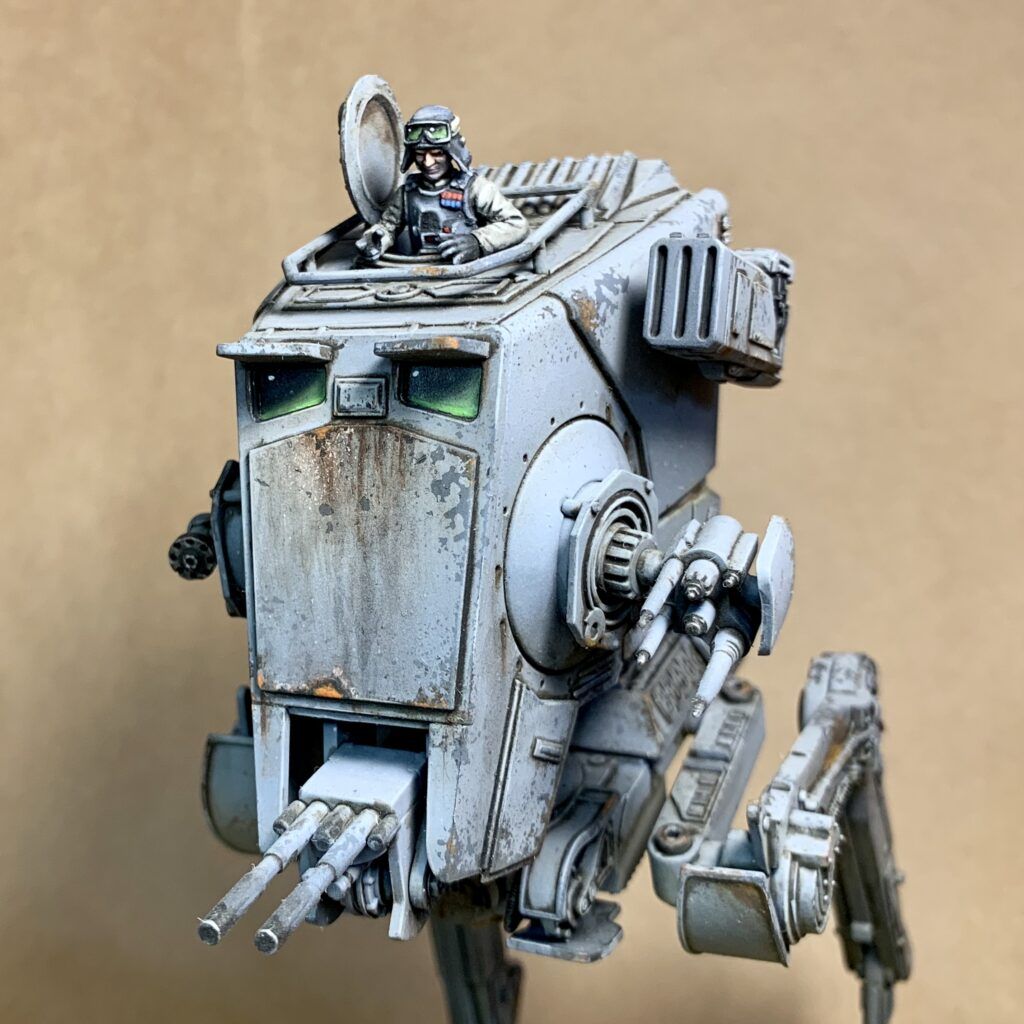
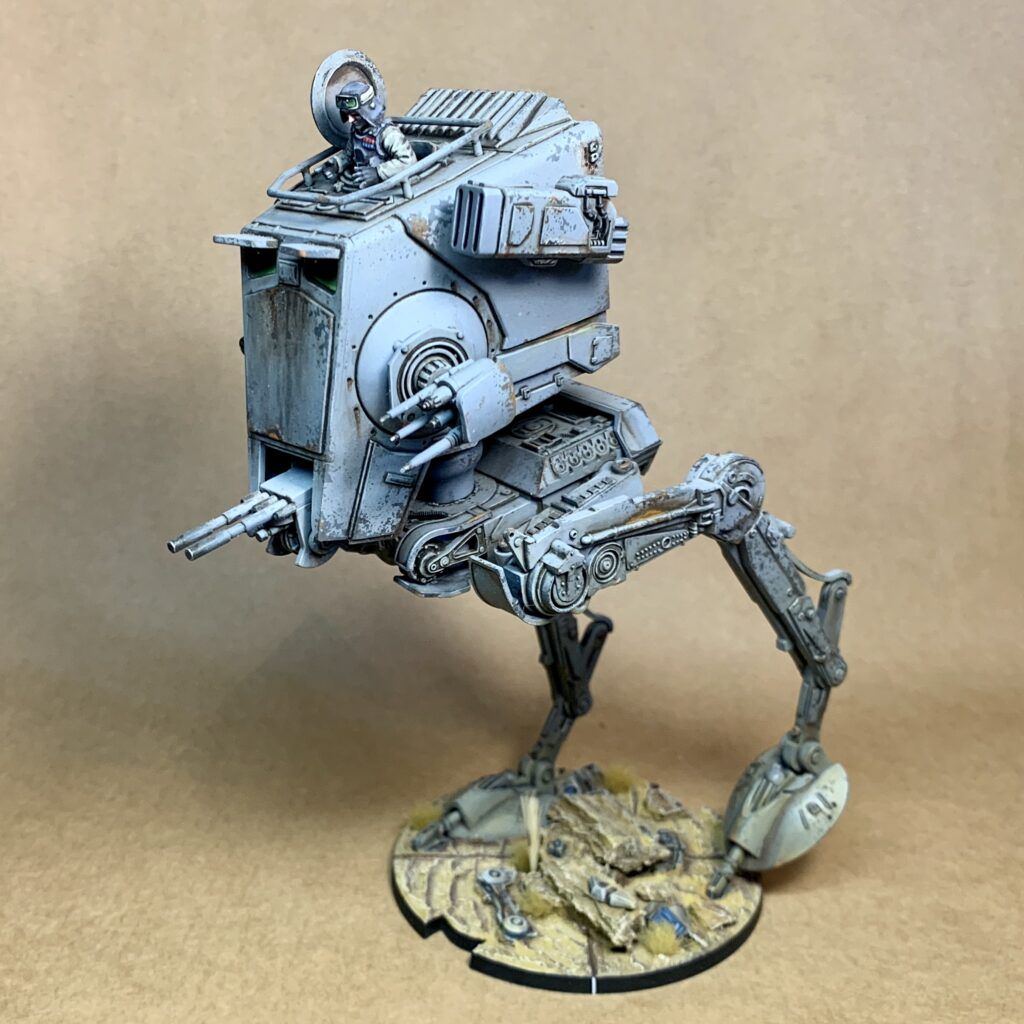
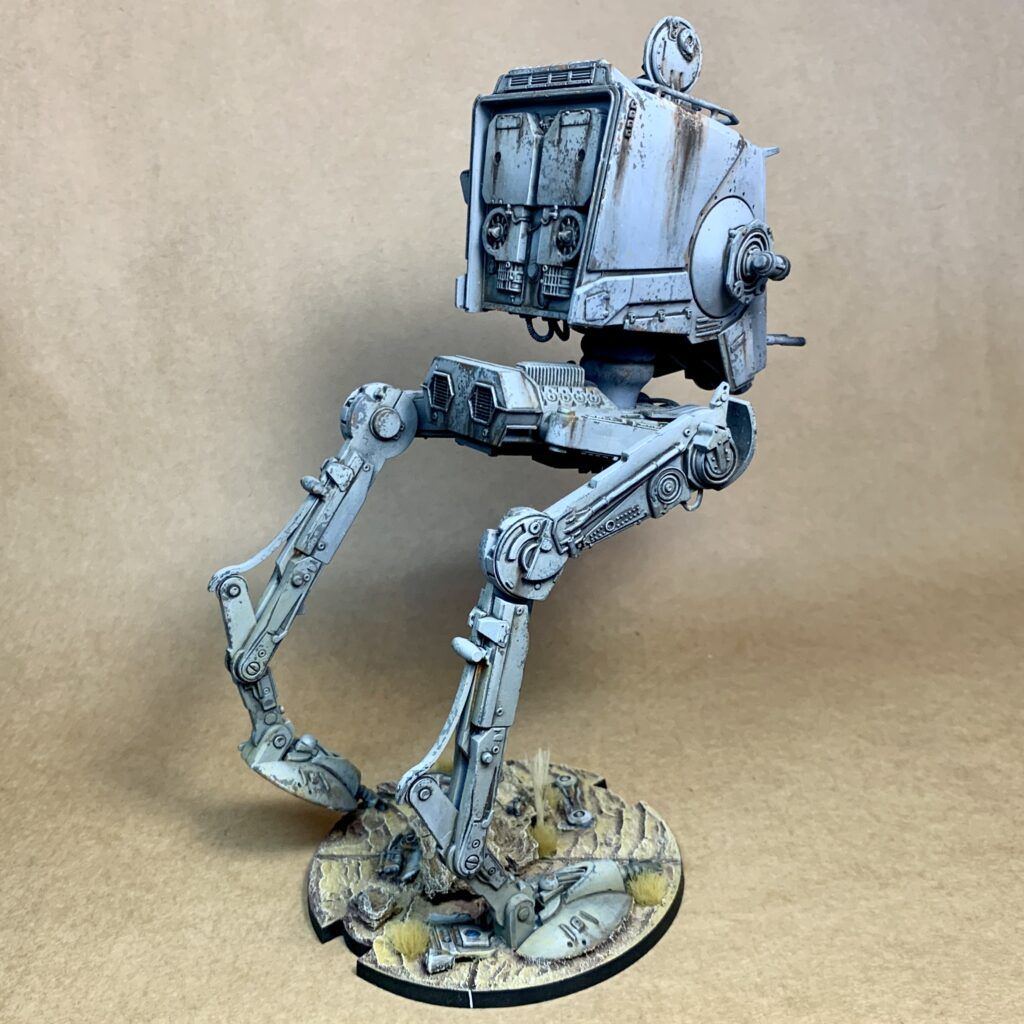
AT-ST (1x)
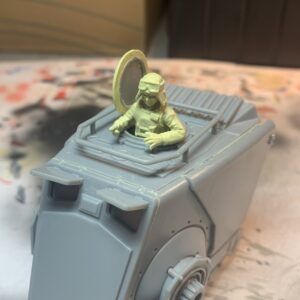
This is the single biggest miniature I ever attempted. I almost glued the main weapon in the wrong position and with legs bended to the opposite site. I tried to make the most dynamic pose possible with the height maintained. All the weapons are interchangeable, and mortar is magnetized. When I noticed that General Weiss is one of the available pilots, I decided that I need to have this option in my arsenal. I opened the back of the cabin, cut out the hatch and placed a card with magnets from the inside. Then I glued it together. Looking back, now I would do it slightly differently, with a lockable hatch. General Weiss is a copy of Veers with alternate hand sculpt, devilish look on his face and alternate color scheme. He can be used as a pilot of the Occupier Tank as well.
As it was my first meeting with vehicle weathering, I might have overdone rust here and there, but the overall weary look that I aimed for was achieved. Chipping Fluid from Vallejo turned out to be great for that application. As for other minis, I used oil washes and dry pigments from pastels. I wanted to have a focus point on the face of the cabin with the visiors matching the General’s glasses.

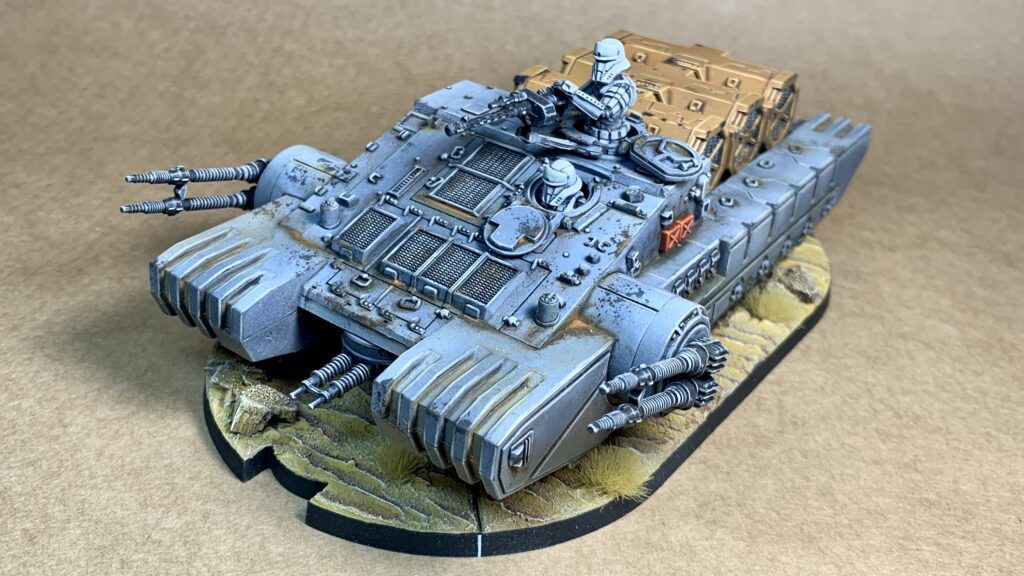
TX-225 GAVw Occupier Combat Assault Tank (1x)
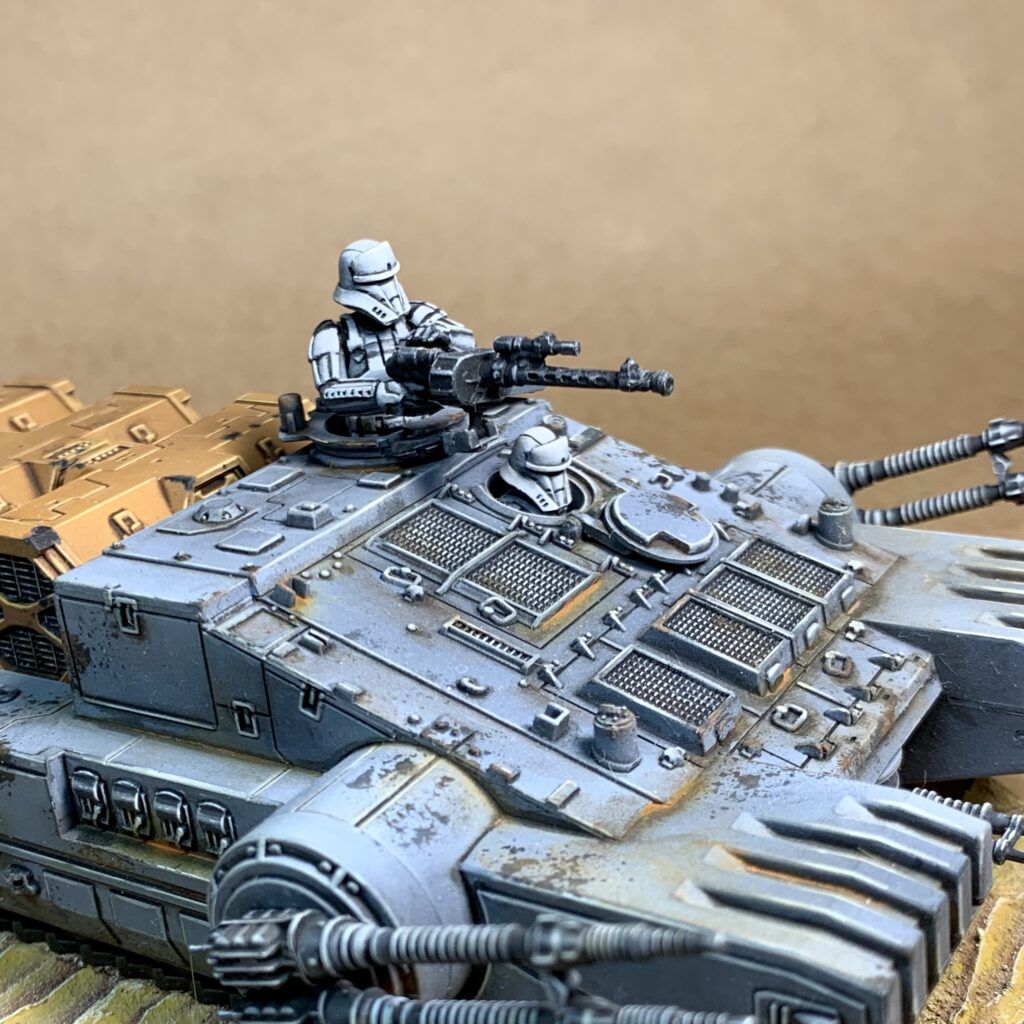
It was way easier to paint than the AT-ST, with all the gained experience. I spent quite some time to prepare and magnetize the weapons and the riders. I had to cut the pilot in half to have 3 possibilities for the Tank Trooper on the top of the tank. His waist can be attached to Weiss as well. Both hatches are placed on hinges so they can be closed if needed. For the boxes in the back, magnets were added, but, unfortunately, I drilled a hole on the wrong side in one of the Kyber crates. Therefore, in order to fit them in, one of them needs to be turned around. I considered having the Tank coming out from the water, but eventually I decided that caterpillar tracks will also do the job.
Barricades, Movement Tools and Ranges
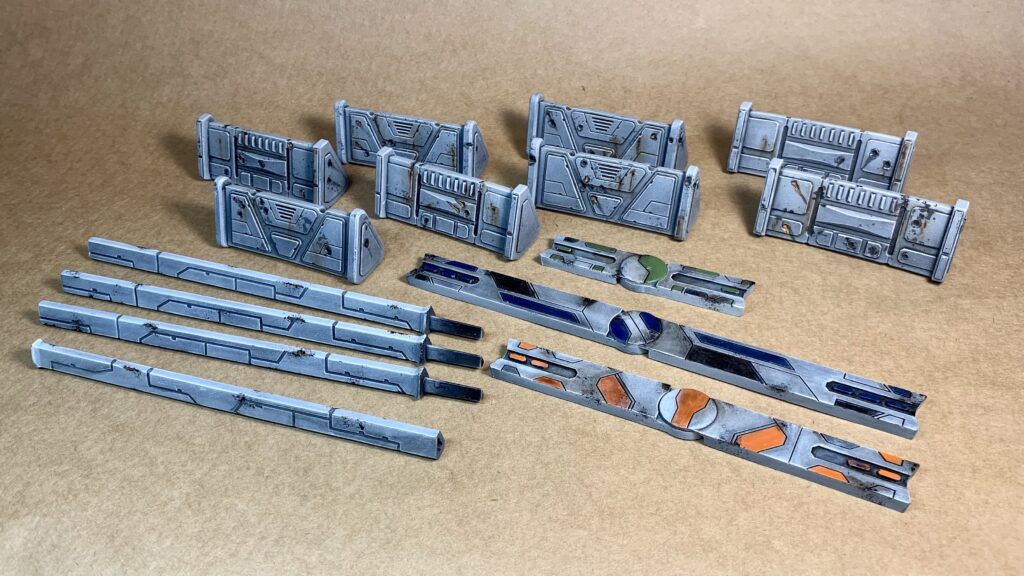
They were painted as the last element of the army. I applied the techniques used for the vehicles along with drilled holes for battle damage. Then they were filled with plastic putty and modelled with a brush handle.
I was looking for a nice complete look of the army on the table, so painting rulers was inevitable. I considered unified look, but decided to match the D-0, BB-8 and R2-D2 schemes as per the size.
Vital Assets
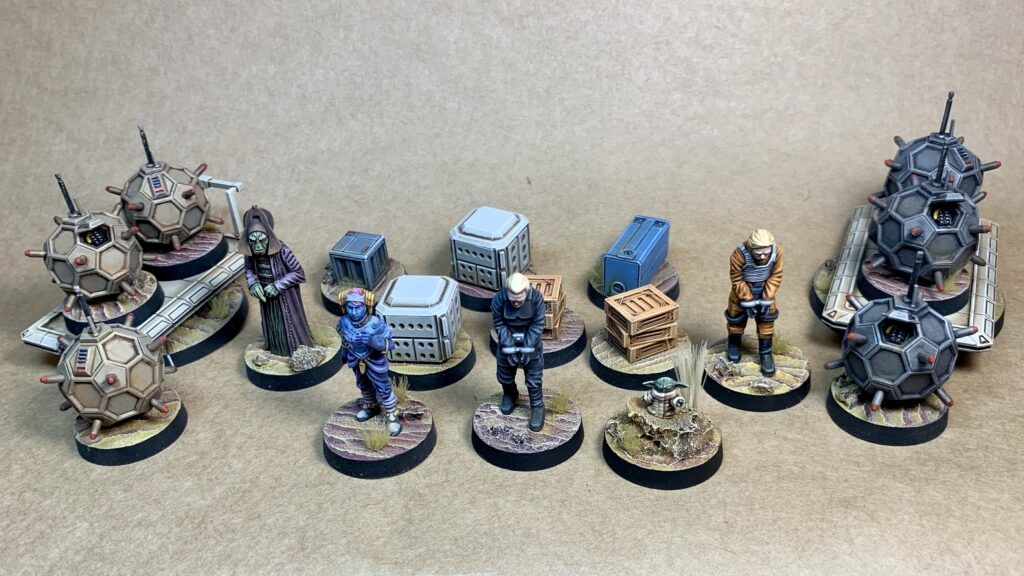
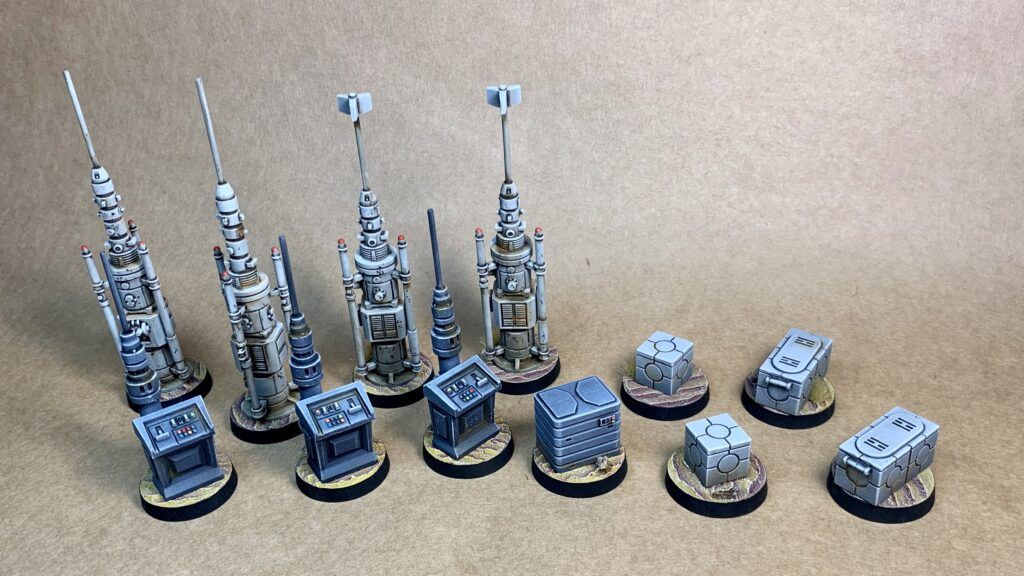
I really like the sculpts of the miniatures of this expansion. It was quite a fast and satisfying paint job. I wanted to have some diversity among the mines, so decided to paint them in two schemes and slightly alter the position of hatches. I mounted magnets on the carts and mines so they can be removed from bases if required.
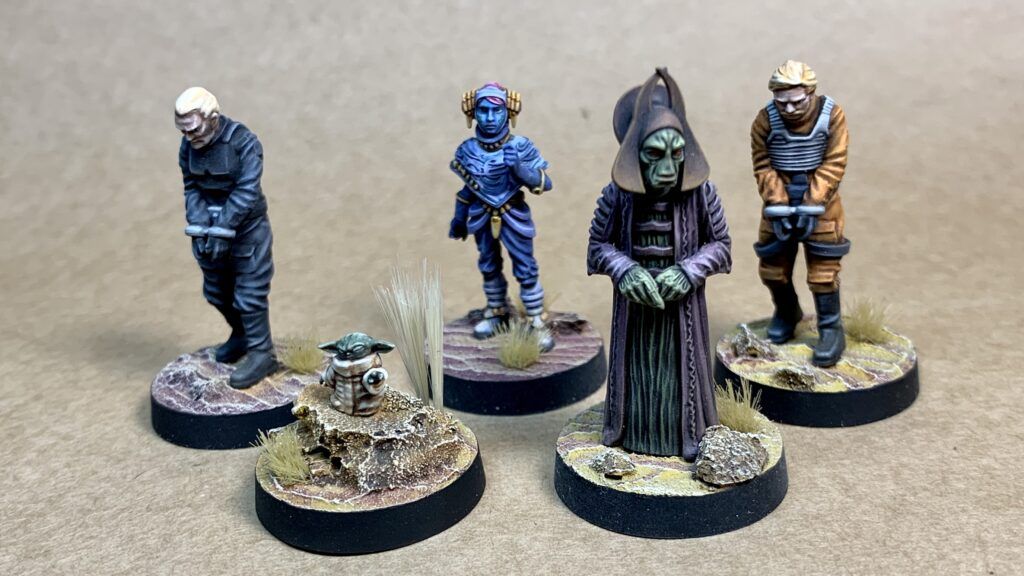
I used Skull Forge minis as additional hostages that shall suit the army. Thanks to that, all of my opponents can have their own themed miniature. Of course, my objective would always be the Child.
Priority Supplies
Those were hard to get, but it was essential to have them in order to complete the army. Weathering of the moisture vaporators was tricky, but zenithal highlighting and drybrush did the work. With the experience gained from painting Vital Assets the rest of the set was quite easy.
As any other Imperial player, I am looking forward to the Inferno Squad release later this year. They look amazing and as they are coming on the sprues, they shall be also quite easy to modify. Of course, I also hope for further releases based on Mandalorian e.g. Moff Gideon.
I know that I am missing Celebration Vader, but I have to live with it, as I cannot purchase it now. Also, I know that one of the Speeder Bike riders from the separate box is slightly different with the position of his hands, but this is not a big deal for me.
After I have completed the army, I decided to buy an FDM 3D printer and start with thematic scenery (desert/junkyard look with combination of Tattoine/Jedha theme).
So, this is the end of the journey with the attempt for “The best painted, complete Imperial army in the galaxy far away”. I hope that you enjoy the work that I did with the models and I am looking forward for your comments.
Radek “radeczex” Kurkowski
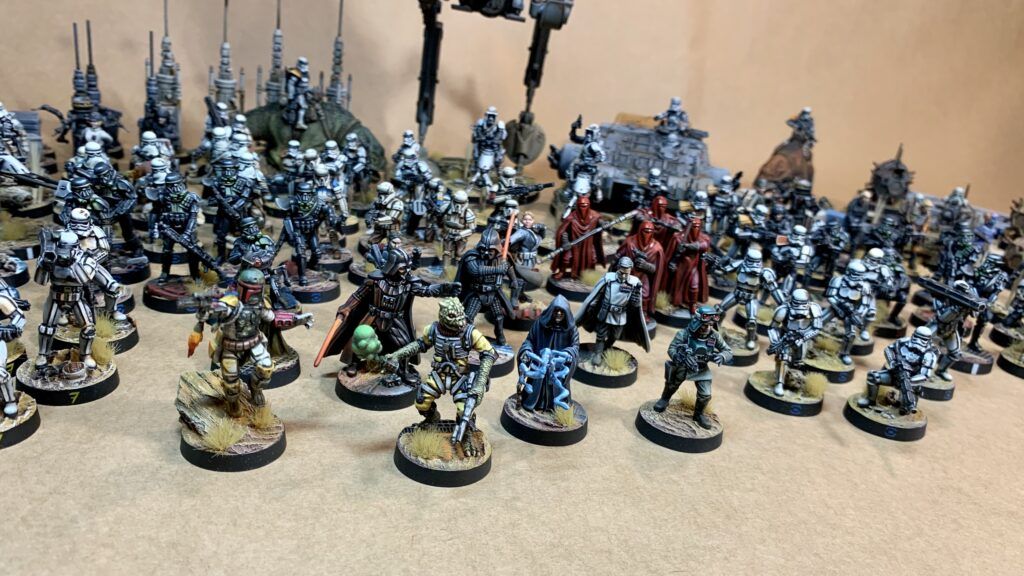
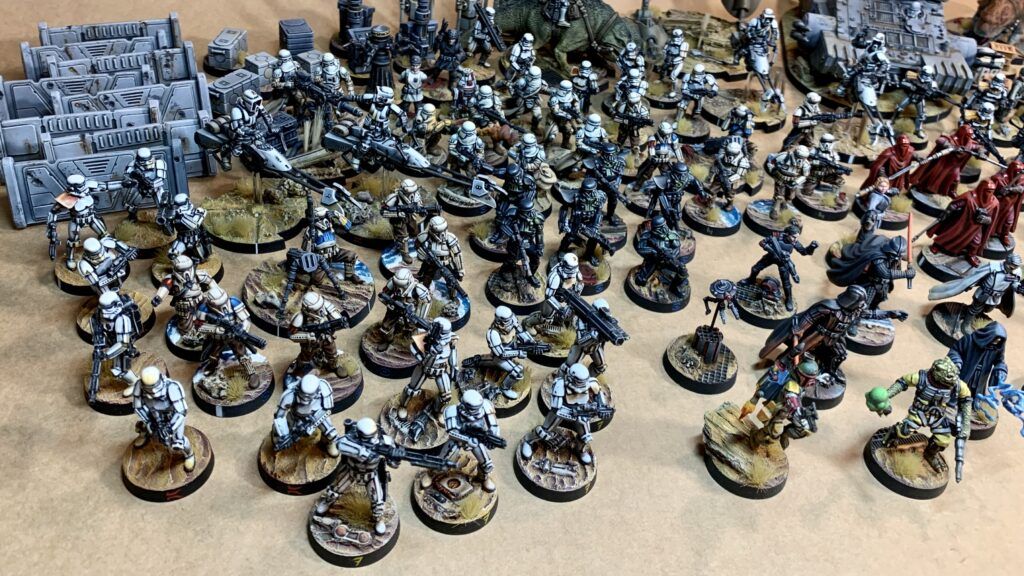
If you want to see more photos of this awesome army, Radek has posted them on his Pinterest, which you can find here: https://pin.it/wq0aaho

Copyright © 2024 The Fifth Trooper. All Rights Reserved.