
In this post, I’ll be writing about the TX-130 Saber Tank.
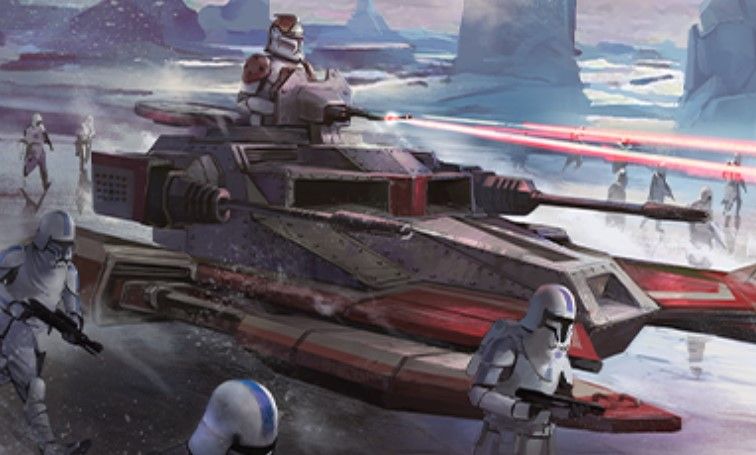
The Saber Tank is designed to be nimble and ready to meet the enemy where they are. The Saber can provide excellent infantry support as well as provide an excellent weapons platform. In Legion, the Saber Tank is very fast and maneuverable, but it can still repel a lot of damage and then return fire with massive effect. I’m going to try and pass on my plethora of Saber Tank experience to you in this article.
This has been updated to reflect the changes in the 2024 “Legion 2.6” update, original article by Timbo and 2.6 edits (in blue) done by Evan “Doc Velo” Paul.
Strengths
- Durable
- Offensive Output
- Loadout Options
- Fast and Maneuverable
- Blocks line of sight
Weaknesses
- Massive Weak Points
- Expensive
- Needs Support
Overview
TX-130 Saber Tank
155 Points. The Saber Tank comes in at 155 points base. This is about what you would expect for a heavy unit. With upgrades, you will have this unit sit around 170 or more points. Prior to the change to 1000 point armies, this usually made the Saber the center point of the list but now it doesn’t have to be.
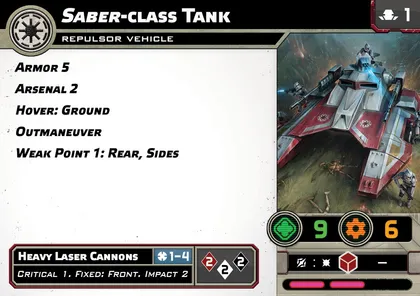
Defense. Coming with 9 wounds protected by Armor 5 and red saves the Saber Tank can be a tough target to take down. There’s also the keyword Outmaneuver on the Saber Tank, which allows dodge tokens to be spent to cancel critical results. This is especially good on an armored vehicle as it can cancel random crits rolled by non-impact pools easily, as well as canceling Pierce or Lethal shots. You can also give the Saber surge tokens to raise its save even more. One huge defensive weakness is its 270 degree weak point. Do all you can to avoid letting your opponent shoot into your side or rear arc, or your Saber will start taking damage. Overall, the Saber Tank can be made to be the hardest heavy unit in the game to kill by far.
Offense. The main gun that comes on the unit card is a double rainbow (Red, Black, White) with Critical 1 and Impact 2. This pool already is pretty good. The Critical 1 often means you effectively surge on your offensive rolls. Critical and Impact on the same pool also means you have a good anti-armor weapon. However, I would never suggest bringing a saber tank without a secondary weapon. We will discuss them further later on, but in general you will be throwing about 8-9 dice with some good keywords. It now surges to hit as well which is a nice bonus.
Maneuverability. This tank is very maneuverable with Speed 2 and a massive 6″ base, combined with Hover: Ground. This lets you make some big moves forward, or decisive strafes to catch a unit out of cover. The full forward move is about 10.5″ (slightly shy of Range 2) combined with Range 4 firepower, the Saber’s threat range is just under range 6. The Saber is a Repulsor vehicle, which allows it to move over or onto terrain less than the height of the tank (rather than half its height like a normal ground vehicle). The Saber Tank model is fairly tall which means that maneuvering is much easier compared to standard ground vehicles; you are less affected by a table with lots of terrain. Finally, now that non-Speeders get to pivot before moves, you’re very likely going to get to where you need to go.
Upgrades
Pilot
Plo Koon

Plo Koon is the least-taken pilot for the saber tank. Though he provides a good ability combined with the tank’s outmaneuver, his cost and the fact he exhausts means that he really isn’t ever taken. Plo Koon might be something to look at if you want a Saber Tank moving a lot (which you probably don’t). It’s too bad, the art is great though!
Veteran Clone Pilot

A very good upgrade for your Saber Tank, which allows you to give your Saber Tank aims, dodges, and surges. This ability does exhaust and then ready during the end phase. You will get to use it once every turn, but not all the time. This pilot is really good at providing a few aims to your tank.
Now, this card serves as a funny little time capsule. When it was created it was meant to evoke the clone sharing rules at the time, but since the text was not changed with the rules updates it interestingly both gains and loses from this. It gains from the standpoint of being able to share unlimited tokens but loses by being limited to Range 1 when standard clone sharing is now Range 1-2. If you think your army will be huddled together this could help your tank get an extra surge for a save. Alternatively it could use ALL those usually-wasted aim tokens from full ARCs on turn 1 to really make sure that first tank attack packs a wallop.
Aayla Secura
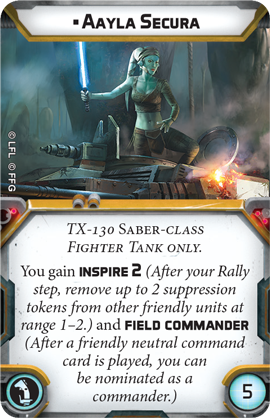
She is a field commander, which is especially relevant for if you want to run a double Saber list. Additionally, if you have Aayla on a saber tank it allows you to use the GAR 2 pip, Air Support. She’s generally seldom taken because neither of these keywords are usually too important for a given list’s strategy.
Hardpoint
TX-130 Beam Cannon Turret

A signature weapon of the saber tank that unfortunately just isn’t good right now. 30 points for a weapon that can’t effectively get through heavy cover isn’t worth it. This weapon is super interesting though and I hope it gets revisited in the future.
Good news Tim! Now it’s half the cost and twice as good! Even though the change to 15 points came first it was still seldom taken but the Legion 2.6 ruleset made most beam weapons a ton better via the effective nerf to cover. Now your main gun shot can be eight dice every turn without the need to recover, BUT ALSO you get two free surging double red dice attacks to nearby targets as well. When you put it all together, you’re throwing 8 red, 2 black, and 2 white dice at three targets (most of those on the first one obviously) with decent keywords. The Saber was already pretty good at shooting but now it’s entered a new level that usually surpasses the AAT and rivals the AT-ST and snail tank.
TX-130 Twin Laser Turret

This used to be the go-to but is very likely to fade into obscurity unless the cost is reduced or something like suppressive is added, the beam is just much more attractive due to its dice output and range.
Ordnance
Bunker Buster Shells
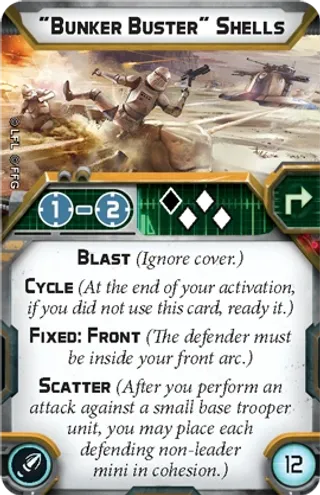
Largely wasted on the Saber Tank. Blast in 2.6 is both less necessary to have all the time and yet potentially more useful since it prevents huge cover rolls but 12 points is a lot for such a situational card.
High-Energy Shells
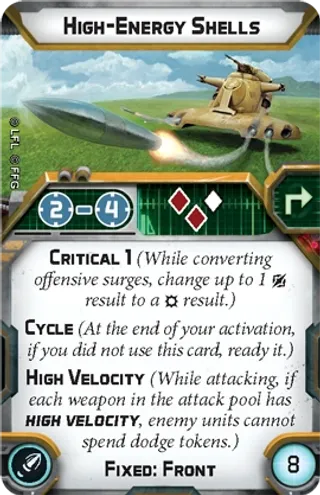
This went from the main choice to the main waste-of-points with Legion 2.6: Critical 1 and one white dice is NOT worth losing beam and making the weapon exhaust. If the Saber had arsenal 3 then we’d be talkin’, but since it doesn’t…
Armor Piercing Shells

My personal favorite ordnance upgrade as combined with the main gun you will have 3R 4B 2W with Impact 5 and Critical 1. You can often force 7 or more saves on armored targets. Rebel AT-RTs cower in fear! If you really want the tank to have multiple options for different threats then this should be your choice in ADDITION to the beam cannon.
Comms
There are 2 relevant comms upgrades to the Saber Tank.
HQ Uplink
It’s nice to have but is also an expensive way to guarantee order control, though the value goes up a little if you’re also packing AP shells.
Linked Targeting Array
This is the comms upgrade you are often with a Saber Tank. In most single Saber Tank lists, you will often want an order on it every turn, especially if you’re running Cody. This upgrade also allows the Saber Tank to go early in the turn if necessary and still have a decently aimed shot before your support units can provide a lot of aims to the tank.
Emergency Transponder
If you only have 4 points left this is a fine-enough replacement for Linked Targeting Array.
Example Lists (for Legion 2.6)
Single Saber
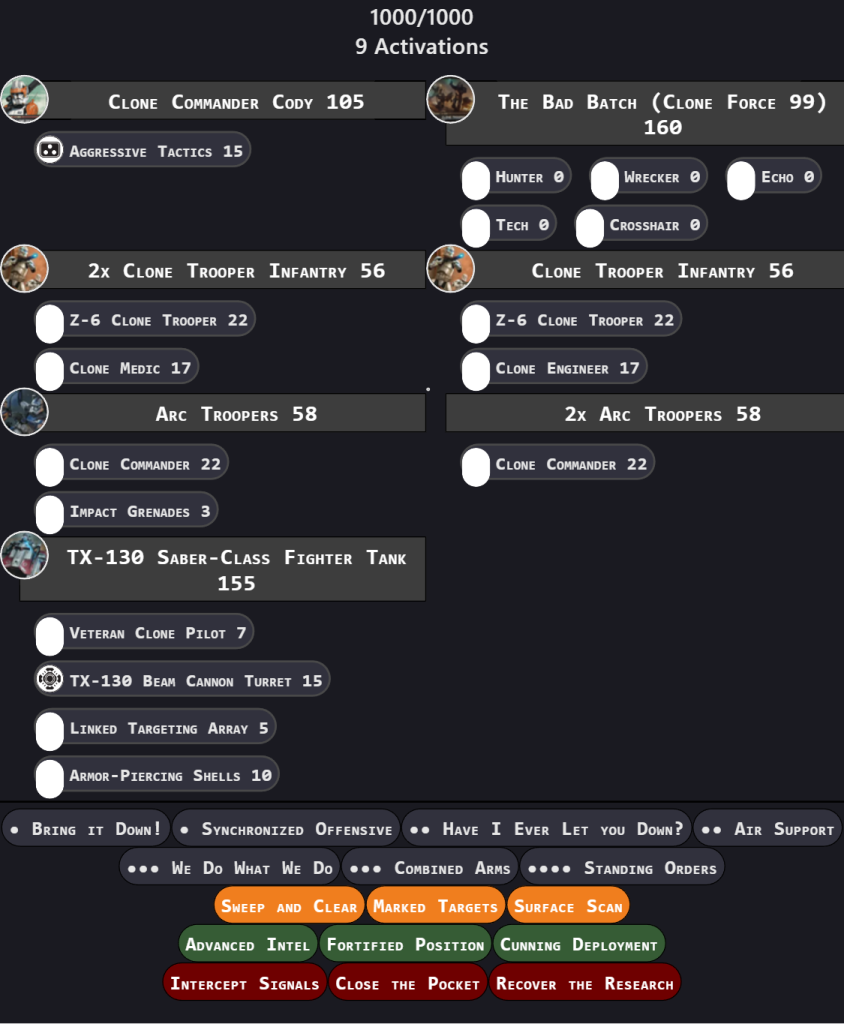
This puts a lot of points into having one big boy with 10 effective health (this has one engineer) and the ability to use clone tokens when necessary. Also, aggressive tactics will mean it will always have a surge to spend on defense making it very…tanky.
Double Saber

Those of you who are Legion veterans may recognize the nostalgia value of putting Padme and tanks in the same list. That combo ain’t what it used to be but this could be a very fun list where the tanks hold up the back line while the rest rush in to wreak havoc.
Wookiee Defenders!
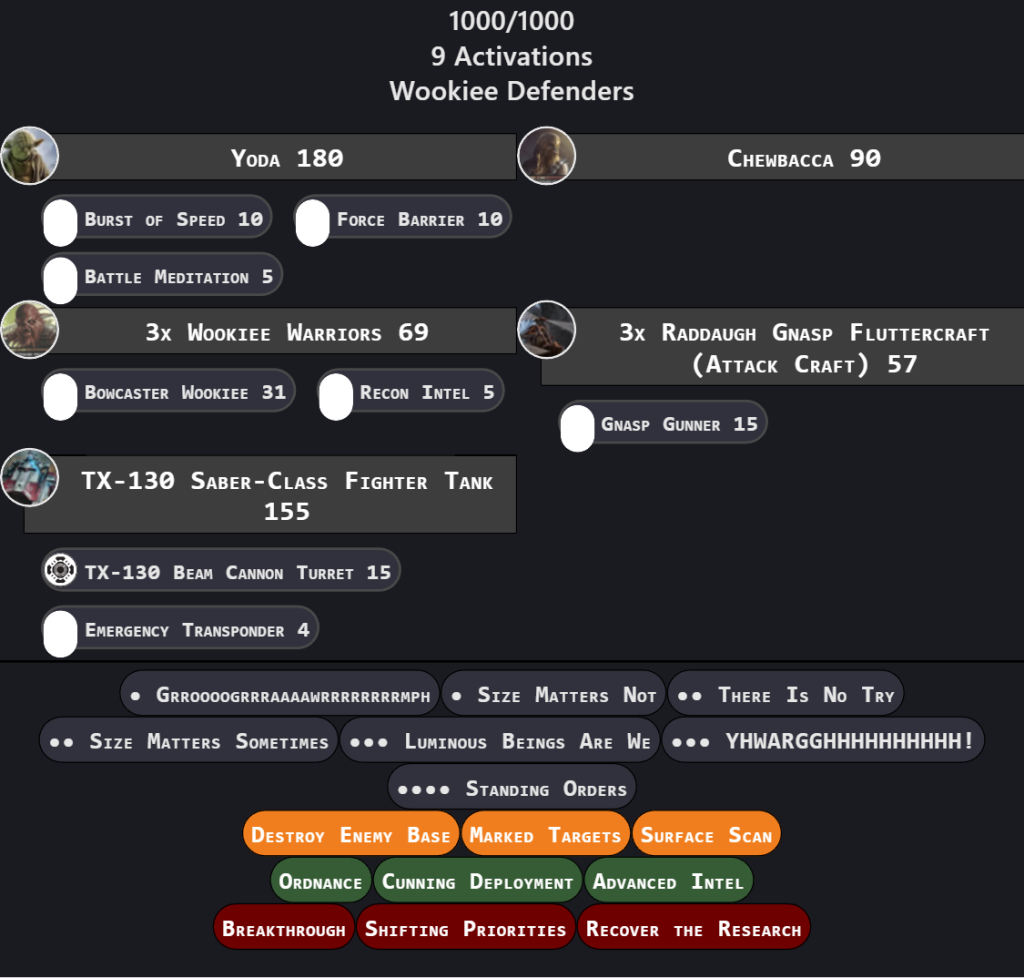
The Saber used to be sort of a joke for Wookiee Defenders but it’s a legit choice now that you can spend so many points! I like to use the tank to bully one side and have the Wooks on the other.
#sabergobrrrrrrr
Summary
The Saber Tank is one of my favorite units in Legion and has been my favorite Star Wars vehicle ever since Star Wars: Battlefront 2 (2005) where I also made the Saber go brrrrrr.
Overall the Saber is a super tough unit that, with support, can be made into an offensive and defensive powerhouse. The saber also has very good customizability with a variety of upgrades and builds that are very good and viable.
Cheers,
Timbo

5 Responses
Padme is very good with aggresive neg to hostage.
Hi awesome article!!! Very useful! I’m a little confused by your discussion in maneuverability. You say given that it is a repulsor vehicle it can move onto terrain less then the height of the tank as opposed to half the height like a normal ground vehicle. That’s not how I thought hover ground worked. And it doesn’t have speeder 1. Can you point me to where in the rrg this is described. Thanks so much!
“While performing a standard move, reverse, or strafe, a repulsor vehicle mini can move onto or over a piece of a terrain that has a height that is equal to or less than the height of the unit leader’s mini.”
How do you like to run this list with Payload? With the lower activations, it has been a bit of a struggle for me.
Hello there,
You really have 2 main options with payload, commit to stopping their cart and winning on kill points or secret mission, or, more typically, pushing your cart and/or stopping theirs.
Look to deploy in a way that where your tank will be set up will be in the path of the enemies objective, and preferably will help push yours for a few turns. I usually use my troopers to scrum the carts/push mine, and the tank+support pieces stop the enemies cart. Payload forces your enemy to move towards an objective, which should lead to them running straight into a tank possibly with standbys at somepoint.
cheers