Trending Today


If you clicked on this article expecting a carpentry lesson, I apologize. I do not possess the relevant woodworking skills or knowledge to advise on building an actual table. The closest I’ve come is assembling tables from IKEA, which we can all agree isn’t quite the same. Instead, I want to focus on tips and tricks for laying out terrain to make interesting tables that work on all three Shatterpoint missions. Grab some terrain and let’s make some tables!
Before we begin, it is very important to say this: the goal of this article is not to encourage cookie-cutter tables that all look the same. By no means am I saying these are the definitive “right” ways to build a table. Variety and uniqueness are things that make things fun, at least for me. However, not to pat myself on the back too much, people seem to enjoy playing on the tables I make. As such, hopefully, a bit of insight to my process can give you some inspiration to tweak your formula.
With that out of the way, let’s begin!
Building tables in the early days of Shatterpoint was relatively easy; we had only one objective to worry about! Things got a bit more complicated with the introduction of Sabotage Showdown, but at least the three midline objectives stayed in the same spot. However, now we have Never Tell Me the Odds to worry about. It has a unique layout, sharing only the very middle objective with the other two missions. Building a table that works for all three is tricky, and that’s why I’m writing this article!
To help me, I’ll be using some graphics made by Dave from tiny plastic dudes. Drawing things to scale is hard and I’m lazy, but luckily Dave had already made these beautiful drawings, so why do the work again? Yellow objectives are for Shifting, green for Sabotage, and blue for Odds. The colorful circles represent range 2 (contesting range).
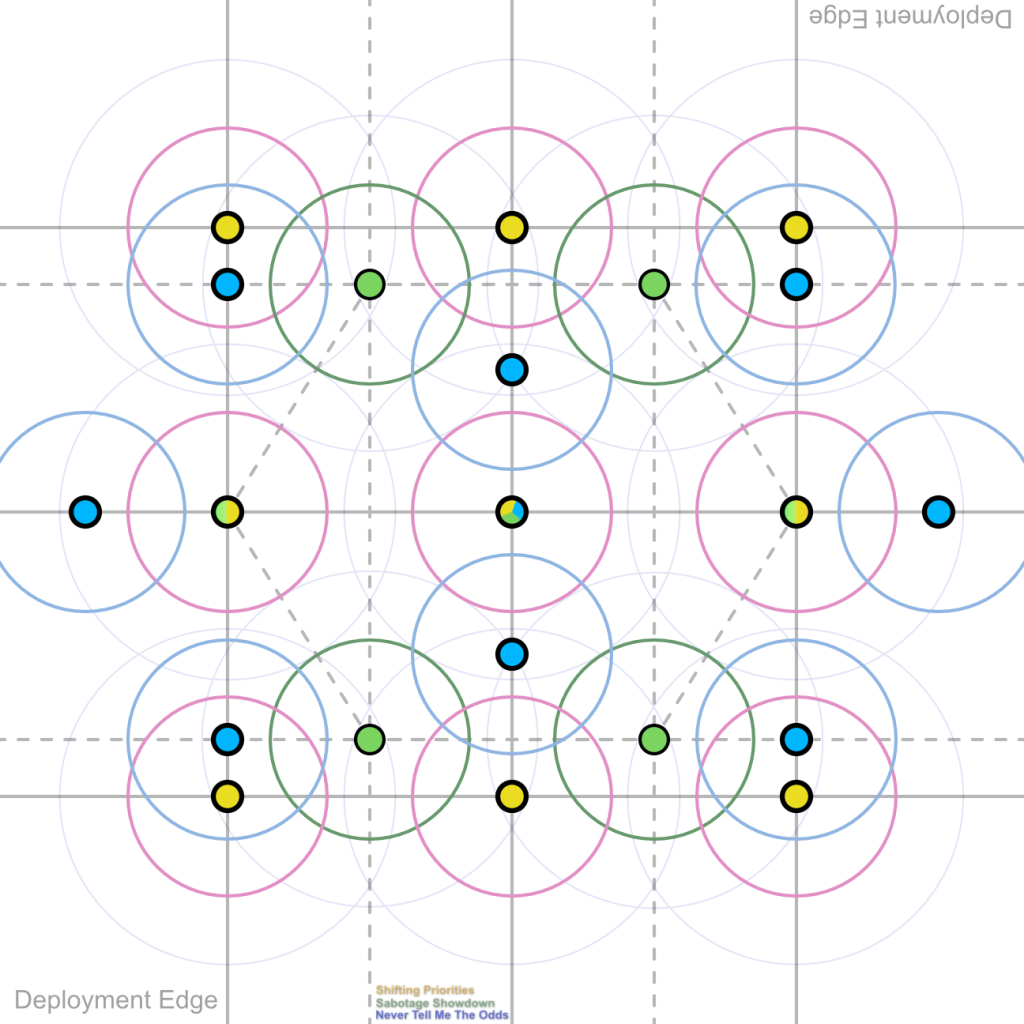
When it comes to priorities, I want to make sure the midline objectives are fun and interesting. These locations are where the bulk of the action usually happens in the first struggle. As such, when I make a table I like to start at the middle and build outwards. Specifically, I start with an idea of what we can call an “elevation profile” for the middle. That’s just a fancy way of saying “which objectives are elevated, and which aren’t?” As a general rule of thumb, I like 2/3 elevated objectives in Sabotage and Shifting or 3/5 in Odds. To be 100% clear: these numbers are malleable and just a starting point. There are great tables with 1/3 or 3/3 elevated objectives in the midline, for example.
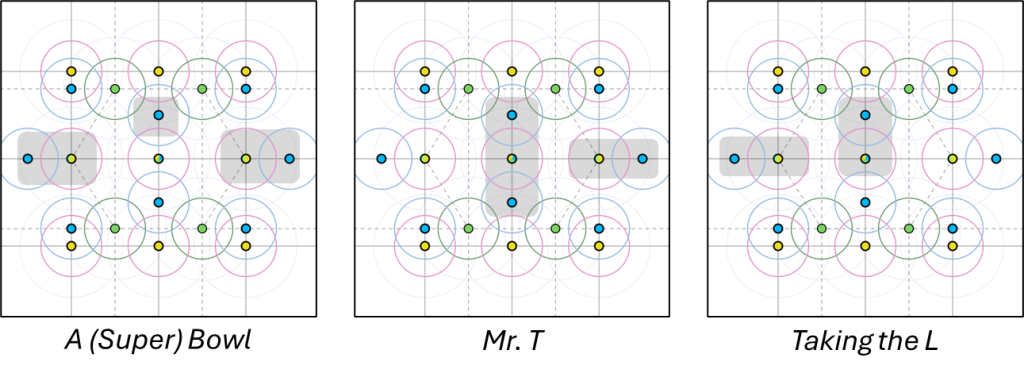
In the graphic above, I’ve slapped together three proto-tables, starting from the midline (midline-ish since we’re including the two off-center objectives from Odds here, but I’ll just keep saying midline). To be transparent, I’m not thinking too hard as I make these layouts right now. My table-making style is very vibes-based and improvisational so I’m hoping to create a more authentic feel here rather than slaving away coming up with “perfect” layouts. When you have to set up one or more tables for a gameday, for example, you won’t have forever to sit there and tweak things. I realize now that the T and L layouts are not especially different. As such, let’s modify the L slightly. This will also give us a chance to see a table with less elevated midline objectives.
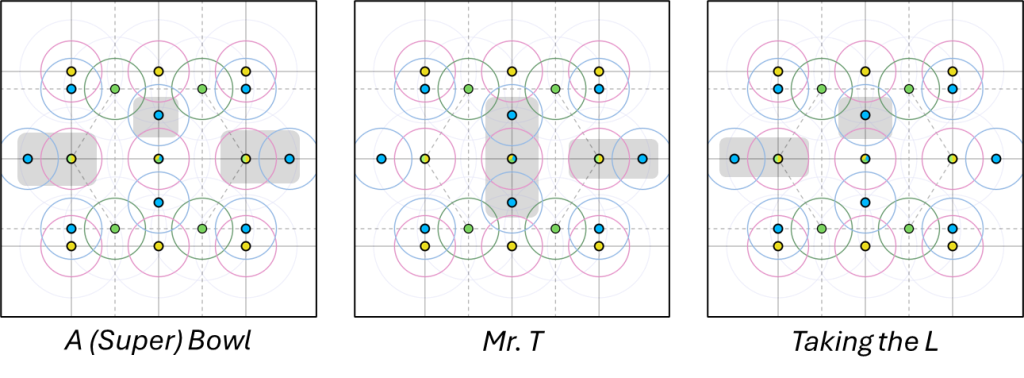
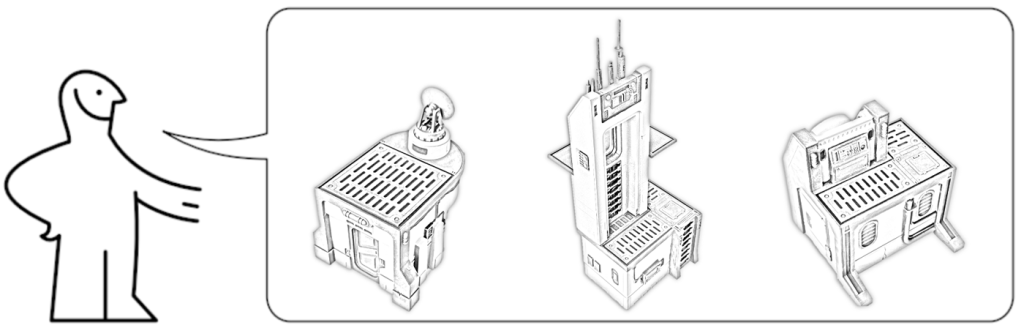
I should say this somewhere: the grey bits could be whatever. Maybe some are single large pieces, others are smaller pieces joined by gantries. The important assumption I’m making is that the grey parts are more than range 2 above the table surface (and thus count as a different elevation).
Now that we’ve tweaked our midline setups, it’s time to expand a bit. I generally like to have a mix throughout the table when it comes to elevation. I don’t often build large areas where all objectives are elevated, or large areas where they are all on the ground. On each backline (the objectives that each player may deploy on) I like to have around half the objectives elevated. With all that in mind, let’s go ahead and add some more terrain to our tables now.
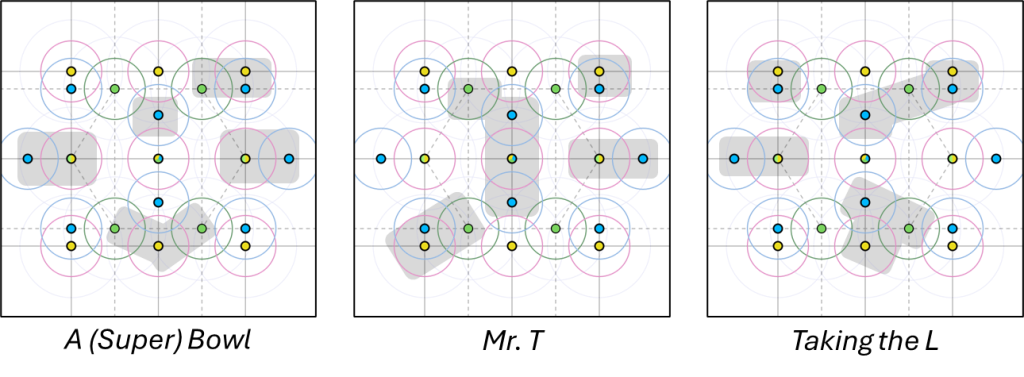
For the bowl layout, I wanted to lean into the idea of a lot of elevated area around the middle, so I added that little V at the bottom. I added a blob in the top right to elevate some of the backline objectives along the top, though that could just as easily have gone on the top left. The T layout now looks a bit more like a Y, but that’s fine. You could easily add another bit of elevation in the bottom right or top left if you want, I didn’t here to just keep it a little less symmetrical. Finally, the L doesn’t look like its namesake at all anymore, if it ever did! If I were looking to add a little more elevation then the bottom left, bottom right, or midline right would probably be the places I’d first consider.
You may notice that I’m usually clumping certain objectives together. For quick and handy table building I usually try to group up the Shifting and Odds objectives in the corners since they are so close. I also tend to group up the wide midline objectives. This is just a method for quicker table building, but if you are willing to spend a bit more time then there are certainly fun ways to build arrangements that don’t group these objectives together on our elevation profile.
I wouldn’t focus too much on the specifics of the layouts above. There are many, many combinations that are all sort of similar but also sort of different. The main point here is how we placed the big pieces, starting with an idea for the midline and then riffing off that to fill up the backline. About 1/2 – 2/3 objectives are going to be elevated in any particular mission and there’s a good mix of elevated and non-elevated objectives.
Our job isn’t over yet, though, we still need ingress points and scatter terrain! I like to go ingress first since it’s more important, then I’ll sprinkle in scatter last.
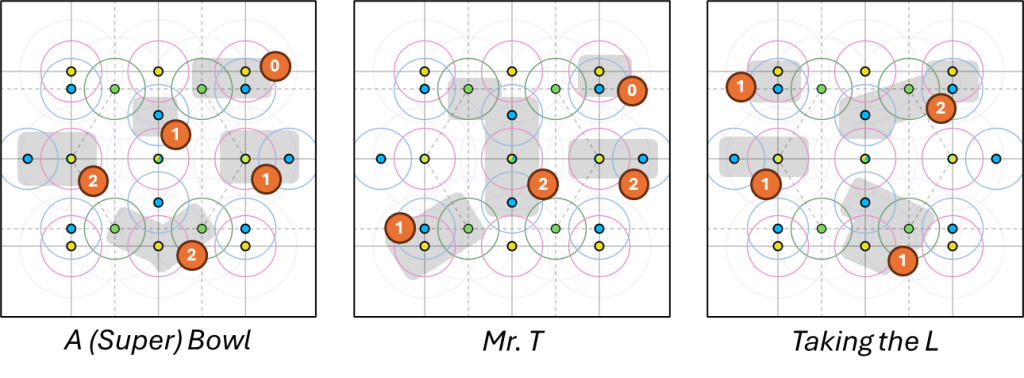
If I haven’t already ruffled feathers (I’m sure there will be people who think I don’t put enough elevated objectives, but whatever) then I surely will now. As a disclaimer, I’m sure there are critics out there who will think I use too many ingress points. Again, whatever. The important part is that we find a sweet spot where vertical abilities like jump or climb are useful but units without those abilities don’t get screwed over. However you achieve this balance doesn’t really matter, and the sweet spot will be different for different people.
Personally, I solve the balanced-verticality problem by considering both ingress quantity and placement. I generally have about one ingress point per elevated objective on average. Since we’re talking about “on average” that means some objectives may have two nearby while others have none. The important part for me is making sure that not every ingress point is in the “ideal” location. More on that later. For now, I’ll add a number to each grey blob on our three earlier tables as an example of how many ingress points I may attach to that blob.
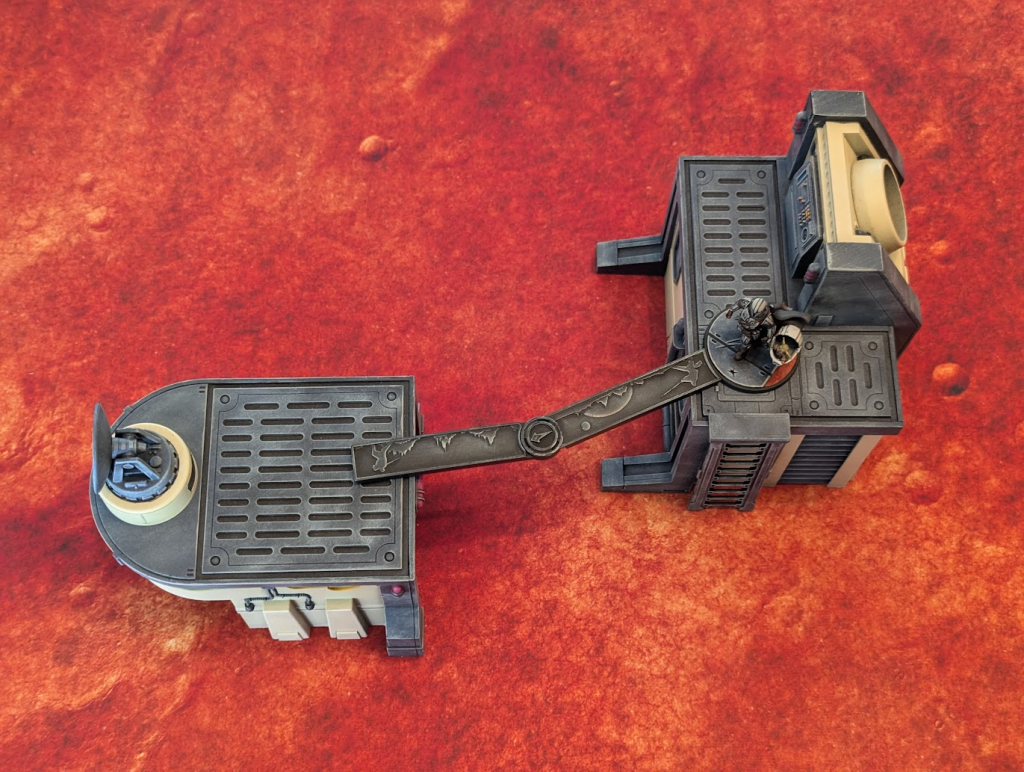
When it comes to the placement of the ingress points, I said that I don’t want them to be in the ideal locations. That is to say, not every ingress point needs to allow you to pop up and be within the contesting range of the objective. Alternatively, maybe you have to go kind of out of your way to get there. As an example of a non-ideal ingress placement, let’s look at a technique that I all the time in table building: ladders on backline objectives towards the middle of the table.
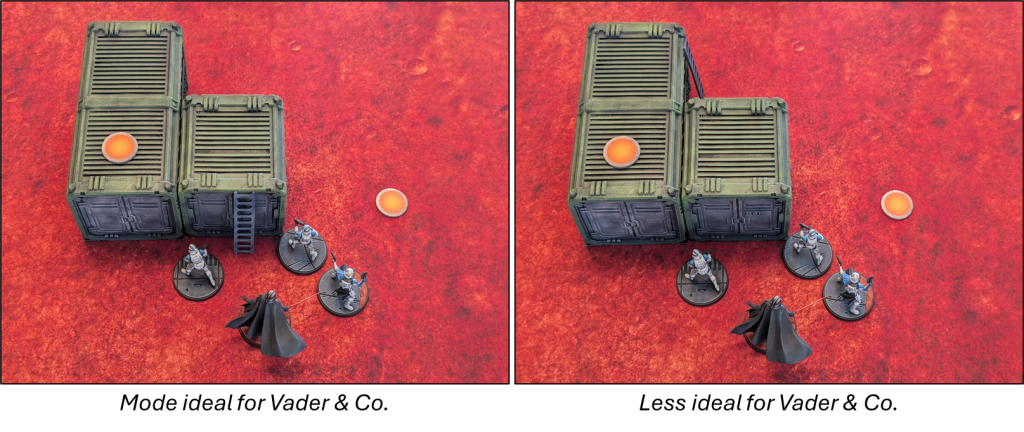
In the picture above, we see a player’s squad in deployment near one of their backline objectives. An ideal placement may involve having the ladder closer to the deployment edge such that the deployed units could easily reach it with a dash, getting them elevated easily and maybe netting some extra distance in some circumstances. Moving the ladder around the object makes it a little tougher to get there, though not impossible. Critically, and this is why I like to place ladders like this, the ingress point is also now more vulnerable to attack from the enemy. The defender has deployed to capture these objectives turn 1, but they aren’t on the same elevation as the left objective. If the attacker can dive a unit up towards the backline and get up the ingress then that objective can be stolen. The objective wouldn’t be as vulnerable in what I’ve termed the ideal location because it’s a longer path for the enemy to get there (and easier for the defender to reinforce). Making the backline objectives a bit more vulnerable in this way can often create more dynamic and interesting games, in my experience.
Once ingress points have been sorted out, I finish off the table with a bit of scatter.

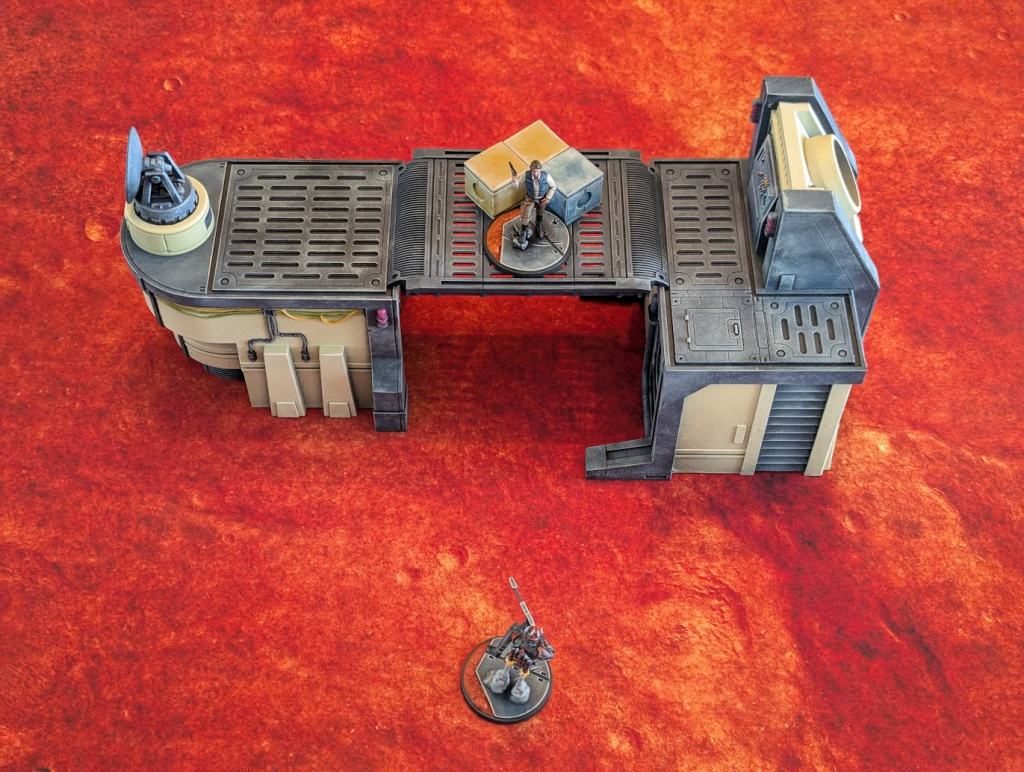
I like putting out scatter terrain. It feels nice and easy to plop down some crates and such after doing all the hard work of laying out the big pieces and ladders. In Shatterpoint, scatter can provide cover, but its main purpose is to stop pushes and pulls. As such, I like to sprinkle it around the board to open up opportunities for units to backstop themselves a bit and bring some extra tactics to the shove game. One thing I’d avoid though is making “shove-proof” spots, especially along the midline. Let’s consider an example with the picture below. Let’s say there’s a midline objective near Han. If Gar is shooting Han then a shove is going to be almost impossible early on since the attacker would need to go past the halfway mark of the board just to get a useful angle. Meanwhile, if Gar were to go first he wouldn’t get much benefit if Han then comes and tries to shove him away.
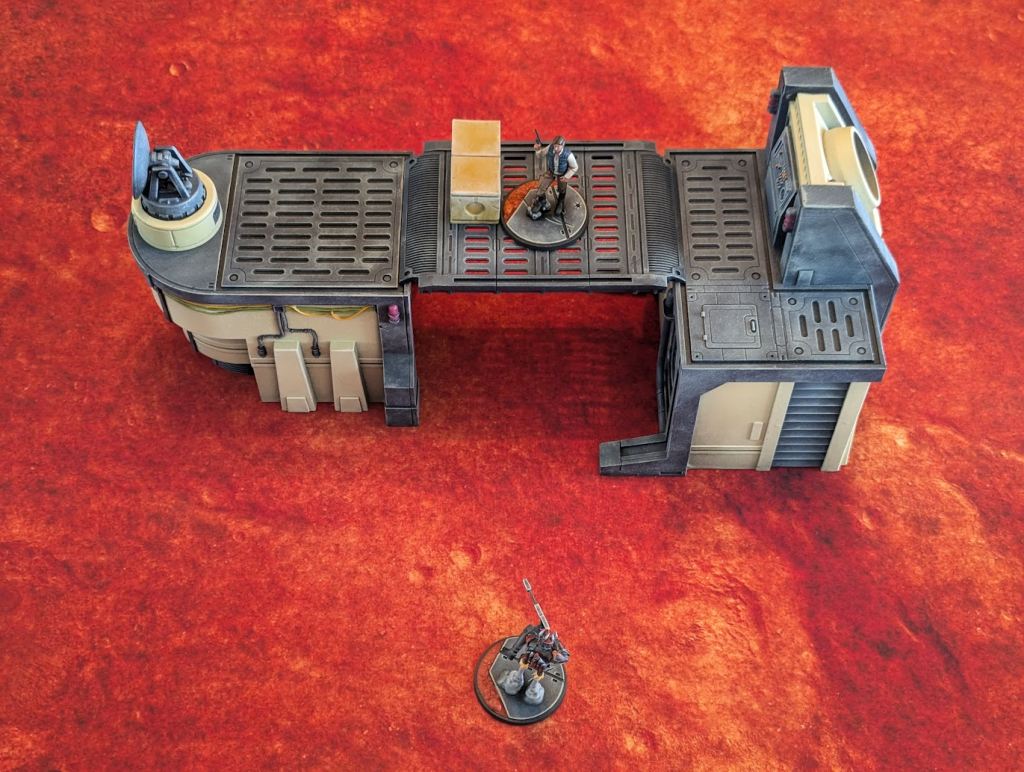
A less one-sided approach could be something more like the image below. The crates are still useful at stopping shoves from some angles but there are more positions where the attacker can get useful shoves. This placement is also more balanced because it doesn’t heavily favour one player.
One other pitfall I try to avoid is scatter in the deployment areas. Scatter in these locations often doesn’t serve much in-game purpose except to make deployment more difficult. Shaking up deployment isn’t necessarily a bad thing, but it’s just something to be aware of and make sure you’re doing intentionally. This is also an area where I’d try to make sure the scales are relatively even. I don’t want one player to have a deployment disadvantage that really hampers them while the other doesn’t have to sweat things at all. I’ll talk more about symmetry more generally in a later section.
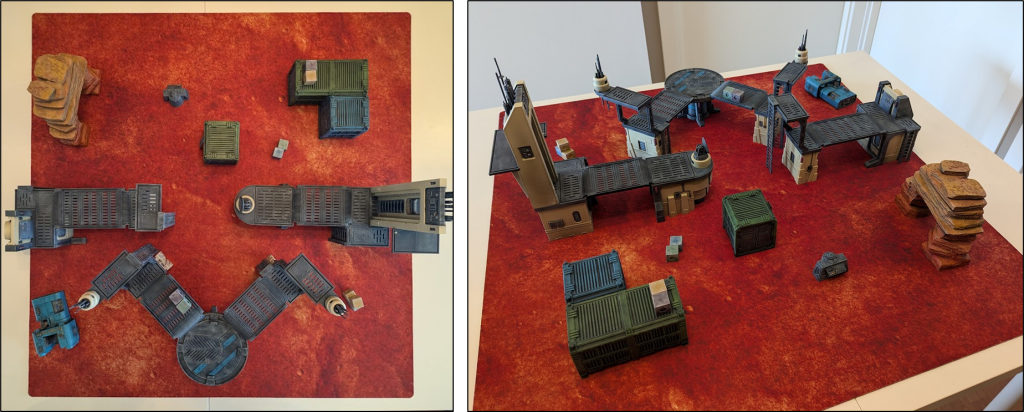
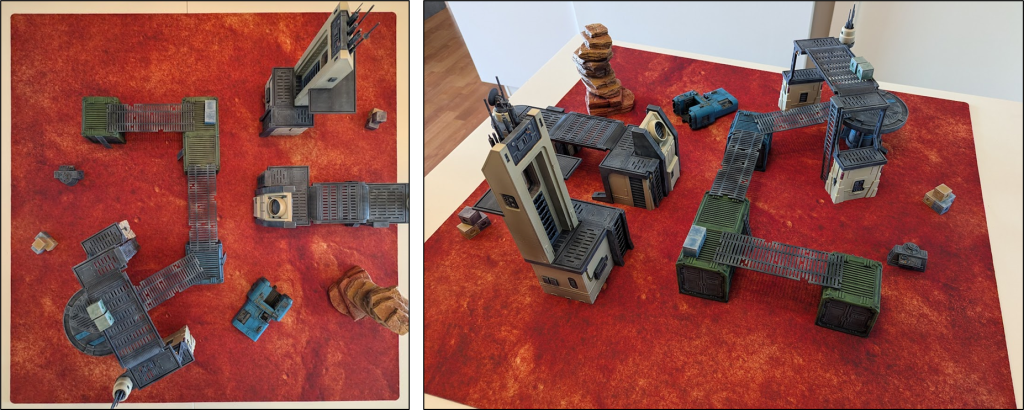
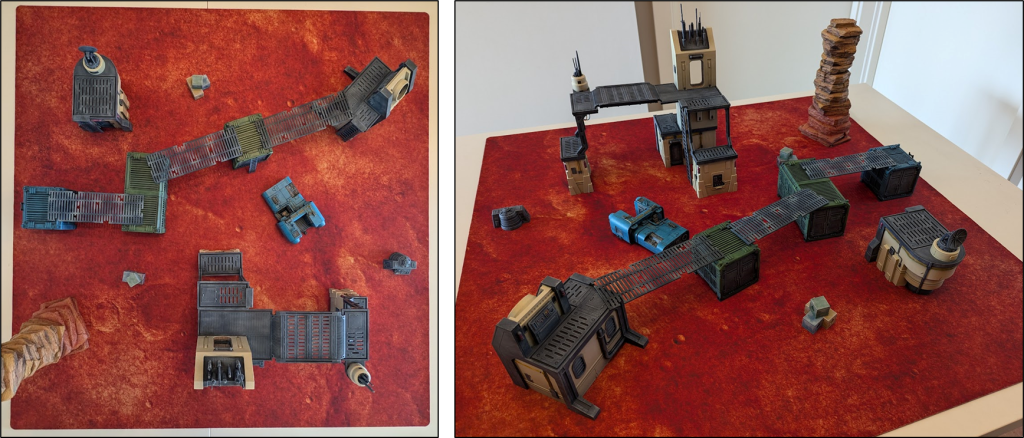
Now that we’ve talked about all the basics, let’s check back in on our example tables. To complete the exercise I actually went and built these tables, or at least close-ish approximations. Again, my methods are fairly vibes-based and “go with the flow” so I made some tweaks. The tables would probably look even more different if I had started building with terrain, as one usually does, since ideas will morph and change as soon as terrain actually starts hitting the table. Sort of like how the plans you have for a Shatterpoint game may change as soon as units hit the table.
I should say that I find it quite hard to make good tables, especially quickly, for all three objectives using just the core set plus high-ground terrain. I’ve supplemented my official terrain with some 3D prints here, but more official terrain would certainly work. I like the 3D prints because some of them, the crates in particular, I can fudge angles and spacing a bit more than with official terrain.
Once again, are these perfect tables that you should copy-paste and bring to your next game day? No, not necessarily. These are just examples of our method. However, I do think they can create interesting games on any of the three objectives we have currently.
I haven’t fully addressed symmetry and “fairness” yet. Let’s start with the obvious thing: symmetrical or nearly symmetrical tables are kind of boring. I want each area of fighting to feel a bit different rather than a copy and paste of some other part of the battlefield. That being said, I do often try to create sort-of-symmetry to maintain a modicum of balance. I don’t want one player to have a much, much easier time getting to one section of the midline, for example, because that could be a huge advantage. Sometimes I may put two ingress points roughly mirrored around a piece of terrain, but often I try to be more subtle if possible. Perhaps one player has an ingress point near the midline while the other has an ingress point further back but with gantries to travel to the midline once they gain elevation.
The thing that hurts me the most when I see a discussion of table building is when people say “make one side a little bit better” to ensure the first player gets some advantage from picking the table side. Quite simply, I dislike this approach. It’s putting your thumb on the scale way too much and you’re actually eliminating player agency by removing choice. After all, is it really a choice if you are dictating what the choice clearly should be? I won’t dive deeper into the philosophical aspects of free will, but suffice to say I think we should aim for balance as table designers. Make things different, but strive for balance. If things are different then one side or the other may be better depending on the situation (objective, lists, playstyle, etc.) so the first player should still have an advantage, but we aren’t enlarging that advantage artificially.
A split level is something that exists at two elevations at once, kind of (the technical explanation is a bit longer but we’ll bypass that for now). Often how this manifests is an object placed on the ground that is less than range 2 (3 inches) tall. A character standing on that object would be at the same elevation as the ground, but potentially at the same elevation as, say, a gantry. Using a split level can create some interesting situations with melee and contesting, as well as act like a stepping stone where a unit can move on to the split level with one move and then a second move on to a higher level (compared to their original elevation) like a less-efficient ingress point.
I don’t use split levels much because I honestly don’t have many pieces that work for the role, but I want to incorporate them more. If you want to see one in action, the train bed in my third battle report acts as a split level and creates some interesting situations.
When characters move in Shatterpoint, they are considered to be at their starting elevation until the end of their move. That means a character could cross an area with no gantry or support as long as they end on the same or lower elevation, see the picture below. This is a great way to make some elevated areas more accessible and create some interesting plays. I often like to have an elevated objective with no ingress nearby but you can get to contesting range at the correct level by dashing or advancing from a nearby terrain piece.
Small areas, such as the two-step towers from the core set, can be easily body-blocked. In the picture below, a single model can occupy the top level and prevent any other models from contesting at the same elevation if there’s an objective there. Personally, I don’t think it’s inherently bad to have one or maaaaybe two objectives on small areas, but you want to do it intentionally.
Body blocking also comes into play on ingress points. Even if the elevated area is large, some setups allow for maybe just one model to block the route up or down an ingress point. Again, this isn’t necessarily bad, just something to consider as you place ingress points (and scatter around those ingress points, which is why I do scatter last).
Building at 90-degree angles (relative to the board edges) is generally the easiest way to go. However, I find tables to just look better and be a bit more dynamic when built on an angle. If you’ve got some extra time (or a good amount of practice) then try building at an angle to see how you like it!
There’s no shame in cataloging your table layouts and going back to them! Don’t just find one that works and keep using it, obviously, but whenever you do find one you like take a picture. Over time you will have a nice inventory of table layouts that worked well with that particular terrain and if you are in a pinch (such as setting up one or more tables right before a game day) then it’s easy to pull out an old picture and use it as a reference.
Back in the Shifting-only days, I would usually lay out all the objectives before building a table. Nowadays that will take a lot more time and you’ll need to borrow some extra objective markers. It isn’t ideal, but the best way to do things now is probably just to place the very middle token and then memorize other key measurements. Now, I realize that may be easier said than done for many of us. As such, here are a few critical measurements to remember (all measurements are from the edge of the table to the middle of the objective token): range 4+5 gets you to the middle of the board, the widest backline objectives are range 4 in, the widest midline objectives are range 2 in. The backline objectives are either range 4 or range 5 from the table edge. If you can remember these things then that should help a lot.
Regarding terrain, lots of stuff can work for Shatterpoint. However, one thing to be wary of is sloped sides or other effects that make the footprint of a terrain piece larger than the top. If you have a unit on top of a building with sloped sides then that will affect how or if the unit can be shoved off. Shoving units off of elevation is an important part of gameplay and, in extreme cases, not being able to shove a character off terrain at all because of sloped sides can be a real feels bad.
There we have it! Hopefully, there was something here that inspired you for your own table creation. There are tons of ways to make good tables, but my key bits of advice would be as follows:
Happy table building!