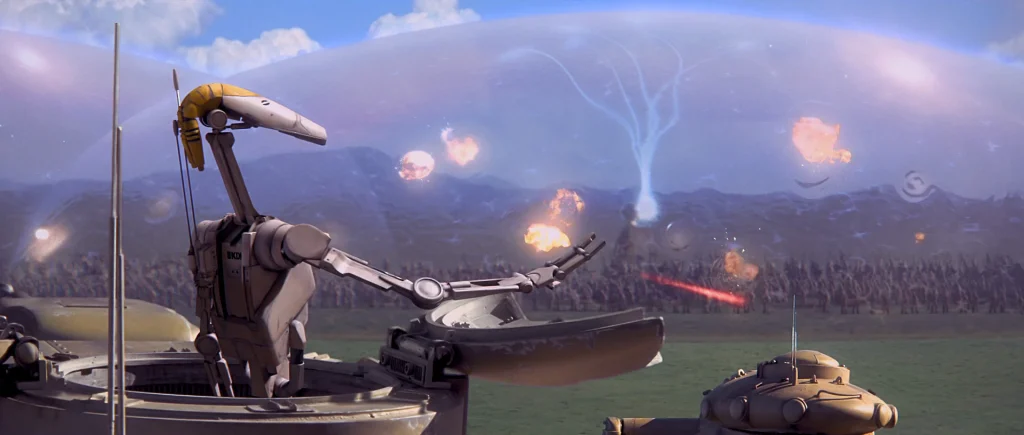

One of the battleforces that has oft piqued my interest, but is not nearly as prevalent as others is the Separatist Invasion Force. Today we are going to explore some list building ideas for this Battleforce to get the most out of it we can.
Invasion Force Rules
The list building rules for this battleforce open up some great possibilities while also bringing some big restrictions. The first big restriction that will affect how you structure your list is that requirement that invasion force must have at least one heavy. The only heavy that is allowed in this battleforce is the AAT. This means that every invasion force will come with either one or two AATs.
The big list building advantage of Invasion Force is the ability to bring up to eight corps. The only corps option available is the lowly B1 unit… but eight of them is a lot.
On top of this you can bring Dooku, Grievous, Maul, Magnaguards, Droidekas, STAP Riders or a T-Series Tactical Droid.
Command Cards
Invasion Force comes with three powerful command cards to supplement your CIS forces.
3-Pip – Unstoppable Advance
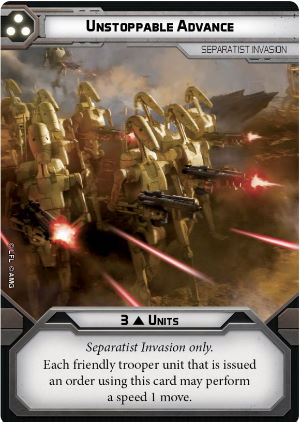
The 3-pip is a fairly standard movement based command card. Trooper units issued an order by this card get to make a speed-1 move. The ability to make moves with command cards is always powerful. This card gives up to three units moves. The big limiter however is that the orders have to go to corps units only. This is quite the limitation as you’d actually like to give the moves to units other than your B1s.
2-Pip – Unrelenting Assault
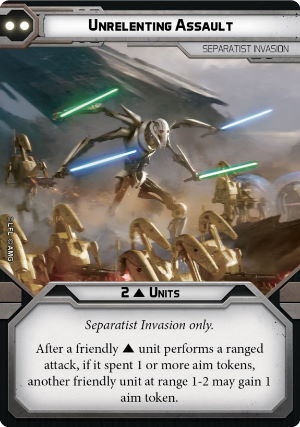
Unrelenting Assault is the second coming of the Coordinated Fire command card. This time the very powerful ‘Aim Tossing’ effect appears on a 2-pip, which is a touch better than on a 3-pip as it is an offensive card. This card can help the B1’s offence, taking them from meh to decent potentially.
1-Pip – AI Coordination
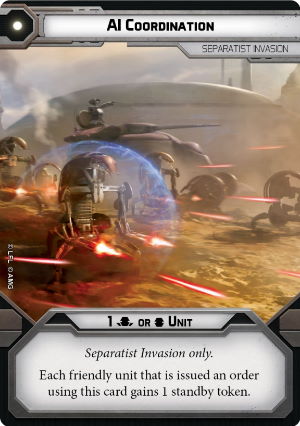
The 1-pip AI Coordination gives a standby token to the unit issued an order with this card. Standby tokens from command cards are usually quite good. This card is restricted to a heavy unit or support unit. Remembering that Speeders can’t get standby tokens, the standby is limited to an AAT or droideka. A standby on either of those is fine but not really the best. We will see later where this card can really excel. That being said, standbys on units that can’t lose them is excellent and can provide very good zone control.
List concepts
The general list concepts for Invasion Force largely fit into two buckets: either a giant horde of bodies, or use some force user tricks.
List 1: Double AAT
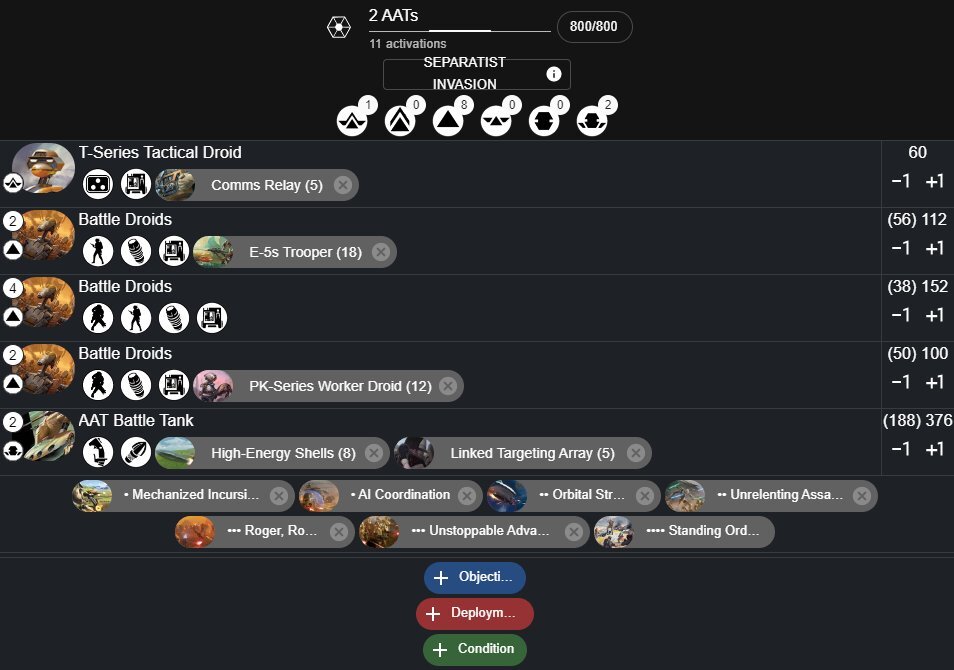
A classic Fifth Trooper favourite archetype is the double heavy list. This list brings a whole horde of B1s along with two AATs. This list will seek to do as a lot of double heavy lists do, shoot the enemy and do the objectives with the horde of troopers. This list could also be adjusted to ten activations to bring a couple more heavy weapons.
Remember when we’re looking at these lists that even naked B1s can be somewhat effective at shooting as they have six dice, #justrollcrits.
List 2: Dekas and AAT
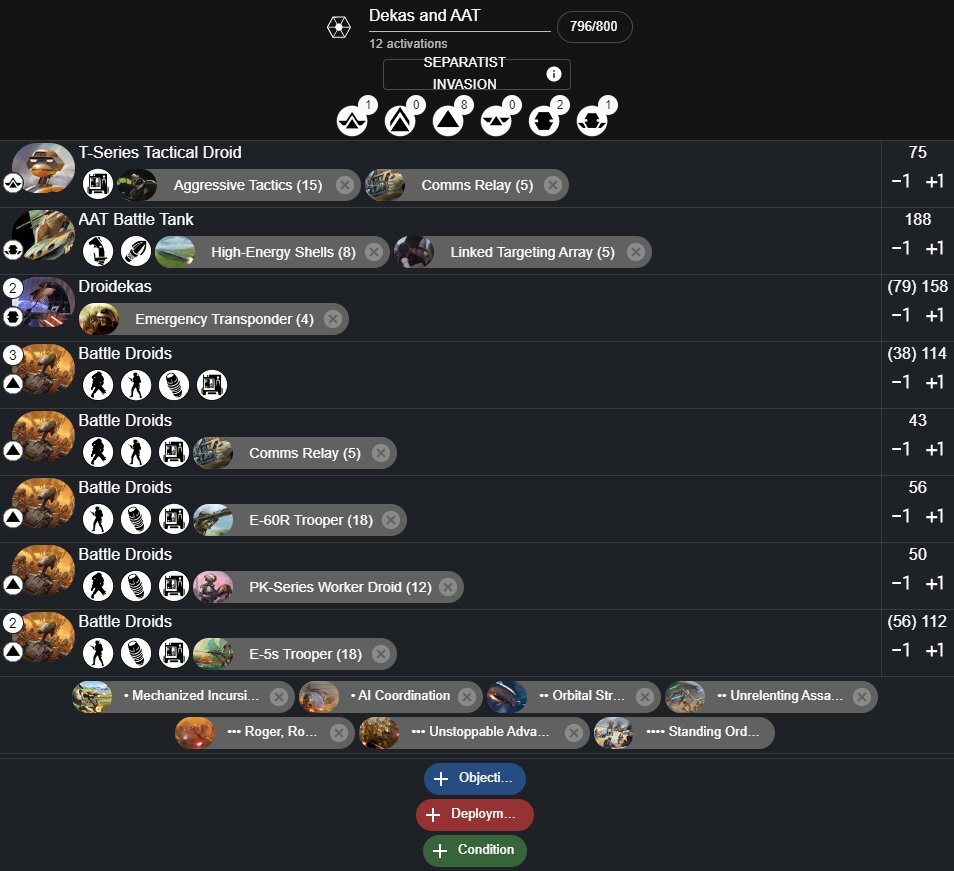
For those who want to see Dekas see the board, this might be something to try. This list brings 12 activations, a bunch of bodies and three thick vehicle units. This list definitely has a lot of things going for it. As with above, you could easily cut an activation to give yourself more firepower.
This list also features two comms relays to try and get orders to all your vehicles. This is really important as all of these vehicles don’t want to be forced to do their AI when they don’t want to.
Additionally, this list also brings Aggressive Tactics. AT gives a decent boost to the list in terms of both offence and defence. The AAT will want the surges for defence, and the other units will mostly want the surges for offence. Droidekas that have access to an aim and a surge really start to become potent offensive units.
List 3: All the Repair
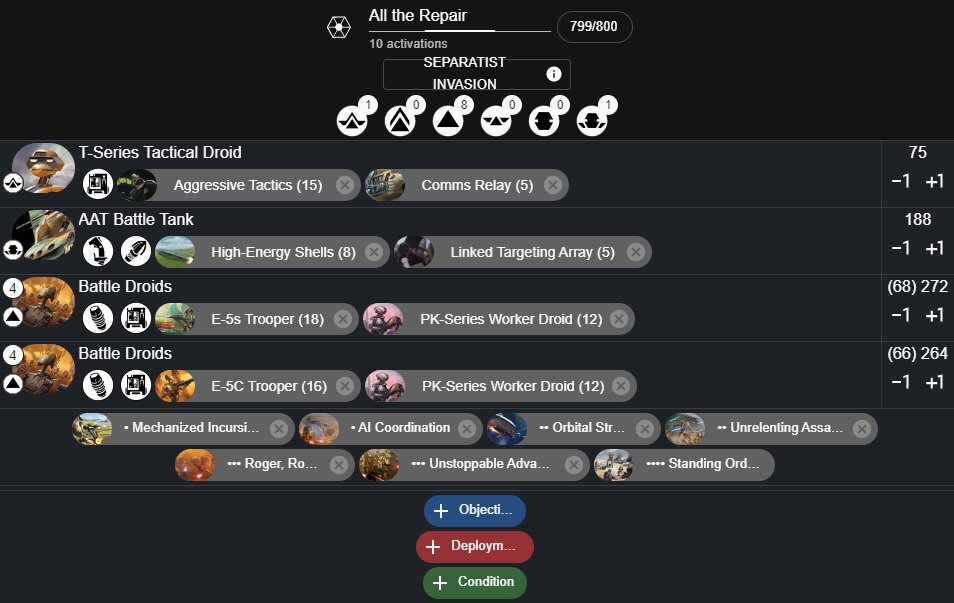
So if you want a list that brings a lot of wounds and repair look no further. This list has 64 wounds of B1s with a total of 16 wounds of repair. This is of course on top of the 9 wound AAT and the T-Series. This list is quite the monster to wrap your head around. The sheer amount of repair really breaks a lot of the assumptions you can make about repair and target priority. In essence, the first 16ish wounds you do to the list won’t take a body off the table. That just really screws with how you should treat this list.
On top of all this, the list also carries a copy of Aggressive Tactics. These surges are to help raise the efficiency of the list even more. They help block some damage, but most importantly really raise the potential of the E-5Cs. Especially on the Unrelenting Assault turn the E-5C units can really pack a decent punch.
With this list you’ll do your best to get ahead of your opponent on attrition by taking none to start the game, and then do some damage back. Whatever the objective ends up being, the B1s are also going to be decent at it as they are hard to wipe quickly as well as never losing actions to suppression (unless they panic).
One thing that is very important for this list is to keep very careful track of which bodies have died this turn and are eligible to be repaired, as well as how many repairs have been used by what units. This requires, (as well as B1 hordes in general) very specific unit markings/basing/base rims. Long story short, make sure you’re able to tell which unit is which.
List 4: Maul Invades
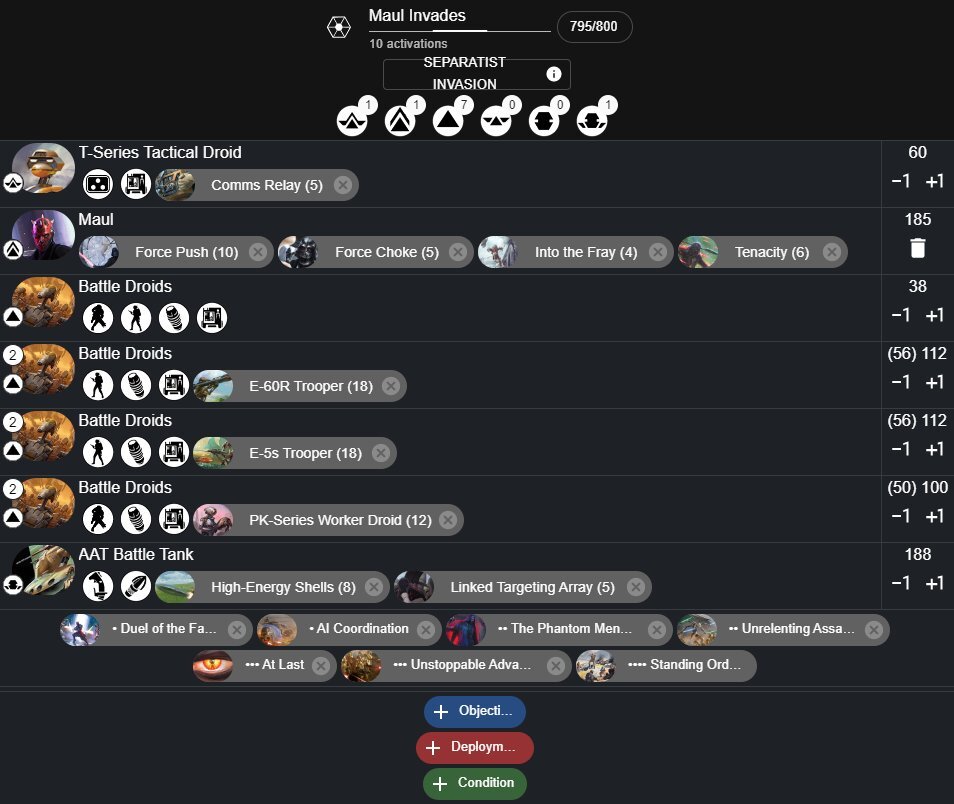
This list will end up feeling like a ‘standard’ Maul plus AAT list with an extra B1 squad and some good command cards.
The way to operate this list is largely akin to a force user plus gunline archetype. Maul is about as independent a force user as there is, not really caring what the rest of the list does. The rest of the list should just provide a good base of fire while Maul goes and messes with your opponents.
One addition that would likely be good for this list is improvised orders to 100% guarantee order control. Right now there are two turns where there is a 50-50 pull on whether you get Maul or the T-Series using reverse sorting. This is done by directing a B1 and chaining that order to all the B1s and finishing on the T-Series, who can bounce to the tank. With Improv you always have 100% order control.
List 5: Grievous Invades
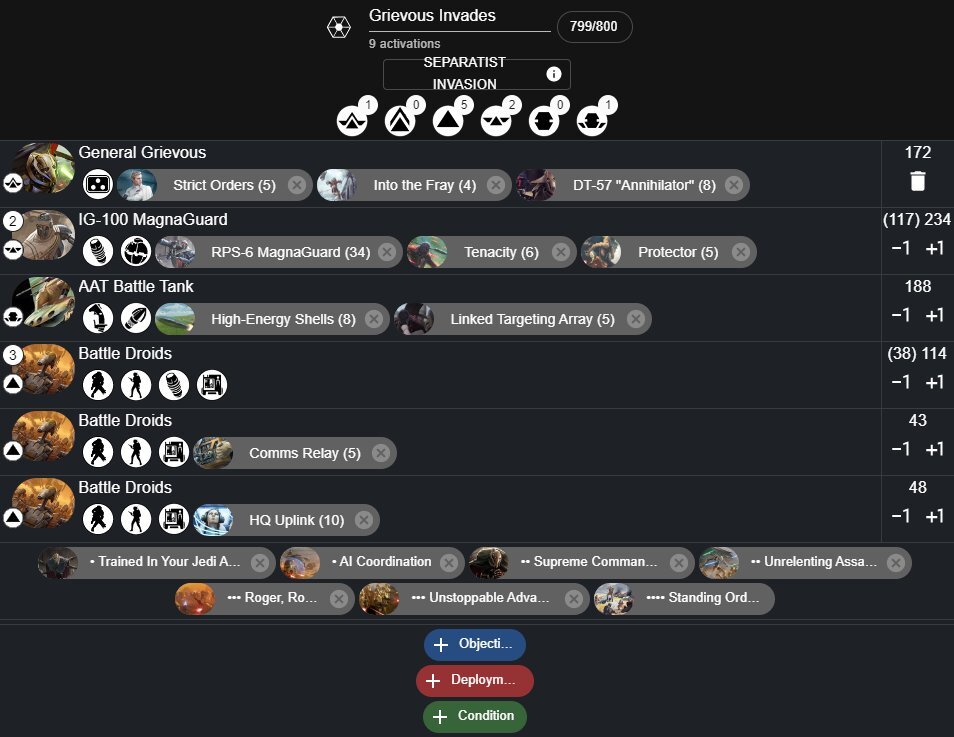
When putting together a bunch of CIS lists, one must always have a stab at a Grievous list. Though this is one of the weaker options that we will look at today, it definitely looks fun. Shoot stuff with a tank and charge them with Grievous and Magnas, always fun. The biggest issue for this list will be order control and suppression mitigation on Grievous. If you do manage to get the two magnas and Grievous buried in your opponent’s list though, you may be able to make some things happen.
List 6: Dooku Invades
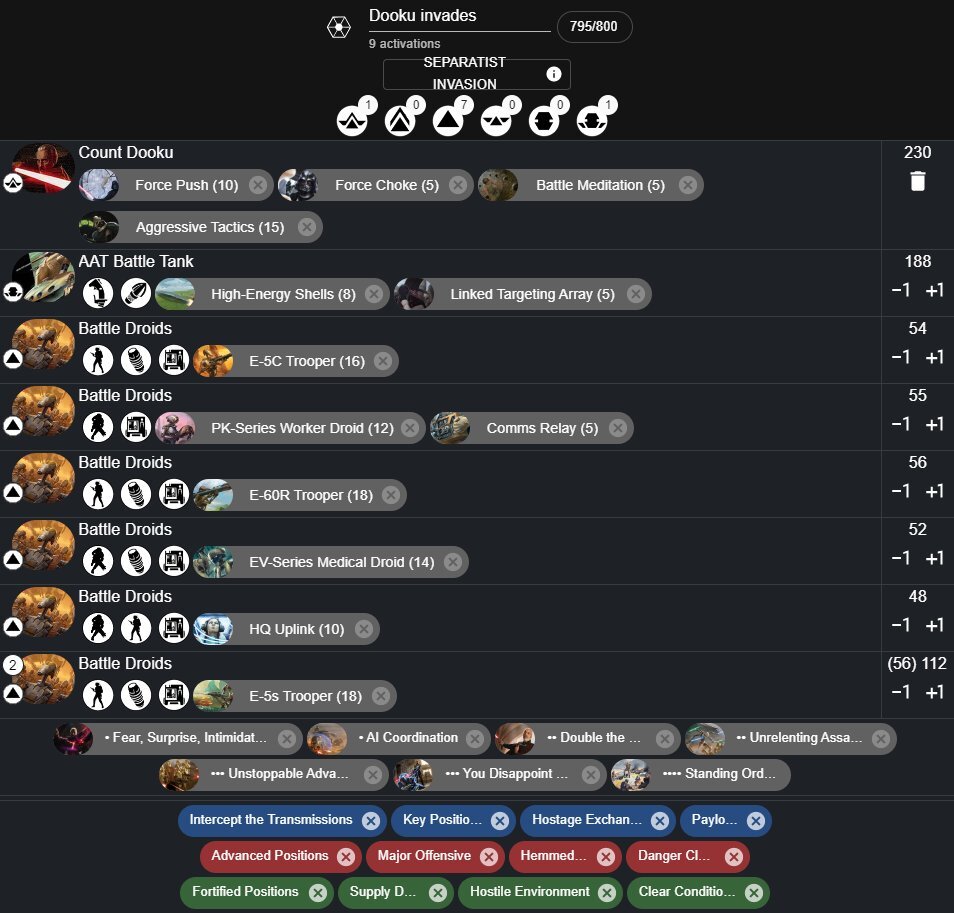
Now we’re finally getting to the real shenanigans. The key thing to look at in this list is Battle Meditation on Dooku. This one upgrade opens up so much for this list, and specifically Dooku. Battle Meditation lets Dooku use the awesome effects from the Invasion Force Cards on himself. Specifically Dooku can get the Standby Token from the 1-pip and the speed-1 move from the 3-pip. Both of these effects are excellent on a force user. On top of this Dooku brings Aggressive Tactics as he needs access to surge tokens, and surge tokens for the rest of the list help raise the efficiency.
A standby on a force user is super powerful as it prevents them from being withdrawn from and being left in the open. If your opponent withdraws you can just spend the standby to move into the unit that withdrew. You could also spend the standby once another unit has activated to get a free attack and then activate Dooku to get him into melee with an activated unit. Getting a second attack/free action in general with force users is amazing. This goes for both the Standby token and the free move.
This list also brings along a medic to help keep Dooku alive, if Dooku falls, the list falls. The rest of the list should just provide a base of fire so that Dooku is able to do his work.
General Strategy Tips
AAT
As every Invasion Force must have an AAT we should talk about it a bit. The AAT is a strong vehicle with solid dice. Boasting 9 wounds with a red save it does take quite a bit of firepower to remove.
The AAT’s offence is solid, throwing a lot of red dice with High Velocity. It is the bane of dodge spam lists. One big issue that the new rules for the AAT however is that the AAT will likely never get a shot that isn’t heavy cover. This does hinder its offence a decent amount, limiting it to forcing 4-5 saves a turn. Though this isn’t bad it isn’t quite as potent as when you had the chance of forcing some open or light cover shots.
When using the AAT keep in mind that if you need to shoot armour you should seek to use barrage, not the high velocity shells (unless you have armour piercing shells, obviously). Barrage is better as the Impact value will be used twice and then you will be throwing more total dice for crits to appear.
B1s
B1s are generally considered quite ‘meh’ right now. If you don’t have Aggressive Tactics or Unrelenting Assault their offence really is bad. The two things they bring to the field that are a bonus over other corps in the game is the droid trooper keyword, making them unable to be suppressed. They also bring a lot of wounds. The number of wounds B1s bring is their shield from being one shot for the most part, as well as limiting the effectiveness of units that bring few but quality dice. Units that fit this bill are force users who will struggle to wipe B1 squads, or snipers.
B1s should be used as a base of fire as well as to swarm objectives. Do your best to always maintain heavy cover with your B1s, as without it they will start to crumble really quickly.
Invasion Force can also bring tons of repair which generally wouldn’t be used on B1s. However, one of the strengths of Invasion Force is the sheer amount of wounds that can be fielded. Don’t shy away from augmenting this even further by returning B1 bodies to the field, taking your B1 horde all the way up to 80 wounds. 80 B1 wounds (before taking surges into effect) is 96 effective wounds. Most lists would struggle to force that many wounds through during a game.
Force Users
Most of the general force user advice applies within Invasion force of course. The biggest thing to remember when considering Invasion Force though is that you should only make the sacrifices Invasion Force requires if you are getting a big benefit. Grievous and Maul don’t really benefit much, whereas Dooku can get access to some great abilities.
Conclusion
Invasion force can bring some great benefits for those who have an idea in mind. The abilities that the command cards bring plus the ability to go up to eight B1 units is really powerful. That being said, you do have to make some sacrifices to get an Invasion Force and that shouldn’t be taken lightly.

