
Trending Today


If you’re an amazing Shatterpoint player winning every game 2-0, you’ll never have to worry about picking a layout. However, when you do need to eventually pick the layout, you don’t want to mess up. Since you only get to choose the layout after losing a struggle, losing a struggle where you picked the layout means you’ve lost the game. I’m here to help you win games, not lose them. As such, let’s dive into some things to consider when you’re picking the layout for a new struggle.
In this article, I’ll be presenting a lot of examples using an overlay similar to my battle reports. The wounded icons should be obvious, however I will note that a unit being greyed out means a unit’s order card is in the discard. To keep things simple, all examples will be shown from the perspective of the first player and directional references will be from this perspective.
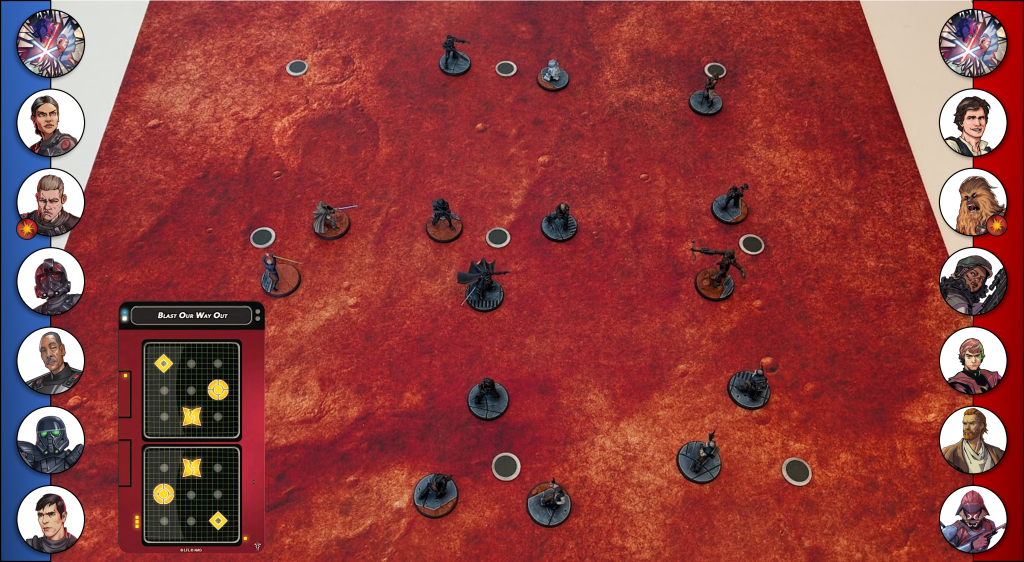
This is the most obvious metric and usually the first I consider. Starting a struggle with units already contesting objectives gives you some freebies and can quickly give you a leg up on your opponent with minimal effort. If your layout options have you either up 2-0 or down 0-2 to start, you’re almost always going to take the former. In the example below, the rebels can either start controlling two objectives (and tying a third) or start with one empty objective and the empire controlling the other two. Most of the time you’re probably going to want the bottom option here.
Any layout that has you leading right away is often preferable to a losing or neutral position. However, it’s not always that simple, especially when the lead is narrow or when each option has the same margin. For example, what is better, a 2-1 lead or a 1-0 lead? To answer that, the next thing I’d look at is my opening activation.
We will assume that you’re activating first in the new struggle. While it’s possible to lose a struggle on your own turn (meaning the next one starts on your opponent’s turn) these situations are rare and should be avoided at (almost) all costs. Going into a must-win struggle where your opponent goes first isn’t ideal, even if you get to choose the layout.
The number of cards left in your order deck can vary wildly when starting a new struggle. Perhaps you have one card in reserve and only one in the deck. In this case, you know what your next two cards are and you’ve got perfect control over the order in which the two units activate. In other cases, you may have just refreshed your deck and have no idea what’s coming next. When we have some idea of what’s coming next we should harness that knowledge and use it when choosing a new layout.
Let’s now return to our example of 2-1 vs. 1-0. Which situation is better? Let’s talk through an example. Here the rebels can choose either a vertical or horizontal line of objectives. They also know that General Solo is going to activate next since he’s the last card in their deck. If the rebels choose horizontal then they’ll start in a 2-1 position before anything goes. However, when Han activates it will be very hard for him to flip the left objective. Doing so would likely require moving R2 off the middle objective. Either way, rebels will probably end the turn up 2-1 when it comes time to actually claim objectives.
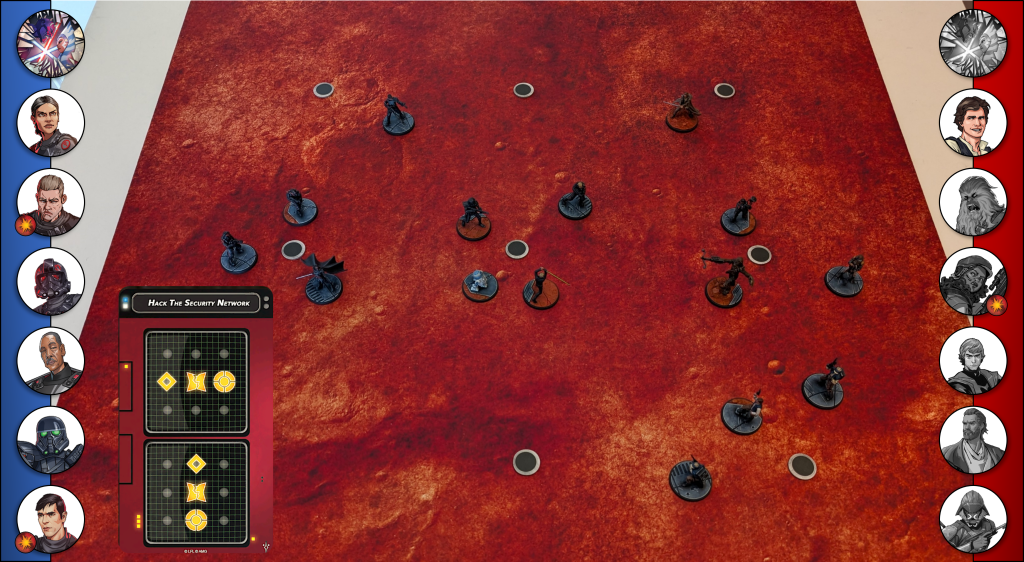
If the rebels choose the vertical line of objectives then only they start up 1-0. Han can easily claim the bottom objective at the very least, and maybe the top too if the dice are kind. Ending the first turn up 2-0 is better than 2-1, and 3-0 is obviously better than either of those. Evaluating the potential of the first turn gives us more information than just considering the position of units at the very start of the struggle.
Before we leave this section, let’s consider instead an alternate scenario. The bottom layout has the rebels start 2-0 whereas the top is 1-1. So we should definitely pick 2-0 then, right? Wrong! Chewie activates next, and he’s one of the bodies that would give us our 2-0. It’s not like he can walk to the last objective on his turn and give us a 3-0. Furthermore, he should be able to shove Iden away if he wants to. As such, rebels would likely end the first turn up 2-0 either way. The bottom layout may still be the way to go, we just have to think about it a little more.
In the first section, we considered only the here and now. In the next section, we looked into the future a little bit. Now we’ll look even further into the future, but of course, to do that we must look into the past. I could probably make a wise comment about history here but I’m no philosopher, despite what I may have claimed previously.
Considering the first activation is most useful when we have few cards remaining in our order deck. Maybe one to three. Conversely, considering remaining activations is more useful when we have only activated a few units. It’s easiest to explain this with an example.
In the scenario below, the Republic player only gets to choose the location of one objective; the other two are locked in. Initially, the bottom layout may seem more appealing since we start with ARF contesting the left objective. However, there is a problem. Two Republic units have been activated on this order deck: ARF and Vader. Those are our two units in the best position to contest the left objective. If you imagine some terrain in the way then it’s not too crazy to see a scenario where the other four units cannot meaningfully threaten the left objective. The Shatterpoint may be our only chance to retake that objective if we lose it, and one out of the next five cards isn’t a good ratio there. Even though we don’t start on the right objective we do have a lot of units in that area of the board. Depending on the terrain we may want to choose the top layout here because it’s a better fit for most of our upcoming activations.

One additional note: when it comes to units that are about to activate (or won’t activate for a while) it works both ways! When picking a layout you should think not only about your upcoming activations but also those of your opponent.
Taking objectives is great, but it’s less great if we can’t hold those objectives. Objectives can be more or less vulnerable depending on both the quantity and quality of units defending it.
The greater the unit differential on an objective, the tougher it will be to flip that objective. It all comes back to Swing Theory! An objective where you have two units and your opponent has none will generally be less vulnerable than if you only had one unit there. Units with a lot of remaining health are also better at defending objectives than units close to being wounded. Defensive keywords (such as Steadfast) or abilities (such as Mind Trick) allow units to better defend objectives and make them less vulnerable.
Let’s pretend we’re the Republic player once again in this next example. Whichever layout we pick will have the starting objective balance at 1-1. The left and right enemy objectives are roughly similar in terms of vulnerability. The B2 has a bit less health and worse defenses than the Magna but at the end of the day, both are defended by a single model with no special keywords. There is a huge difference in vulnerability for the left and right Republic objectives, however. Both are defended by two characters, but on the right, those characters are in different units. If the ARF gets wounded then the left point can be taken by a single model. If either Wrecker or Hunter are wounded then the other is still there to contest. Furthermore, Wrecker and Hunter both get Protection and Steadfast as long as Wrecker isn’t wounded. Add in the fact that both have more health than ARFs plus Hunter’s defensive rerolls and we can clearly see that the right objective is less vulnerable. In this case, it would seem preferable to take the top layout option.
I think you get where this is going; we want to minimize our own vulnerability while maximizing our opponent’s.
This section was originally combined with the last section, but I think it’s important enough to warrant its own header. How vulnerable an objective is can be heavily influenced by how easy it is to access. Furthermore, a lot of movement abilities cost force. Even if you can get to some objectives, you may deplete your force budget doing so and may be setting yourself up for failure even if you manage to win the struggle (if there’s still another struggle to be played).
More generally speaking, you want to consider which objectives will actually be fought over. Even though three objectives are active, all three may not be changing hands frequently. I’ve found myself in situations where I can fight over 2/3 of the objectives but can’t threaten the third. This allows my opponent to easily farm the “safe” objective for easy points. If there’s a safe objective to be had, you want to be the one who has it! Be careful, though, because sometimes an objective can look safe, but if your opponent is able to flip it then suddenly it’ll be very hard to retake.
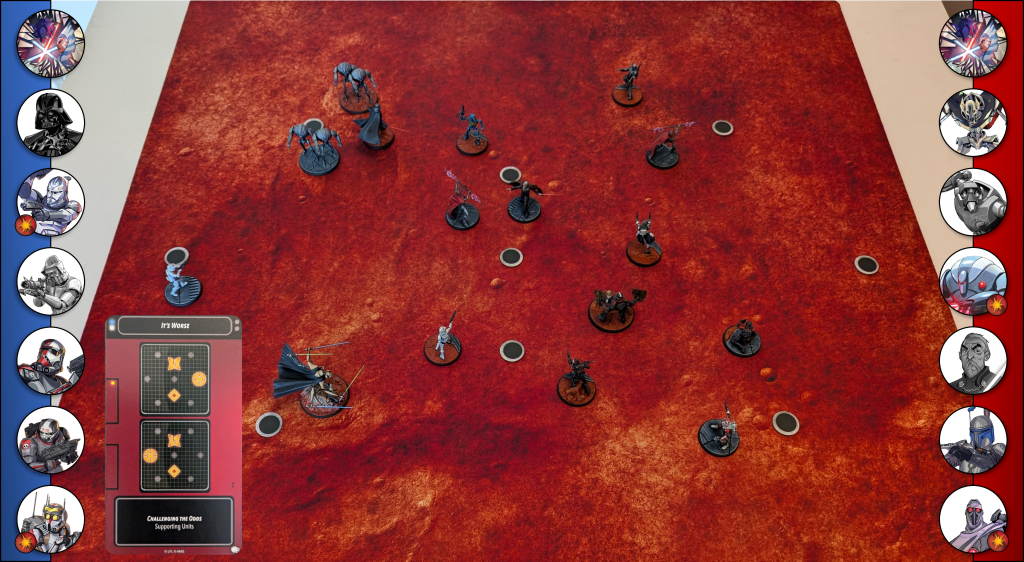
For this example, let’s think back to the scenario with the Republic starting It’s Worse. If the Republic can only reach the left objective with the Shatterpoint then the Separatists could flip that objective and farm easy points for most of the round. Conversely, if the Republic can access that left side objective (maybe via some handy ingress placement or if the units were arranged slightly differently) then that opens up more opportunities for Coordinated Fire: Expose since the ARF are currently out of range to use that ability on any unit contesting the right side objective. Choosing the objective layout dictates where the battle will be fought, and fighting somewhere with a strong aura ability like CF: Expose can be a big advantage.
If you’re picking the objective layout for Struggle Two then you’ve lost Struggle One. As such, winning the game requires winning both struggles two and three. However, struggle two is not a must-win for your opponent. There are two ways of looking at this: a) take it one step at a time and focus on winning struggle two, because you can’t win struggle three without winning struggle two, or b) winning struggle two is meaningless if you can’t also win struggle three. A move that puts you in a strong position to win Struggle Two but a terrible position in Struggle Three (such as burning through all your force at the start of an order deck) might feel good in the short term, but you should probably look for an alternative path. However, a move that sets you up great for Struggle Three while losing your Struggle Two isn’t helpful at all since you’ll never live to see Struggle Three.
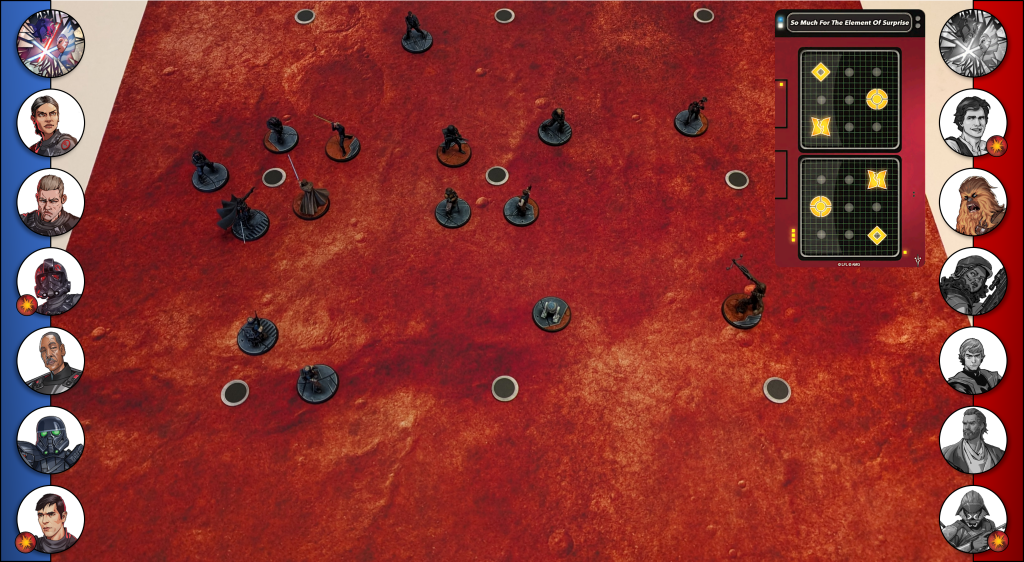
So what does this mean for choosing an objective layout? Well, the key is to remember that your opponent is not in a must-win situation for the second struggle if you are choosing the layout. If you’ve read my first Shifting Priorities article you may remember that each player’s bottom left objective will not be active in Struggle Three. We’ll use this knowledge as we consider one final example. We see the Spectres choosing a layout on So Much for the Element of Surprise. Electing to choose the top layout means they’ll almost certainly have to send one or more units to contest the bottom left objective. The bounty hunters can also keep units on their own back right objective, possibly setting themselves up for a nice starting position on Struggle Three. Choosing the bottom layout may set the Spectre player up for a more successful Struggle Three as compared to the top layout while keeping the chance to win Struggle Two fairly consistent.

It can be hard to make choices. For example, one of the nice things about losing priority is that you don’t have to pick the table side or the mission, meaning you’ll have less to blame yourself for if/when you lose. Similarly, it feels bad to find yourself in an uphill battle on an objective layout that you chose. A good starting point would be to evaluate the objectives as if you were scoring immediately. Incorporating a longer-term view, you’ll want to also consider units that are about to activate (or won’t activate for a while) and the accessibility/vulnerability of each potential objective. Going into the second struggle it can also be helpful to think about setting yourself up for success in the third struggle.
It should go without saying, but this is not an exhaustive list of things to think about. What are some other factors that you consider when choosing an objective layout at the start of a struggle?