

Here we’ll take a deep dive into some tactics that can help Yoda thrive on the battlefield.
I’ll be honest, for at least five minutes I was sure that I was going to call this “Tactics and Craptics.” That’s pretty terrible even for me, and caused a mental freight train to speed towards me in my brain…if it reached me before I came up with something better than that I would be incontrovertibly washed up only five articles into my employment here. Luckily I listed lazily to the left at the last minute into “A Few Maneuvers™” thus staving off that inevitable fate until at least April. I’m doing this not because I presume to write something like this again in the future, but in case I do I can pretend that it was my plan all along.
Ok, where do we start? Yoda is some kind of gremlin…or is it a goblin? who apparently played around in the mud while multiple former padawans worked their butts off to try to defeat the Empire We have a wonderful article by Timbo that covers all the basics for Yoda play and list-building along with a few tactics. Read that first unless you feel comfortable on what he does already. We’re also not going to cover list building as between Timbo’s article and our event list articles we’ve covered what seems to work pretty well (short version: take wooks or a tank). Speaking of the tank: I ain’t REALLY gonna cover the Saber/Padme build. My reasons for this are:
- Those tactics differ in large ways from most other Yoda lists
- I find that list particularly uninteresting
No offense is meant there to anyone who has played it already or plans on doing so, I’m not suggesting it’s an “easy” but I would say that the tactics of mostly sitting around and waiting to punish your opponent for playing the game are boring (and probably unhealthy if you ask me). I’m sure you’re all crushed.
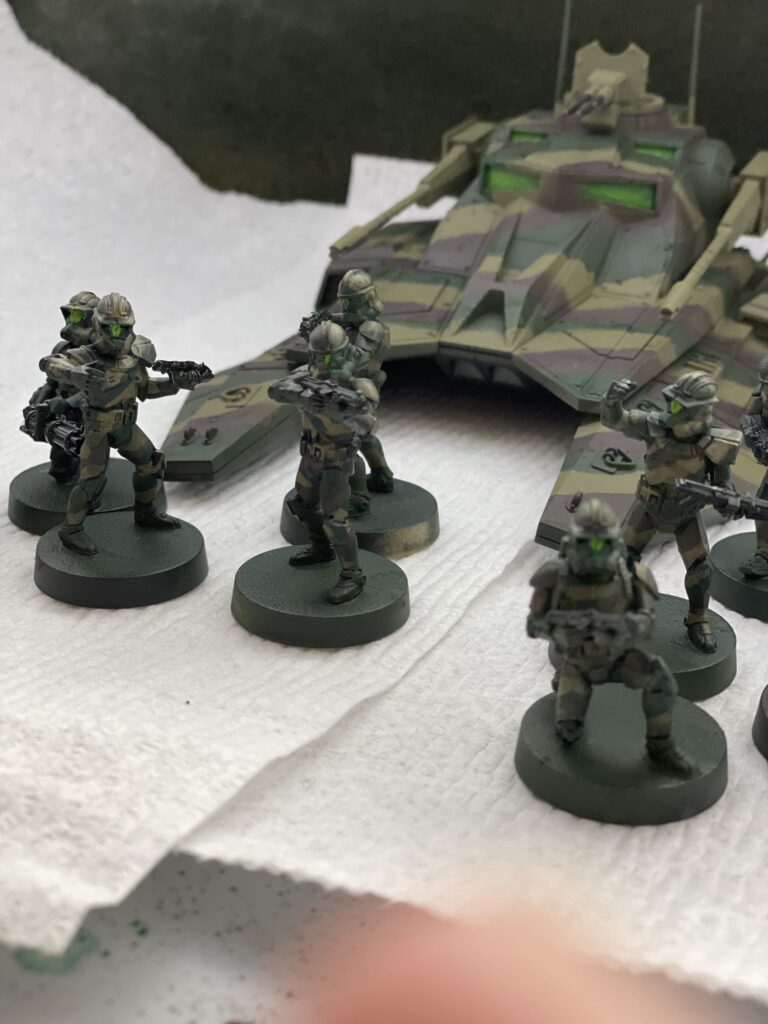
Feast your eyes on the only real Saber content in this article, my 41st Rangers paint job, complete with now-defunct Phase 2 Clones!
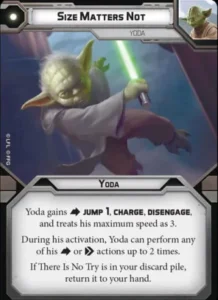
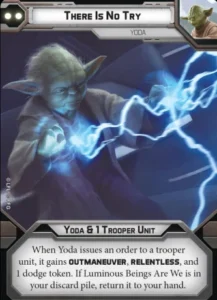
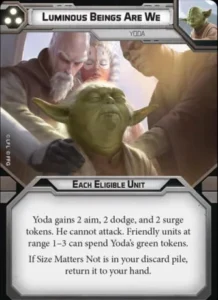
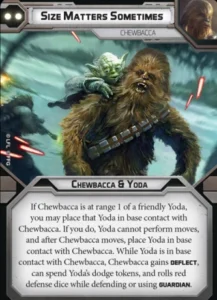
One more thing, this article is gonna get really long if we don’t have a LITTLE bit of short-hand so here’s the command cards for reference, we’re gonna reference them A LOT as “Yoda 1” for “Size Matters Not” etc. etc. so feast your eyes:
Maneuver #1: Plan your command order based on turn 0
This one is true for all lists but Yoda players have boon/burden of considering command hand recycling into your game plan. Depending on the deployment, objective, and sometimes the condition, the command you play on turn 1 may vary wildly. Let’s say I’m playing Yoda-Wooks against a fairly standard meta list (Vader Dews) and we’re tied for the bid, meaning a wide variety of battle cards could potentially fall into those slots. Here’s a couple of situations to illustrate what I mean:
- Sabotage/Long March/Minefield and Yoda is Red
- Turn 1 Standing Orders: Likely no shots either way so a real command is a waste of opportunity, plus you might get to go second
- Turn 2 Yoda 1: Get Yoda into a safe place since the real fighting will start soon
- Turn 3 Yoda 3: Gets the 1 back for the final turn, allows your army to move into safe positions with a little extra security from your tokens
- Turn 4 Yoda 2: Fighting will certainly happen, play burst of speed for mobility to advance Yoda or just to wreck some face
- Turn 5 Chewie 2: Yoda is probably immobilized anyway, allows Chewie to drop him off where you want him to be for the pivotal final turn
- Turn 6 Yoda 1: You may need to do more crazy goblin-jumping but often the reason for this is going to be double guidance or double force push (with a recover in the middle obviously) to score that vap point
- Recover/Major Offensive/Supply and Yoda is Blue
- Turn 1 Yoda 2: This does depend on how much the enemy list could punish you for being aggressive early, you can (if you have to, AND if you can confidently play Yoda 1 Pip next turn) use burst to get within a SAFE range 2 of where your intended carrier is going to be. Your other order is going to your carrier (we’ll assume its a Wook squad who used recon intel to be two moves away from the objective), who not only will have a dodge and outmaneuver but will be able to take two shots on the way in. Yoda goes 7th to move to where he needs to be then guidance a move on your relentless squad who will at least have a chance at taking a shot after the move if your opponent has already made moves toward the center box. For your last act the carrier will move-shoot again onto the box and grab it.
- Turn 2 Yoda 1 OR Wookiee 1: The answer depends on whether Yoda was able to get to a TRULY safe place for him to be able to spend his whole activation guidance-ing. If you can pull it off, doing up to 4 moves with the carrier on turn 2 is a game-winner, but sometimes the terrain isn’t right. Hopefully given that your carrier went “last” as the 8th activation and your opponent has more than that the Wook got hurt to make the Wook 1 useful, so even if Yoda may not be close enough to START the turn with the guidance shenanigans you’ll still get one extra move for the carrier after he with his dodge and surge (hopefully) went first to get into a safer position than when he started
- Turn 3-6 probably Yoda 3->Yoda 2 (if you saved burst now may be the time)->Chewie 2->Yoda 1: In a game like this where your opponent is on the ropes it’s hard to predict what exact order is best, as long as you use your Yoda 3 at least once you can be ready for that last-round objective play shenanigans IF it’s necessary
As you can see, thanks to the magic of recon intel and/or scale Wooks can get right on that thing AND GRAB IT with ease then be back home safe after the SECOND activation of Turn 2 (4 moves with a little scale)
There are obviously too many situations to count and you shouldn’t take any of the above as a strategy to memorize or whatever, but the principle is plan out the whole game before your first command hits the table. I recommend keeping your command hand in order of what your plans are, figuring out a strategy before the game starts, and sticking to it. As you can see, in general I’m a big fan of having the opportunity to “cheat” with Yoda to do certain actions twice to close out objectives. When you’re just starting out most players will consider this command as his “kill” card but as you see it happen more and more it’s the objective play aspect that often matters much more.
Maneuver 2: Chewie Tricks
Much like Yoda’s 1 Pip there is much more to “Size Matters Sometimes” and (Chewbacca in general) than initially meets the eye. An option for Guardian and a good melee/ranged attack is great and all but anyone who’s beaten a Tony Hawk’s Pro Skater game knows that you score the most points by knowing a variety of “tricks” to use depending on the situation, let’s go through them rapid-fire style:
- Get extra movement out of an objective-carrying Yoda, ESPECIALLY if he grabbed an enemy hostage, by teleporting Yoda to Chewie’s base before activations even start, then for the rest of the turn Chewie can do up to 3 speed-2 moves (one with guidance) with Scale while essentially carrying a hostage.
- Teleport Yoda out of a nasty melee that he isn’t likely to win such as Electro-Whip Magna-Guards
- Drop Yoda INTO a safe melee
- Deal with immobilize tokens from Burst or whatever else
- Acts as a backup if the enemy Han plays “Change of Plans” to try to ruin your command order to limit Yoda’s mobility
- If Chewie is already in melee: Teleport Yoda in to stab twice, which will leave you with 2-4 dodges (depending on reflex and vigilance) for Chewie to escape the situation ready to deflect some shots after Yoda goes

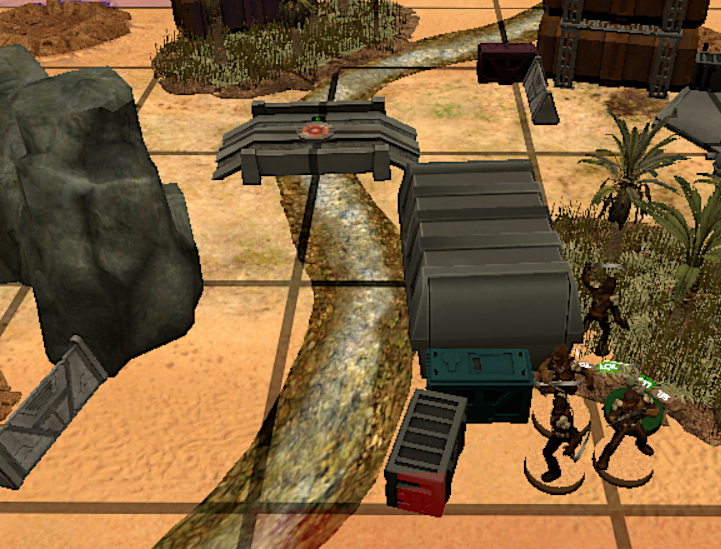
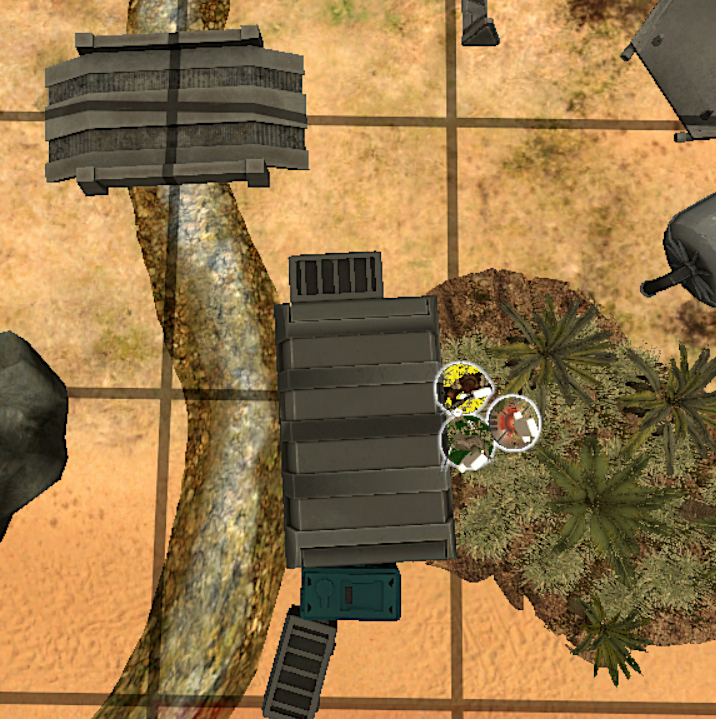
Photographer appropriately places the REAL shredders in front
There’s probably stuff I haven’t even thought of, feel free to let me know in the comments! The above plus the general bonus of better dice for the big boy himself does remind us of the general importance of keeping Yoda and Chewie range 1 from each other as much as possible, this isn’t to say they shouldn’t ever separate but you need to think twice before you do so.
Maneuver 3: Guidance Shenanigans
There’s a reason I used a stronger word to describe these than the Chewie items, some of them are dumb to the point of feeling like you’re literally cheating. Again, let’s go for volume here…most of them speak for themselves. So, in rough order of how often you’re going to actually cheat in these particular ways:
- Move action: Set up an attack/objective grab or just have a unit get to safety
- Move action: Trigger charge or relentless
- GAR units with charge: Melee wooks, Obi Wan, Chieftain, enraged Chewie
- GAR units with relentless: Anybody ordered by Yoda’s 2-Pip, Anakin after his 1-Pip
- Standby action: Force push an enemy to allow said unit to move and/or attack however they’d like to, this also allows for you to manipulate where your opponent’s unit ends up (out of retinue range for example) should they survive
- Claim/Repair: Given that Yoda is the only unit you should basically always have control over, doing this as the last activation of the round (or game) is sometimes your best or only choice
- Recover: Absolves a mega-suppressed unit and/or refreshes their tapped cards
- Aim: Make an upcoming ranged attack (especially Shooty Wooks with Precision Scopes) all the more deadly
- Dodge: Probably not common as if you’re really worried about a unit you should move them, is useful if you’re running a crazy double Jedi list though
Force Push: Don’t forget that free actions are still actions, and if you ARE running a crazy double Jedi list you can allow the other Jedi to go first and use force push which then comes back with Master of the Force. Then, Yoda can have that Jedi do it again during Yoda’s activation. For the ultimate cheating Megazord, do this on Yoda’s 1 pip to (during his activation) Guidance the push, then push himself, then receover, then push again. That’s 4 in one turn!- Welp, it was confirmed on a post in the rules forum that the above is incorrect, Yoda can only use Guidance on non-free actions because “free card actions” can only be done DURING a unit’s activation. TBF, this WAS posted after I posted this, very sorry!
- (1 Pip only) Attack twice with the same unit in one activation?!: Ok, hear me out, if TalkPolite clarifies this on the rules forum then I will shake my angry fist at him and correct this but…here’s how it works: The rule about only attacking once per activation AND taking a standby after an attack action only applies to what can happen during “its own activation” meaning that this rule does not apply during a different unit’s activation.
- Therefore, you can guidance a charge, then guidance a standby, then force push to trigger another charge to smack one unit with the same piece twice in a row. Naturally, you’re giving up Yoda’s attacks to do this which means that he’s either safe or his death won’t matter if you can get this kill. The use-case for this would be when you need to kill an immune-pierce unit (other Jedi or, yuck, Magnas) which is the sort of target that Yoda’s mere 4 dice can feel quite anemic against.
- CLARIFICATION added 4/3/22: The above is still true, but DO remember that if you’re guidancing a standby action the unit must NOT have made an attack during its activation, so if you want that unit to attack later be sure to do the Yoda shenanigans first
- Therefore, you can guidance a charge, then guidance a standby, then force push to trigger another charge to smack one unit with the same piece twice in a row. Naturally, you’re giving up Yoda’s attacks to do this which means that he’s either safe or his death won’t matter if you can get this kill. The use-case for this would be when you need to kill an immune-pierce unit (other Jedi or, yuck, Magnas) which is the sort of target that Yoda’s mere 4 dice can feel quite anemic against.

Ultimate Maneuver: Treat Yoda as the fragile resource that he truly is
You know what use all the fancy tricks we’ve detailed so far matter if Yoda is dead? BUBKISS! Our man only has 5 health, and despite all the free tokens he generates and the surging reds he is always at risk. So, I know this may be stating the obvious, but the most important “trick” of all is to prevent your centerpiece from suffering an untimely death. So, before you flip Yoda’s command token over for the turn, ask yourself how safe the Gremlin is for the rest of the turn and into the beginning of the next one:
- “Lawn bowling followed by afternoon tea” Tier: Too far out of range, surrounded by an activated unit in melee or behind reliable LOS
- “Basketball with your buddies who can get a little handsy” Tier: In LOS where corner peeking is possible for maybe one enemy unit, in melee but not fully surrounded
- “White water rafting with a competent guide” Tier: In heavy cover with Chewie nearby
- “White water rafting with a nervous-looking guide” Tier: In heavy cover with no Chewie nearby
- “Base jumping and you packed your chute in a hurry” Tier: Light cover or below, my God please don’t.
The amount of danger you can place Yoda in will generally go up as the game goes and units get weaker and die, but you’ll need to remain vigilant right until the end to give you the best chance at success.
“Surging reds are enough said he!”
I’m curious what tricks I may have missed, feel free to add them in the comments below! Thanks for reading!


7 Responses
Thanks for a great article. Now I’m more excited than ever to try that little green fella out!
Thank you! He is definitely fun, and will become even more interesting as more units come out that test his interactions
You cant use free actions with guidance nor can you use it to put a standby on a unit that attacked during its activation, per the FAQ. 😀. Slimer is still amazing though!
Hey Robert, you’re correct on the free card action thing, but to be fair that was posted on rules forum AFTER my article.
On the standby thing, i will clarify as much as possible, but if that unit hasn’t attacked in ITS OWN activation yet it should still be able to take a standby action.
Anyway, J will update article later and credit you/post a link to rulings thank you!
But also Robert, how dare you do this to me, on my own article…you monster
Lol I didnt know about the free action posted after, thats my bad on that one. The standby I only learned because of the tank list and having to look up whether he could throw the tank standbys with guidance after it had attacked. As I read it, if the unit doesnt attack on its activation it should still be able to get a standby so I think your trick works as written. Hopefully TalkPolite doesnt drop the hammer on it 🙂
You can only take the standby action if you haven’t attacked yet. It doesn’t stop you spending a standby token. So you can attack, and spend Padme’s token later.