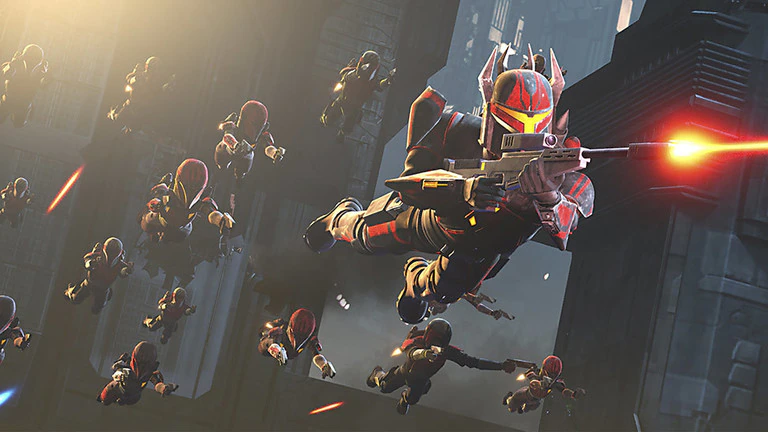

In this time of an oppressive Empire (they’ll claim they just want peace and order), I decided that a big departure would probably be some fun. Today we’re going to take another look at Shadow Collective Mandalorians and see how we can incorporate them into Shadow Collective Lists.
Full disclosure, these aren’t going to be any super efficient tournament lists, but I will still be approaching this from a competitive standpoint. Hopefully we can find some lists for Mandalorians that are fun to play and might even have some good showings. Basically, we want to be able to put together some lists and strategies that could get you some wins at game nights, or do well at local events.
If you want to take a trip down memory lane, check out the initial reactions here and here.
The Review

The Manalorian Super Commandos move fast, jump high, have great saves, and can hit hard at medium to close range. They also are very susceptible to attrition. When you do fail a save, it really hurts. The Mandalorians really lose effectiveness as they lose minis.
Mandalorians are also very much upgrade to taste, with a variety of different weapon and upgrade options that are all valid. If you want units that you can tinker with and bring different upgrades on, Mandos are a pretty good choice.
The New
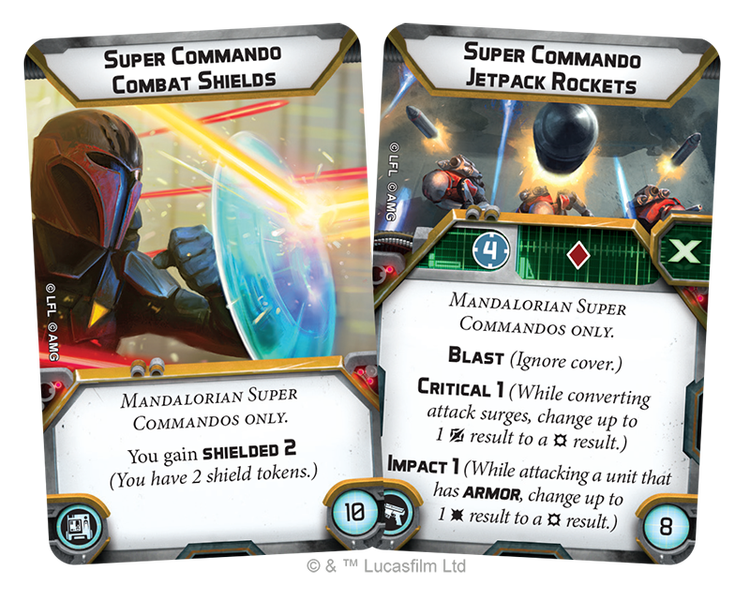
The reason that we’re embarking on this second look now is that AMG made a rules change that helped the Shadow Collective (and not the Rebel) Mandalorians a lot. This change was that when only one number is given for range, the range is treated as being up to that number. So if we look above we can see the Super Commando Jetpack Rockets only have one number listed for Range ‘4’. This means that we can now use those rockets which include some excellent weapon keywords in any of our ranged attack pools, all the way down to Range 1. Crucial to this strategy is that the rockets provide Blast, which is obviously great. The slightly less important keyword (slightly) is Critical 1. This means you can give your Mandalorians surge conversion. For a unit that doesn’t have any surge conversion naturally this is an excellent addition.
The Numbers Part
Everyone loves numbers and calculations right? (Asks the engineering student who is kinda sick and tired of numbers and calculations).
So we’re going to start with the assumption that you will always add some kind of fourth model to your units. This obviously isn’t required by the rules, and there are some players who want a fast cheapish trooper squad. For this article though, considering we’re doing this whole exercise because of an offensive ability upgrade, we will always have four model Mandalorian squads.
Four Basic models
So the cheapest way to get a Mandalorian squad with a rocket and four models is using the heavy weapon upgrade that actually is a personal upgrade.
Basic Boi

Below are the stats, assuming we want to just save our Cache: Surges for later.
1 Rocket, No Aims
Range 3: 3.6 hits
Range 2: 4.4 hits
1 Rocket, 1 Aim
Range 3: 4.6 hits
Range 2: 5.4 hits
2 Rockets, No Aims
Range 3: 3.7 hits
Range 2: 4.2 hits
2 Rockets, 1 Aim
Range 3: 4.6 hits
Range 2: 5.2 hits
We can see already that how many rockets you add to specific pools can be a bit of a choice. It doesn’t change the average hits too much but does allow more variance. The more rockets you add the more reliable the shot becomes but it also lowers the ceiling. Also, as you add more aims, which the Mandalorians have decent access to, you also see a small drop off of effectiveness with the extra rocket.
To lessen the length of the math section, I will only be looking at 1 or 2 rocket shots.
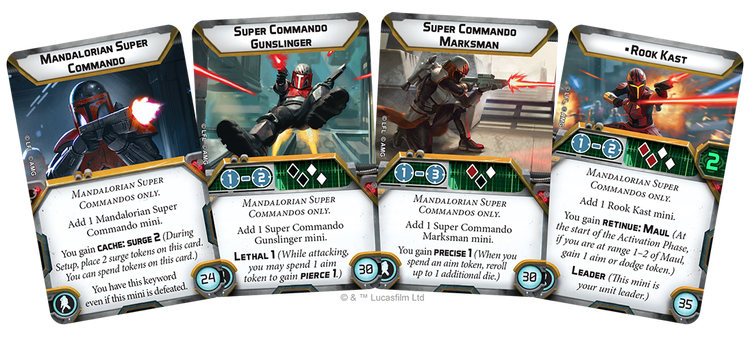
Also note for Rook Kast and the Gunslinger that will follow, you can use the numbers provided above for Range 3 shots when they can’t use their specific weapons.
Gunslinger Boi

A weapon that adds another keyword. The keyword here is Lethal: 1. For these calculations I’m going to run it all assuming you’ll spend one aim on Pierce and that you are shooting red non-surging saves. (Remember that this is now calculated wounds and not hits now. I am only going to do this for the Gunslinger so it’s easier to see the value of the Lethal.)
1 Rocket, No Aims
Range 2: 3.4 wounds
1 Rocket, 1 Aim
Range 2: 4.0 wounds
2 Rockets, No Aims
Range 2: 3.4 wounds
2 Rockets, 1 Aim
Range 2: 4.0 wounds
Marksman Boi

Another Keyword to add. This time we have Precise: 1. I’m going to up all the way to two aims, though even more is possible. You are really looking to maximize your aims when Precise is in play.
1 Rocket, No Aims
Range 3: 4.4 hits
Range 2: 4.9 hits
1 Rocket, 1 Aim
Range 3: 5.7 hits
Range 2: 6.3 hits
1 Rocket, 2 Aims
Range 3: 6.5 hits
Range 2: 7.1 hits
2 Rockets, No Aims
Range 3: 4.6 hits
Range 2: 4.8 hits
2 Rockets, 1 Aim
Range 3: 5.7 hits
Range 2: 6.0 hits
2 Rockets, 2 Aims
Range 3: 6.3 hits
Range 2: 6.5 hits
Rook Kast

1 Rocket, No Aims
Range 2: 5.5 hits
1 Rocket, 1 Aim
Range 2: 6.6 hits
2 Rockets, No Aims
Range 2: 5.4 hits
2 Rockets, 1 Aim
Range 2: 6.5 hits
As Rook does bring the most dice to her squad’s shots you are able to get the highest possible ceiling out of her here. If you manage to get 3 aims on her, firing 1 rocket gets you an average of 7.9 hits. Three aims may sound high, but with her and the squad’s keywords plus a little tech you can definitely get there.
As we come to the end of the numbers and math, we can see that these Mandalorians can really force some decent saves. Ignoring cover and having access to some decent keywords and aims can really ramp them up.
Support Elements
Gar Saxon
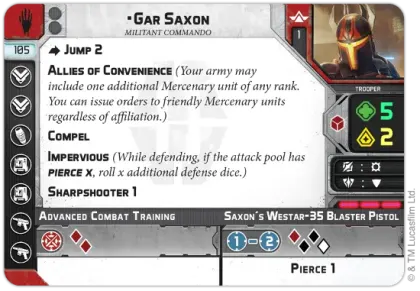
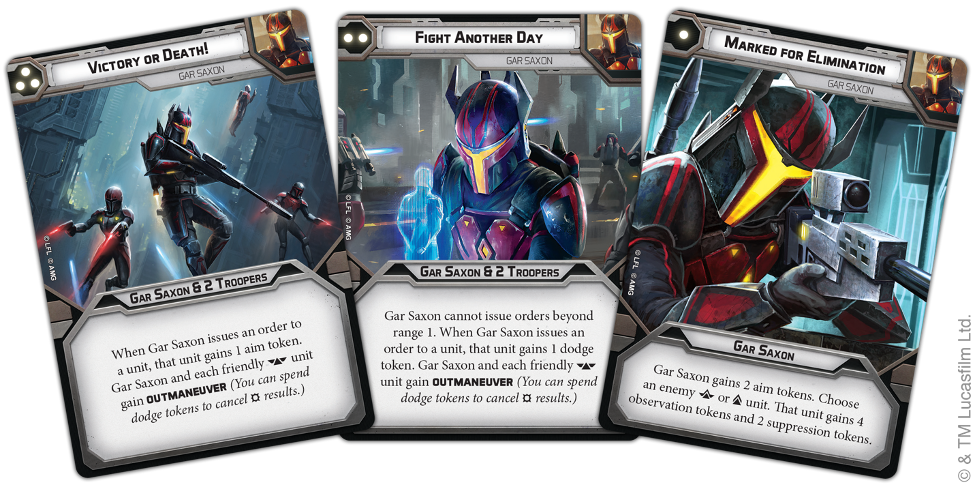
Surprise surprise! The Mandalorian hero can help the Mando squads in several ways.
Gar Saxon’s command cards work well with the Mandalorians to both keep them alive and shoot more effectively. By passing out aims and dodges to your Mandos (plus Outmaneuver and observation tokens) you are able to get them to shoot better and keep them alive for more shots.
The other thing Gar Saxon does is bring the Compel Keyword. While this doesn’t directly benefit their offensive potential, it ensures that you are able to use it. As mobile units, Mandos really don’t like being stuck in place. The risk with Compel is adding more suppression gets dangerous with the new suppression rules. Bringing along some Inspire is probably advised.
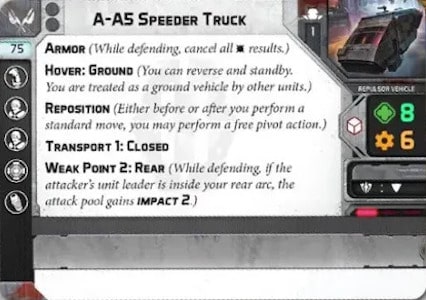
Bus
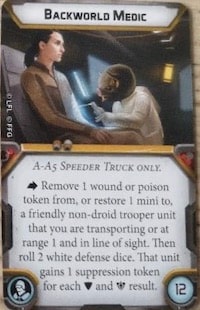
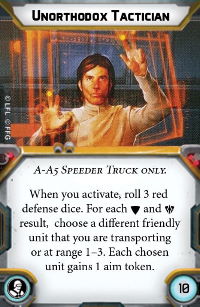
The Bus brings plenty of utility to Mandos. Basically all the benefits should be pretty self explanatory. The Medic is great because Mandos are expensive models with a great save. The Tactician is great because a lot of the different Mando squads want a bunch of aims.
The bus could also be used to transport Mandalorians, though that is probably not super required. More realistically it could be used to create a line of sight blocker to get your Mandalorians close before pouncing in for their alpha strike. This could be especially good for the Range 2 heavy weapons.
Stuff to Add to the Mandos
As stated at the beginning of the article, Mandalorians really can have a bunch of different stuff on them and be effective.
The upgrade I find myself adding a lot is the Shields. Though they are expensive at 10 points, they often make their value. The SC Mandos generate a decent amount of dodges and being able to ignore damage as long as possible is critical for the Mandalorians’ success. The shields really help this. They also get around things that ignore dodges using High Velocity for instance. A shield is a great way to block a Sniper shot that would force you to roll two defence dice. Delaying when you need to start rolling saves as long as possible is great.
Another oft added upgrade is recon intel. Mobile things often like even more mobility, and as we’re focusing a lot on alpha strikes, recon intel helps you do that.
Finally of course all the various upgrades that give you added offence are decent adds. Offensive push, Hunter, etc. It all just depends on personal taste and exact build type.
Lists
Now finally after all that nonsense we can look at a couple of lists.
Gar Saxon and three Mandalorians
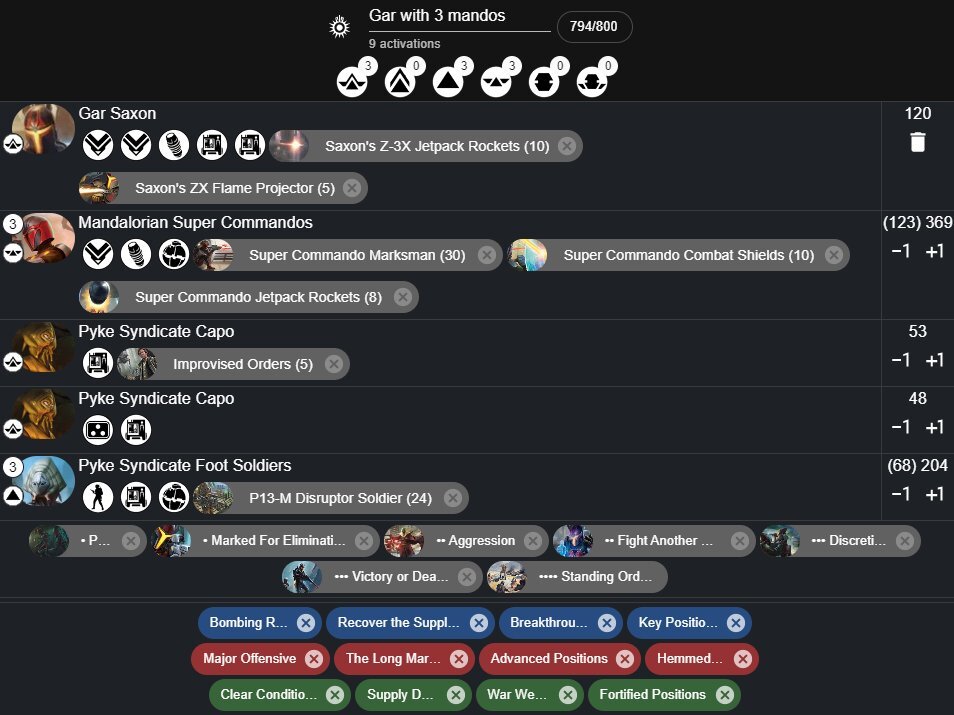
Well we can fit three Mando squads into a list, so let’s start there.
This list utilizes four total mobile Mandos backed up with a decent little gunline of well supported pykes.
This list will really dependent on your Mando squads getting their alpha strikes off to weaken the enemy list. If your Mandos don’t get enough off the table quickly you could quickly find yourself on the back foot.
Gar Saxon and two Mandos
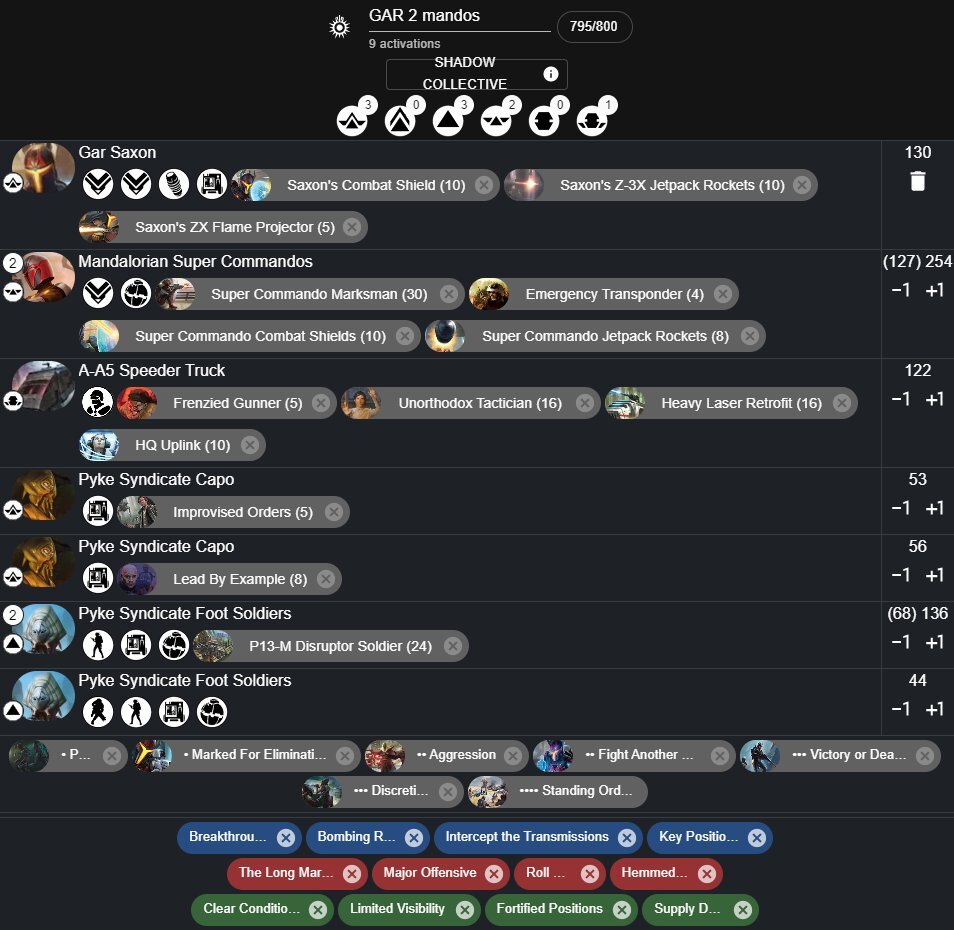
Drop a Mandalorian, what do you get? A Bus.
This list allows the fewer Mando squads to be even more efficient. The HQ uplink gives you a modicum of order control. You really want to be getting 3 aims for every shot the Mandos take.
Two Mandos and BS in a bus
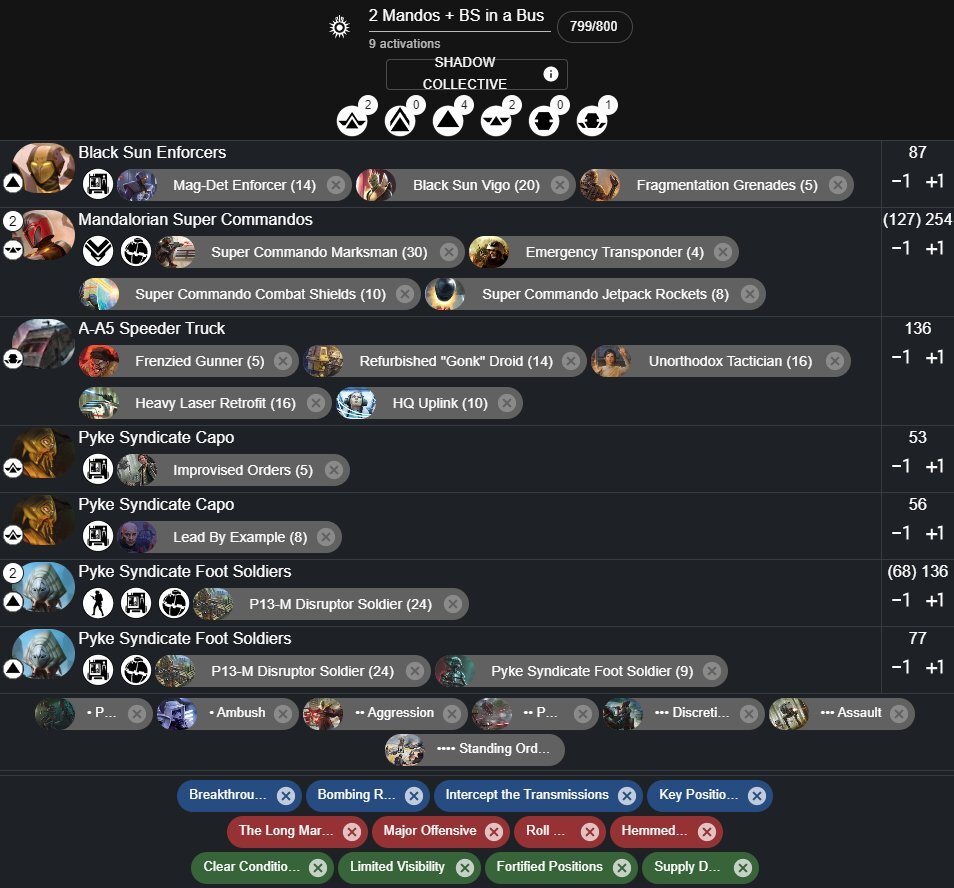
So this list drops some support for the Mandos in the form of Gar Saxon. Instead we have a Black Sun to add even more offensive potential. This list does have quite the punch, and also a small gunline to back it up. The goal here will be to hit your opponent hard and fast and knock out critical pieces before they have a chance to whittle you down. This list has also added in Emergency Transponders to the Mandos to add even more aim support, or the ability to drop suppression in a crucial activation as well. Without access to Compel it is nice to have some insurance for when you need it.
Maul and Rook
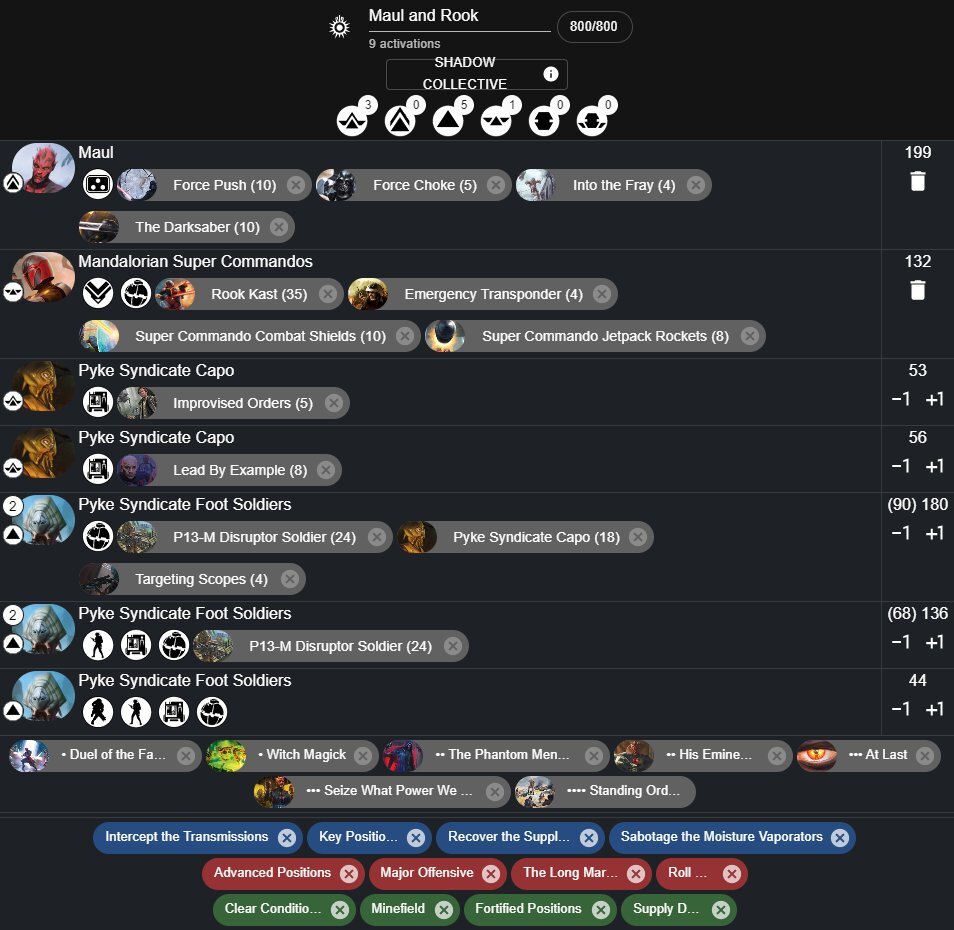
Well doesn’t this look boring… It’s just Maul and Pykes, and Rook I guess.
This list will look to operate as a fairly classic Force User plus gunline setup, but Rook will back Maul up and add some extra support as he moves around. You still need to make Rook worth it though as you’re sacrificing a decent chunk of gunline to bring her. Make sure to ensure she is never exposed unnecessarily and that when you do decide to use the rocket that you are picking a prime target.
General Strategy
As you’ve probably been able to pick up over this whole article the Shadow Collective Super Commandos have the ability to put out quite the alpha strike. Don’t forget though that the alpha strike is only useful once. To get their full value you really need to utilize their mobility. This is twofold. First, you need to make sure you can utilize the Mandalorians to do objectives and try in turn 0 to get advantageous battlecards for their mobility. You also potentially are able to utilize their mobility to get up into places and get (dare I say it) open or light cover shots.
Also with the Mandalorians make sure to utilize tech to get aims and dodges on them. Without token support they really aren’t worth it. Also remember to utilize the SC command cards to get them more tokens. Aggression is especially notable because you can easily get two aims to start the turn on two Mandalorian squads (Rook can start with three).
Conclusion
Mandos definitely have a place in the game, they’re quite fun to run. With some thought put into list building and strategy they should also be able to be decently competitive, though likely not a part of 6-0 lists. It is totally possible that they are a part of 3-0 lists at locals or 5-1 lists at larger tourneys. In the hands of good players with practice I’d like to see them do well


2 Responses
i thought if you shot the rockets, they were used/expended. are you suggesting firing the rockets on a partial number of mandos? and if you do this, you can still get off 4 rockets fro the squad before expended? So you can fire 1 rocket off and add it to 4 separate attack pools in a game? If so, this adds blast / critical / impact to 4 separate attack pools over the course of a game? wasn’t sure the rules worked like this, so just want to clarify. thanks!
Hi,
You can only get one shot with rockets and then they expend yes. I just wanted to show the comparison for when you’re choosing what weapons to use in a pool. Choosing which minis use what weapons is somewhat complex for Mandos