Trending Today

Ideally, you want a list to be decent at every objective. This is especially true in showdown events where you only bring a single strike team with no option to swap out squads between games. However, you will be playing your own objective a disproportionate amount so you want to be especially good at that one. Assuming all objectives are taken at the same rate and the first player always chooses their own objective, you should be play your own objective in 2/3 of your games on average.
The recent release of the new objective Never Tell Me the Odds has unsurprisingly led to a large uptick in “what objective should I run with this squad” posts. I’ve written individually about Shifting Priorities, Sabotage Showdown, and Never Tell Me the Odds, so now it’s time to weigh up the similarities and differences that could be the deciding factors for which objective best suits a given list.
Of course, any article of mine needs a healthy paragraph of disclaimers before it gets going. I’ll start by stating the obvious: I’ll be presenting some general rules of thumb rather than anything absolute. These are just some things I think about when choosing my own objectives that are hopefully useful for you as well. Experience and comfort are very important to success with any given objective. I went a long time without playing Sabotage Showdown recently and boy was I rusty when I eventually had to play it again! Even if a list isn’t perfectly suited for objective X, if you are really well versed in that objective then it may still be a fine choice for the list since you know its ins and outs.
One thing that we must consider is that you’ll often be playing your own objective as the first player. Generally speaking, I find the second player often has a slight advantage in the first struggle due to scoring first, though the magnitude of this effect can vary between objectives. Some previous work of mine suggests that the first player is less disadvantaged in Showdown than in Shifting. Speaking from my decent-but-still-limited experience of Odds I would say the first player doesn’t have much inherent disadvantage in that objective. While there may be a bit more of a built-in disadvantage for the first player in Shifting compared to the other objectives, I would say this doesn’t factor into my decision making all that often. I find the variance in first player disadvantage to be relatively minor and usually dwarfed by other factors. As such, I’m not really going to involve it in my decision making for the examples below. If objective choice is really a toss-up then perhaps inherent first player disadvantage can be a tie-breaker for you.
It should also be noted somewhere in this article that you aren’t obligated to pick your own objective if you are first player. Maybe you feel like you’re better than your opponent on their objective and you want to pick that one. I don’t find myself picking my opponent’s objective often at all, but it is an option.
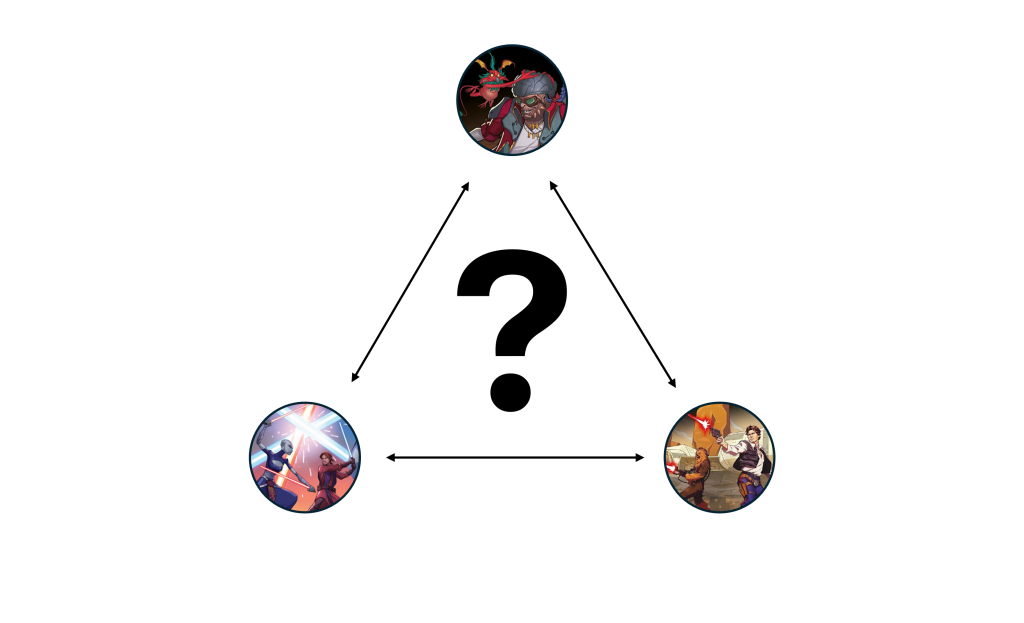
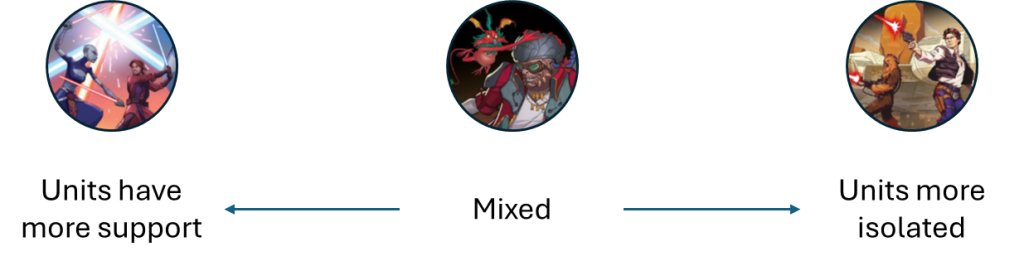
I tend to view the three objectives along a spectrum with Shifting on one end, Odds on the other and Sabotage somewhere in the middle. That’s not to say I’m never debating between Shifting and Odds for a given list, but usually it’s Sabotage and one of the other two. But wait, what is the variable that leads to this ordering on the spectrum? Good question, there’s actually a few. Let’s go through them one at a time.
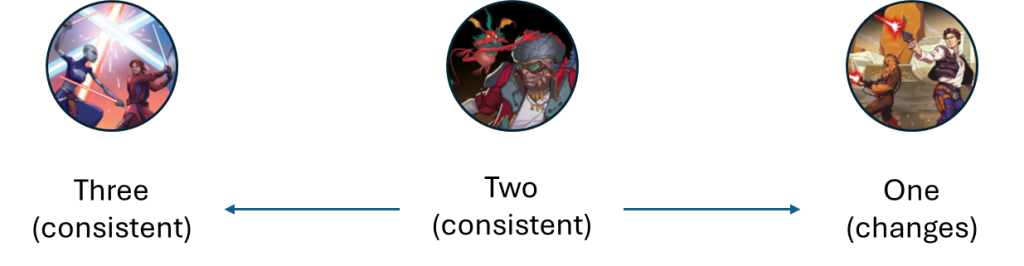
OK, this is the obvious one, but it is very important. I personally feel that I have more options each activation the more midline objectives are active, and that I am less beholden to the whims of the order deck. A number of the following points are partially derivative of the differences in midline objective count during the first struggle.
Some units like to be in the middle of things. Range 5 bubbles like Mace Windu’s This Party’s Over or any Coordinated Fire ability would like to touch multiple active objectives if possible. Units with powerful reactive abilities/identities also enjoy being in the middle. If Mother Talzin is in a central position then Wrath of the Greater Mother is going to be much more threatening than if she’s off to one side. When I talk about centrality I’m also considering the density of active objectives. We’re thinking about clusters of objectives here, but those most often occur in and around the middle of the board.
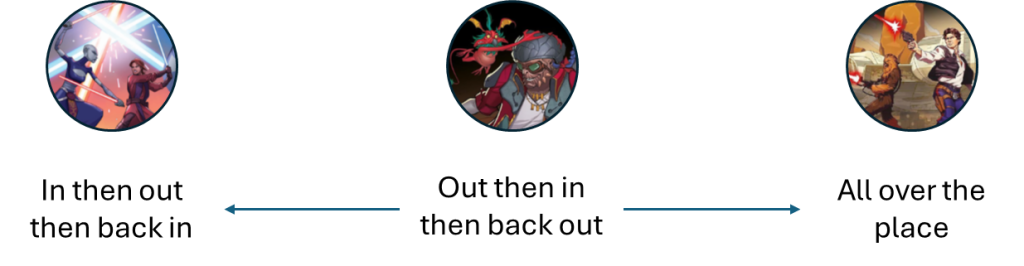
Shifting Priorities starts the game with a decent focus on central locations, then in struggle two the objectives spread out before often consolidating again in the third struggle. Conversely, Sabotage Showdown is sort of the opposite. The first struggle is a donut, then the second struggle condenses then the third struggle usually spreads out again. Finally, Never Tell Me the Odds is a funky one. There are a couple layouts where the center is very important (Questionable Heroics and It’s Worse) but for the most part the active objectives are fairly spread out. I feel like I’ve had more games devolve into a “two lanes” sort of feel on Odds than I have on Sabotage.
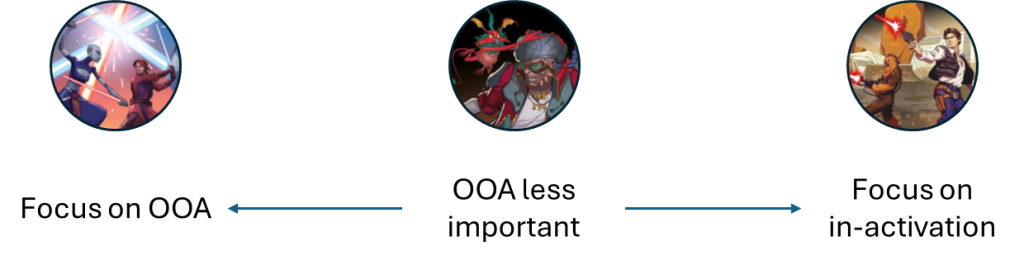
This concept is sort of the opposite of centrality. The more spread out things become, the more isolated units can be. Here I’m essentially asking “if this unit is on an island, how well can they take or hold an objective?” Units that can shove reliably, have diceless displacement, or are very sturdy tend to do well in isolation. A standout unit in isolation would be Wrecker; he has multiple ways to make plays (tactical shove, multiple attacks, decent killing power) and can give himself Steadfast and Protection to be extra sticky on his objective.
Let’s consider an enemy Dooku hanging out on an active objective in the midline on the side of the board. Let’s say it’s on our left. If it’s Shifting and we draw a unit on our left side that can’t deal with Dooku then we’re fine, we can still go towards the middle and potentially flip an objective. On Sabotage we don’t have that option and we need to either do our best against Dooku or hang back to guard our home left objective. If we don’t flip the left side it may not be great, but perhaps we are doing well on the right midline objective. If we’re playing Odds and we can’t take the midline objective away from Dooku then we could be in deep trouble. There’s only one midline objective and, while we don’t have to control it to win, winning the struggle could be very hard if one of our three left-side units can’t do much on their side. As we shift from left to right on the spectrum above I place higher value on individual playmakers and relatively less value on synergy pieces.
Once again, this is somewhat a continuation of the discussion on centrality and unit isolation. In Shifting mobility is certainly useful, but slower units that can usually only move once in their activation (like Kalani and Mother Talzin) still have their place. I also find out of activation dashes to be very useful in the first struggle of Shifting because you can easily threaten to move from a side objective to the middle and vice versa. For example, using General Kenobi’s Knowledge and Defense ability I love to spend the hunker to dash from one midline objective to the other, or at least threaten to do so. On Sabotage or Odds that just isn’t possible in the same way. A dash could threaten the enemy backline but the positioning window is tighter and those objectives are often well guarded in the early stages of the struggle. Droid and Ewok armies can also leverage their out-of-activation movement abilities to take multiple midline objectives in one turn, giving them a strong foothold in the important first struggle.
In Sabotage, out-of-activation movement is still handy, but in different ways. You probably aren’t taking both midline objectives in a single turn, but in the third struggle out-of-activation dashes can be a big help. It’s tough to guess which objectives will be active so this movement helps correct your positioning once the layout is revealed. In the first struggle I find out of activation repositions to be quite potent as they are quite effective at stealing backline objectives away from the enemy. While you can technically do that with a dash they just aren’t as effective for this purpose in my experience.
Up to this point I’ve been focusing mainly on out-of-activation mobility, but Shifting and Sabotage both enjoy in-activation mobility as well. I’ve found in-activation mobility to be much more important in Odds, however. The midline objectives start in wider areas and the objectives tend to feel fairly spread out through the entire game. Mobility goes hand in hand with isolation; units need to make plays in specific places and the first step is getting there.
I’ve found slow units to be quite sad on this objective. Out of activation movement is still quite handy as it lessens the burden on in activation mobility. However, I have found out of activation movement to be less handy when it comes to reorganizing units for a new struggle. A single dash (and sometimes even advance) often doesn’t feel like enough to get on to a new active objective after a layout swap, though it’s certainly still good to have some of this mobility.
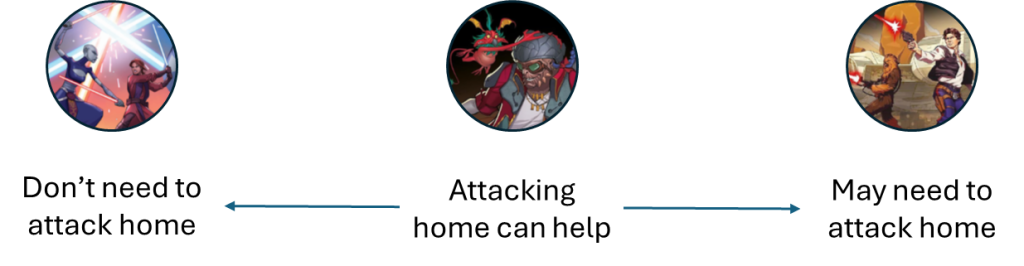
Important to note: we are talking about the first struggle here where the home objectives are the one or two active objectives on your opponent’s side of the table. I had to word this category carefully to maintain the same spectrum I’ve been using. If the category was “feasibility of attacking home objectives” then I would probably flip Sabotage and Odds. Shifting has the home objectives closest to the board edge and the one that is lit up is pretty random. Luckily, taking your opponent’s backline objective isn’t all that important as it’s usually easier and just as effective to attack the midline. In Sabotage the home objectives are closer and both will always be lit up. If you have a good backline attacker on one side of the battlefield then you know they’ll always have a corresponding objective to threaten on that side. While not critical to winning the first struggle, threatening a cheeky backline capture can have a big impact in Sabotage.
Finally, threatening your opponent’s home objectives can be quite important in Odds since there is only one midline objective and half your strike team will likely struggle to get to it. If things are going poorly for you on the midline then you may need to resort to backline captures to have any hope of claiming the first struggle card. However, going for these captures too early in the struggle often results in your attacker getting torched by enemy units that otherwise wouldn’t have had much to do on their activations, so I try to time the backline attacks for the latter part of the first struggle.
I should clarify that the style of backline attacking can vary a bit between Sabotage and Odds. In Sabotage, I’ll usually attack the midline during the unit’s activation, then look to move them out of activation if my opponent leaves a home objective vulnerable. In Odds I’m more concerned with units attacking the enemy’s home objectives on their first activation when the midline objective is on the far side of the board.
Let’s make things a bit more tangible now with some practical examples. I’ll walk through some different showdown lists and discuss why I selected the objective I did for them. Once again, the choices I’m presenting aren’t necessarily right or wrong, but what I would feel most comfortable running for each list.

Here we’ve got a very traditional Obi/Plo list. As mentioned earlier, I really like Kenobi’s identity on Shifting (though the stickiness it brings helps on all objectives). Beyond that, units like Snips and Rex really like Shifting because of how they can swarm the midline and move between those objectives. Sabotage wouldn’t be terrible as Plo and Snips could really lock down a side and our units are relatively sticky, but we’d get less use out of ARF’s Coordinated Fire: Expose in the early going. We don’t excel at attacking the backline and, while our in activation mobility is fine, it isn’t outstanding for the most part. As such, Odds is not particularly appealing. We could potentially trigger Challenge the Odds often with our extra secondary attacks, but we don’t really have the force budget to move the struggle tracker, which is another knock against Odds.

A classic double super tac list! This team has out-of-activation movement out the wazoo, mainly in the form of dashes. In-activation it struggles quite a bit with single move units like Kalani and magnas. As first player on Odds I’d be very worried about drawing the Desperate Measures layout, so I don’t feel comfortable taking Odds here. I have tested similar lists on Odds (Jango instead of Kalani is a key difference though) with some mixed success. It’s not a no-win objective, but not what I’d want to play two thirds of the time. Sabotage is OK but we lack any form of diceless displacement, meaning we could stagnate on one or both side objectives. I prefer the centrality of Shifting as it really let’s magnas strut their stuff.

This choice may be a bit of a contentious one. I went with Sabotage for Mando/Cad, but there are some enticing reasons to go for Odds here. Namely, Cad’s force refresh helps a lot to utilize Challenge the Odds whenever the opportunity arises. Cad can also stay unengaged more easily with the spread out objectives. However, if Cad is doing most of the killing with his reactive then you won’t actually be able to Challenge the Odds all that much since primaries never get to until maybe struggle three. Secondaries Challenge the Odds most frequently and Greef is not killy at all (Jango is fine at killing but I honestly wouldn’t say it’s a strength of his).
Deployment on Odds also makes it tricky for Greef to start within range 4 of anyone in Cad’s squad, which makes his active ability much less useful. Sabotage just fits better with the kit this team brings. Mando is a fantastic backline attacker with the reposition on his identity and IG-11 has the speed to dive the back as well. Greef’s slow can hurt on Sabotage but less than in Odds (if the active objective is on his side). We’ve got diceless displacement on both sides of the board so we’re feeling good against sticky enemies. I don’t love Shifting here because we don’t have much out-of-activation movement and our ability to attack the backline is less useful in the first struggle.

Compared to Mando/Cad, this Maul/Asajj list has more out-of-activation movement, enough that Shifting is probably an OK choice for it. However, the diceless displacement on both sides plus the stickiness that Bo and Savage bring make Sabotage quite attractive. Asajj’s Slip Away ability isn’t terrible for attacking the backline either if they leave it unguarded, similar to Mando. While the list has decent in activation mobility, I don’t think that’s a strength which makes me weary of Odds. With how force hungry Asajj and late-game mandos can be I’d also be worried we won’t have the budget to Challenge the Odds, so Sabotage it is.

If you’ve been watching my Bonus Battles series on YouTube, you know that I love Bad Batch on Odds. They are incredibly mobile and good playmakers. Force can be tight but Vader helps there. He also ups the killing power of the squad to hopefully Challenge the Odds more frequently. The lack of diceless displacement (Wrecker technically counts but the range is small) makes me worried for Sabotage. Additionally, the out-of-activation style of backline attacking I prefer on Sabotage isn’t really there with this list. Shifting is a perfectly fine choice, but I think other lists can play Shifting as well or better, while you’ll often have the upper hand in Odds.

I haven’t really touched on this yet, but I do think Odds rewards strong ranged units more than Shifting or Sabotage. A strong ranged presence helps a lot when the objectives tend to be spread out. Iden loves to kill things (let’s be honest, Hask is a big help there) and her ISF can deploy on her off-center home objective in case that’s active in struggle one. Moff Gideon can mess with your opponent’s force economy; either they still reserve and struggle to pay for Challenge the Odds or they avoid reserving and are resigned to the whims of the order deck. The main downside here is that it can be tough for Moff’s squad to benefit from Hask’s Defiance Will Be the Death of You if the two squads operate on different sides of the board all game. Sabotage can have a similar issue in the first struggle but it’s usually fine after that. Once again, the lack of diceless displacement worries me for Sabotage here (and can make things trick on Odds as well honestly). The plentiful out-of-activation repositions are great for attacking the backline in that Sabotage, though. Shifting is fine for this list, but much like with the Vader/Hunter list I think other teams just player Shifting better.
Picking an objective for your list is certainly not a case of “what objective can this team play decently?” You should be able to play all three objectives somewhat well. However, the objective you bring is the one you’ll be playing approximately two thirds of the time, so you want to be better at it than the average list would be. If you do find yourself in a situation where you’re just trying to figure out what objective you can play instead of where you have an advantage, it may be time to tweak the strike team itself.
Because objective choice is mainly about trying to gain an advantage, factors like your comfort and familiarity with the objective are also important. If you’re not used to playing Never Tell Me the Odds (at least with a certain style of list) then you may actually be putting yourself at a disadvantage by taking it even if it’s generally strong for your strike team. That is where practice and reps can help.
Regardless, there will always be an element of individual preference when it comes to objectives as different players focus on different aspects of each objective. As a test, I sent the six example lists above to a buddy of mine and asked what objective he would run for each. He agreed with me on three of the six.
He clearly has bad and wrong opinions, but also take whatever I’m saying with a grain of salt.
Happy list building!