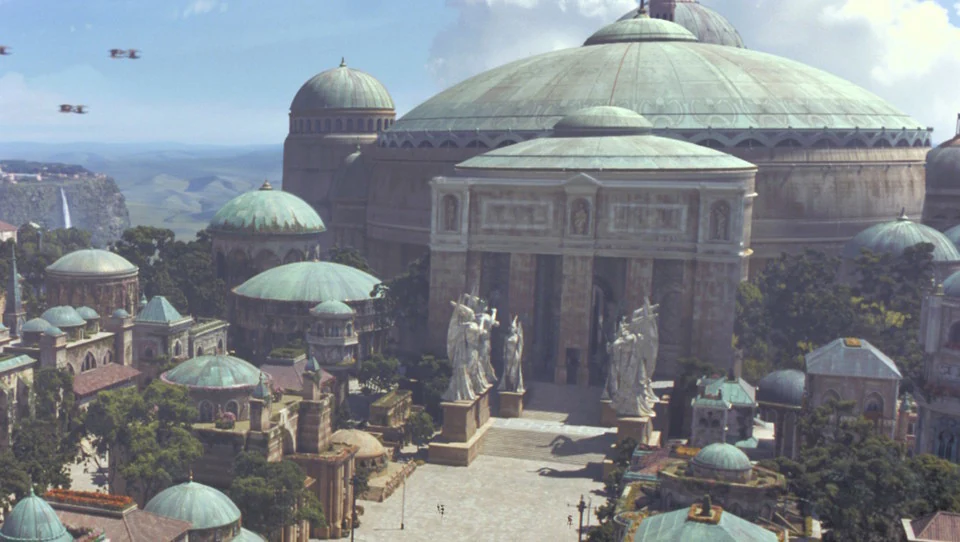

This article will cover setting up terrain for Star Wars: Legion.
Over the last couple of my blogs I have criticized the tables at the events I’ve attended. I complained about the lack of terrain at LGT. I gave feedback about bad terrain placements at 7th City and Element Games. So I wanted to write an article of how I set tables up. How I approach setting up a table is not perfect.
As a matter of a fact one of my tables at MKGT I had made it so the centre piece of terrain was able to place the box, but no unit was able to get into base contact and claim the objective. The individuals did not call me over till they were three turns into the game, at which point I could not move the terrain or the objective. Now was this because by day two the terrain had been knocked, or because I made the mistake and missed it across the 30 tables I had set up? Whatever the reason, no table setup is going to be perfect or with out error.
Hopefully this guide will give some insight on what I believe makes a good table layout but it is not the only way you can set up a table.
Quality is better then Quantity
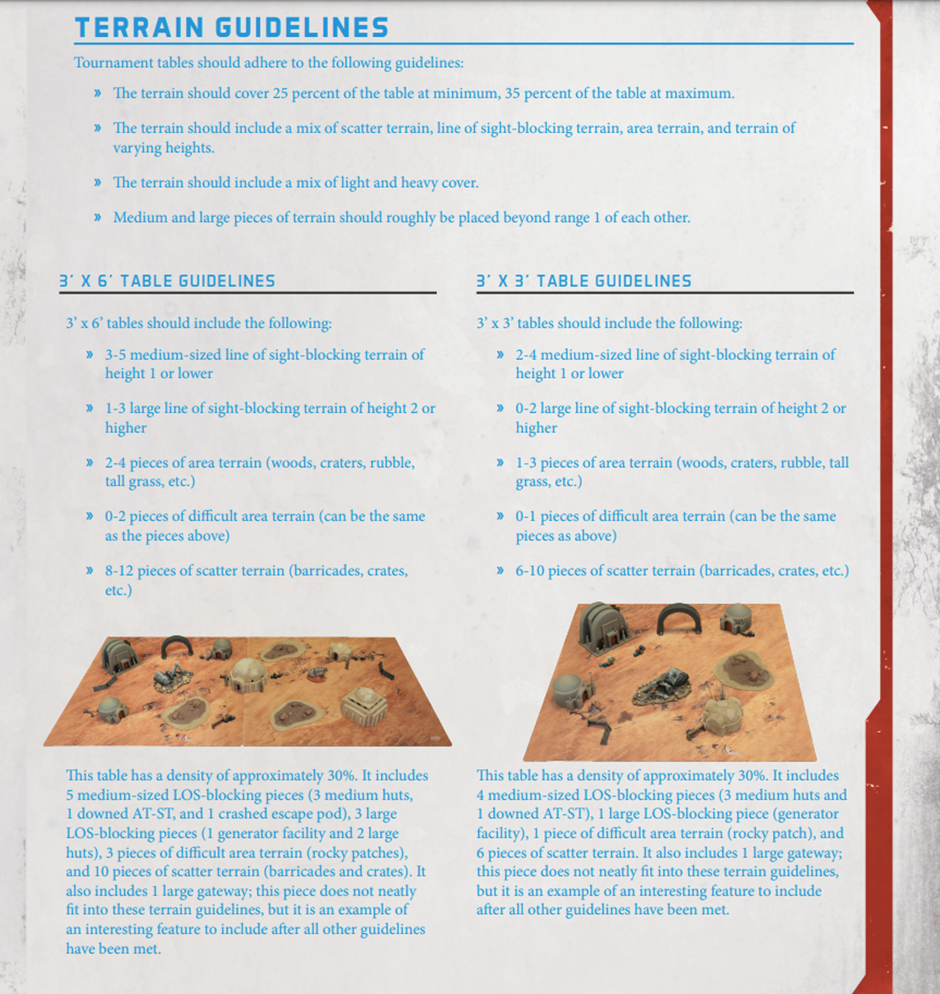
So if we look at the official tournament guidelines we can see from above that a table should be between 25%-35% of the size of the table, divided up by the different types of terrain that can affect Legion games.
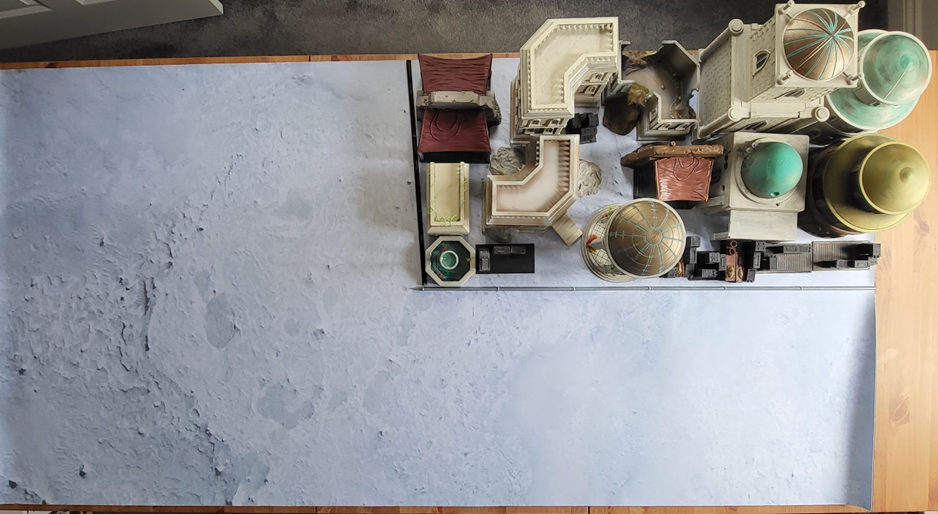
So for this guide I’m going to be using my Naboo box of terrain; it has pros and cons which I will cover as we go through this guide. You can see with all the terrain we are going use that it takes up near enough 25% of the table. I realised when doing this article that I could do with adding some more scatter and area terrain.
Step 1
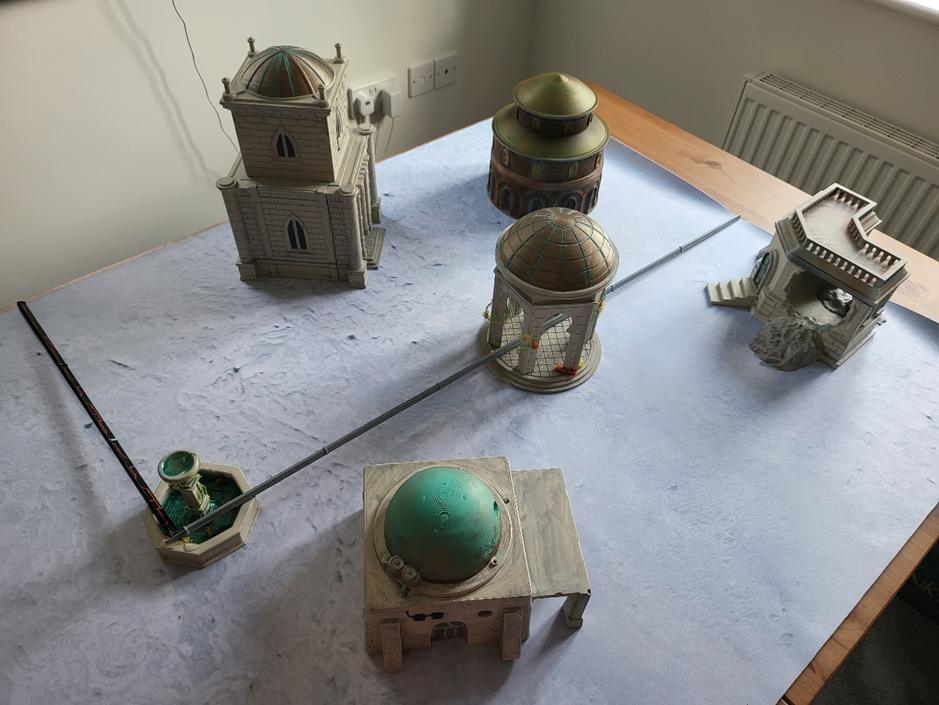
The way I start with tables at the moment is always with the centre piece of terrain. I normally go with something that is not line of sight (LOS) blocking but is something that provides cover. If I placed this fountain dead center of the board, objectives like Recover or Hostage would be starting on top of the fountain and unable to be retrieved. I make sure it is slightly off center so to not affect the above missions.
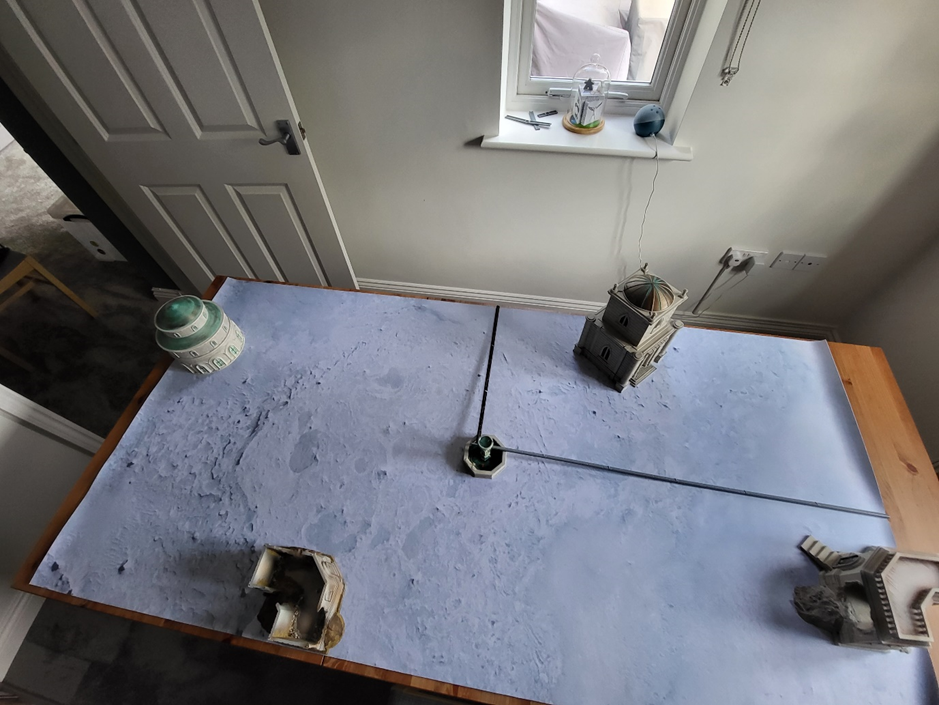
The other thing to consider and why I avoid putting big pieces of LOS terrain in the middle is due to key positions. Having a big piece of terrain and multiple units touching that terrain and not being able to shoot each other leads to less interesting interactions and games.
The next thing I start to do is I place four pieces of terrain with each one touching a board edge. I’ve started to do this to make games more interesting when it comes to Secret Mission or Breakthrough. By having a piece of terrain on each board edge, this stops you from walking straight down that edge without having to risk being shot a single time. You also may have to decide between a double move to score or to try and aim and shoot to prevent a unit from scoring. To me this creates more interesting games and decisions.
Step 2
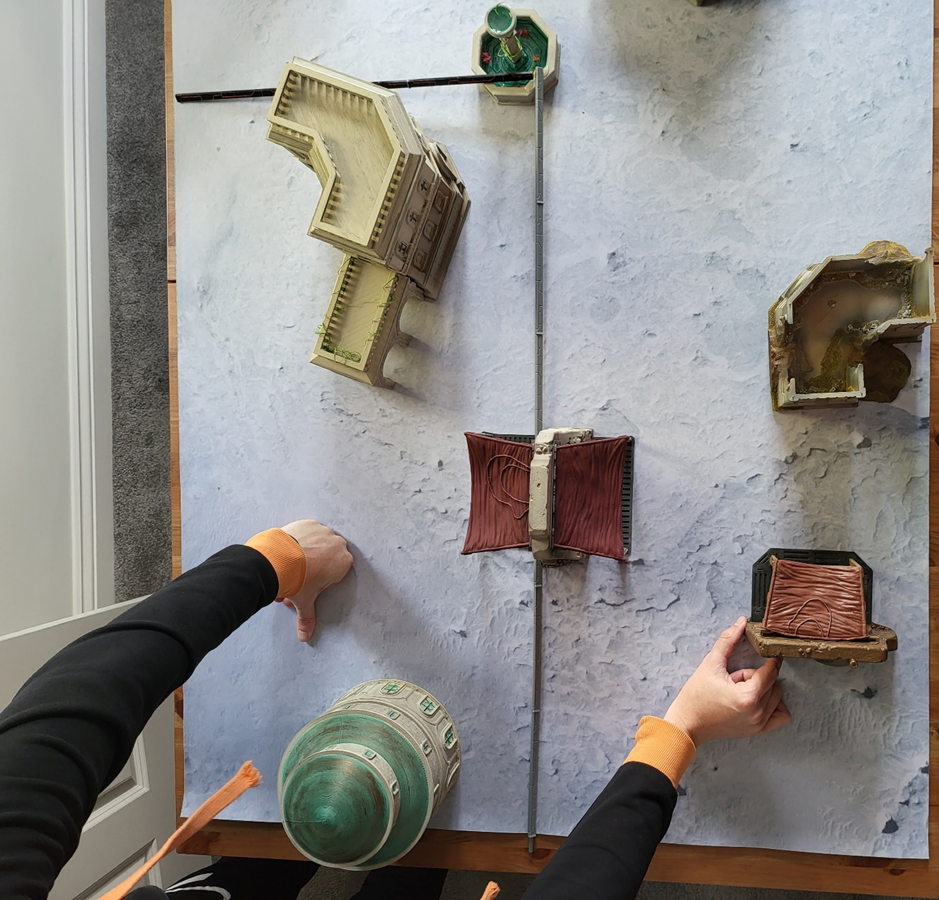
I will then pick one half of the board and place some of my terrain pieces filling the gaps between the currently placed pieces.
I have left my range sticks out so that I can see where the objective for Intercept Transmissions and the end of the deployment for Long March is. By leaving big enough gaps between our current pieces of terrain, this allows for big based units able to move freely around the map and breaks up firing lanes.
Repeat the same step with the other side of the board as well. When I was placing pieces of terrain, I made sure to spread the types of terrain around the board. I originally placed the corner building in the other half of the board, but this gave that end of the board lots of height two buildings. By swapping that with the circle building this still acted as a LOS blocking terrain piece, but is now less likely units can stand on it.
When placing these buildings I don’t normally put buildings so they are parallel to the board edge. Doing that you would get vertical and horizontal firing lines with very little cover. By putting buildings at different twisted angles, this creates different firing lanes and makes it hard to be able to see a unit from one end of the board to the other. This is less of an issue these days with only three units having unlimited range. Breaking lanes up makes these infinite sniper shots less likely, but also harder to line up if they are available, which is how it should be. The last thing you want is an Iden or Cassian deployed and never needing to move because they can see everything on the board.
Part 3
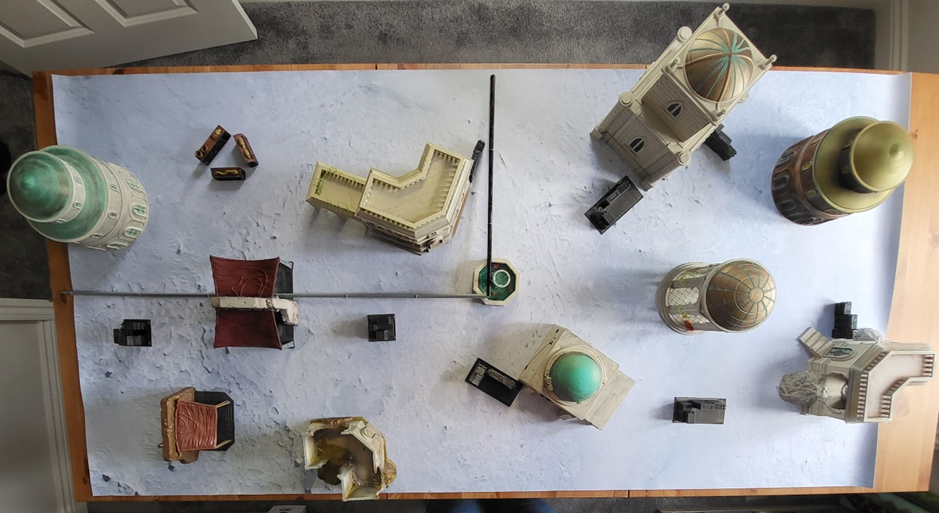
Scatter terrain is always my last step. You can look at the board and see gaps between buildings looking barren. Place terrain between the buildings that makes sense; in this case crates and market stalls. We can fill these gaps to provide cover as units advance towards their objectives.
As I looked at the final state of this board I was happy with it at first. From this angle I can see that the bottom right hand corner is void of any terrain in it’s deployment zone. For Disarray this would not be a great table to play on. I also noticed from this article that I need more area terrain in this terrain box.
If I turned up and saw this at a tournament would I be happy with this as the quality and quantity? Without a doubt yes! Could it be improved? Always! No table is going to be perfect!
Over a longer tournament you will eventually come across a table that is not going to be great for your list. Perhaps it is terrain heavy and you have lots of vehicles, or it’s sparse and your troop focused list does not have much terrain to hide behind.
One of the important skills with Legion is approaching a table and being able to identify if your deployment options are going to give you a big disadvantage. If yes, then how can you tackle that? Perhaps you pick red for the better table side and use your opponent’s battle deck, or maybe you make sure you don’t play that deployment.
Theme
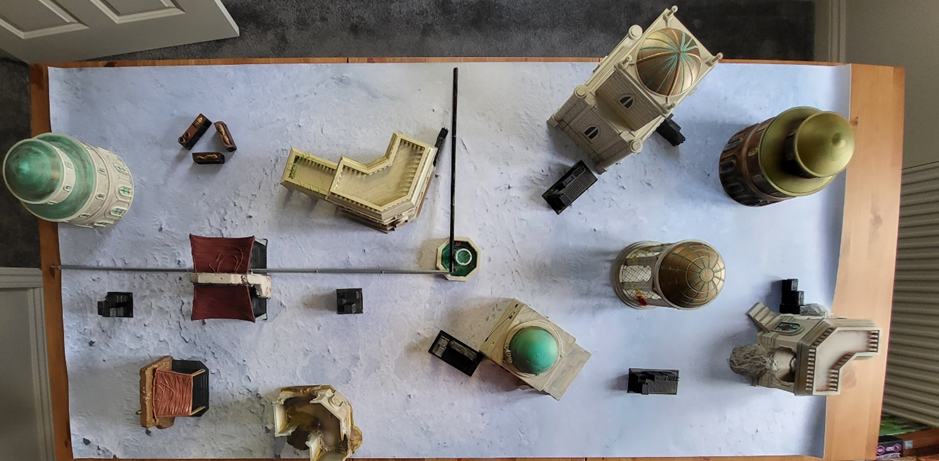
With some of my tables there is a recurring theme. With this table, the theme is the city of Theed on Naboo from The Phantom Menace. As we also look at the map we can see that one half the table is more market themed. The cover is different while the other end of the map is bigger and has grander buildings. Unfortunately the war is just about approaching the city as the two damaged buildings are on the edge of the city.
Being able to tell a story with your terrain and board layouts does not stop it from being competitive at all. It adds a layer of fun to table layout and sometimes adds to the immersion of the game.
Checklist
So if we compare my table to the official documentation how well does it actually do?
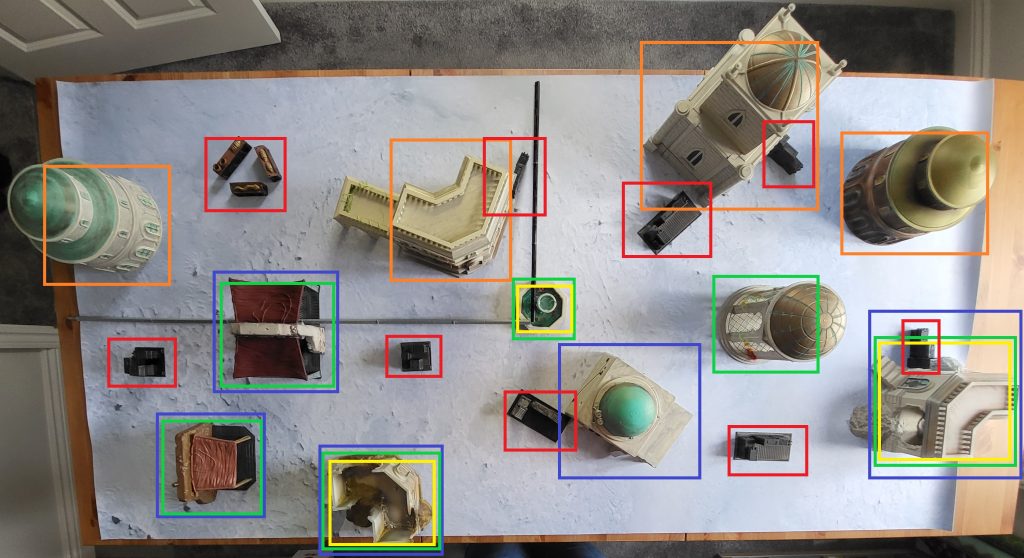
3-5 Pieces of height one terrain (Blue Boxes)
Check – I have four pieces total, with two pieces height one but not LOS blocking.
1-3 Large Pieces of height two terrain (Orange Boxes)
Exceeded – I have four LOS blocking.
2-4 pieces of area terrain (Green Boxes)
Exceeded with six: two blown up buildings, the two market stands, the fountain and the Gazebo.
0-2 difficult terrain (Yellow Boxes)
Exceeded with three. The fountain and the two blown up buildings entrances in and out of the buildings.
8-12 scatter (Red Boxes)
Check – I have nine boxes, barricades or market stalls on the map.
So using their list some of my pieces of terrain do double up which is fine. A single piece of terrain can have multiple properties or purposes on a board. The fountain for instance can be difficult and area. The blown up buildings are difficult and LOS blocking.
Urban Table

This is my urban table setup. Again we can see we hit the 25% mark needed for the table. As I look at all the different types of terrain, we have lots of LOS blocking, a single height two piece and half a dozen bits of area terrain.
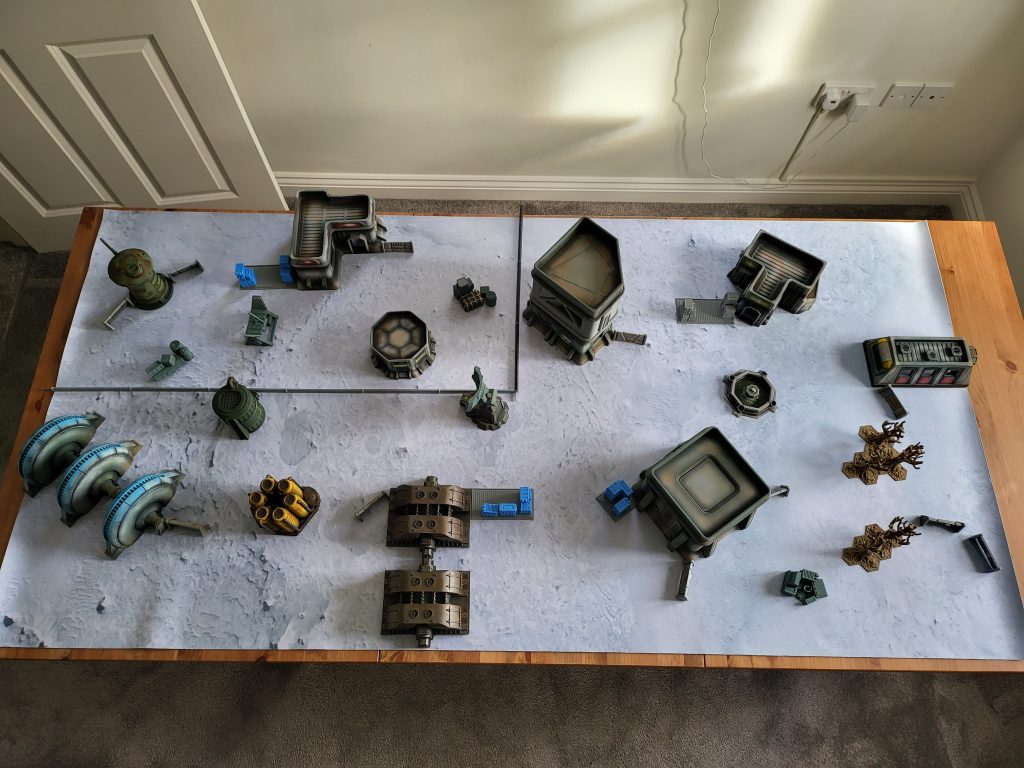
With this table I decided that the left hand side of the map would be more industrial, which lead to me placing the generators and cannisters in this half. The other half is more residential and has all the houses. In hindsight this time I’ve left the left hand corner of the map fairly open. There is lots of terrain near the corner providing line of sight blocking and cover options, but I could have pulled them back slightly to solve this issue.
When comparing the two tables, this table looks like it has more terrain. I think this is because the footprint of each of the terrain pieces is smaller than the Naboo pieces. It gives the impression there is more on the table when we have the same amount.
Overall, to improve this table I would like to add some area and scatter terrain. I can also increase the height of some of the buildings or at least have the options to have them as height one or height two.
Mr & Mrs Bantha
This is one of my more recent tables, which shows with the fact it is closer to the 30%+ mark of terrain. I also have a good mix of area, height one, LOS blocking and a height two piece of terrain along with plenty of scatter.
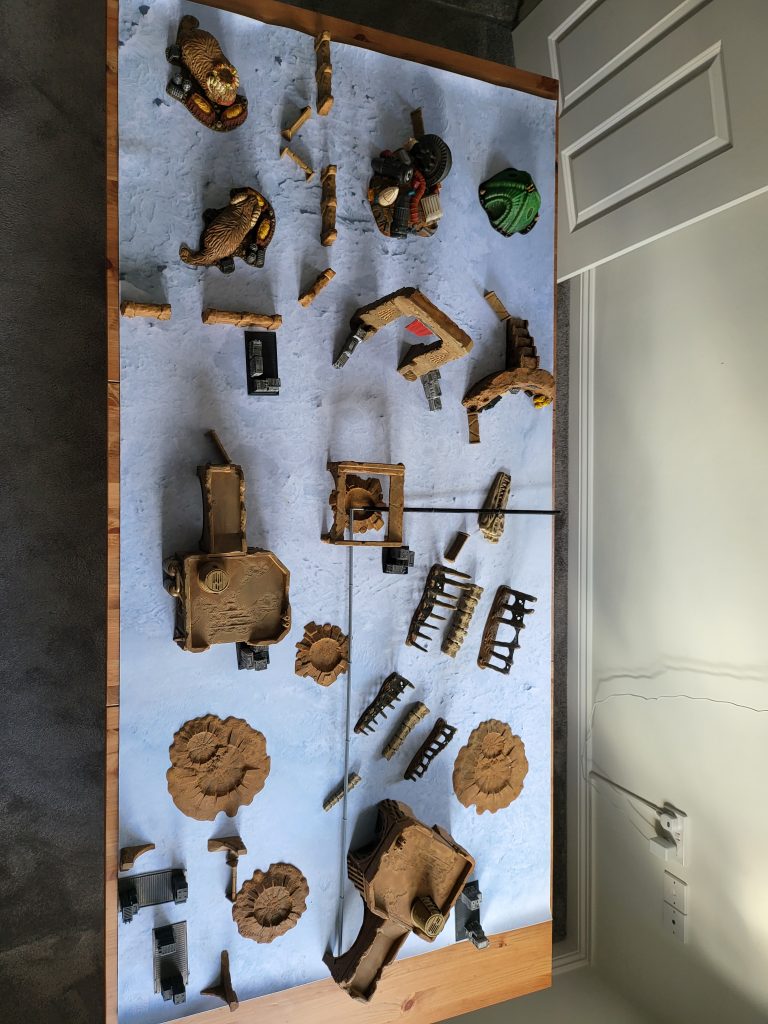
When building this table, I made the left hand side the outskirt of a town and put the Banthas in a pen, with the gates of the city leading to the market stall that used to exist. The market was built next the old remains of the Krayt dragon. Once again I’ve not put enough terrain in one of the corners, this is something I obviously do subconsciously.
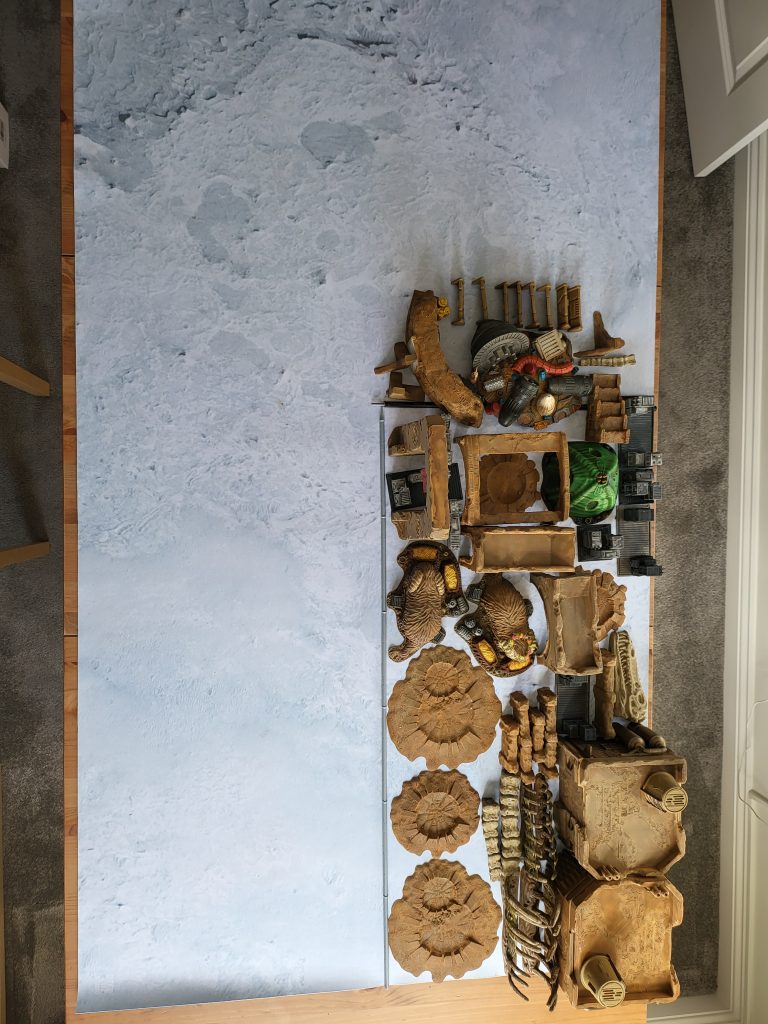
When we compare this table to the Naboo table, you get the impression there is a lot more terrain on the table. But when comparing the two photos of the terrain piled into the corners it is not as much as you think. This table in comparison has a lot less LOS blocking pieces of terrain to hide units behind. On the upside, there is lot of terrain for infantry to be in positions to fire and still have cover in return.
To improve this table, I would like to add some more scatter terrain pieces, take out the barricades and add in market stalls and stands. They fit in with the aesthetic more than barricades, and also help fill in the gaps. I probably have too many craters on the map, and could look at swapping them for some more LOS blocking pieces.
Summary
The two biggest takeaways I found from writing this article. First, I need to make sure to put more terrain in my corner deployments. Second, all of my tables are lacking any form of area line of sight terrain. What I mean with this is terrain like forests, or terrain that if shooting through grants cover but does not block line of sight. If you want an example of what I mean you can find a good example by Cami here.
Now this is not a complete guide or a perfect guide but hopefully it will open up the discussion of how you build your perfect board. I look forward to seeing comments from other people and feedback on things that I might have not even thought of.


1 Response
I agree with everything you said, except one part (slightly). When the centerpiece isn’t an LOS blocker it’s usually a killbox that strongly favors lists/factions with good snipers/vehicles that can easily ignore that cover. BUT placing a huge LOS blocker there can and/or does ruin a lot of interesting actions. What about instead of placing one centerpiece you place two off-center, smaller LOS blockers? Imho this is a better compromise between sniper/vehicle friendly lists and mobility/run-and-gun lists.