
General Solo, is your strike team assembled?
Everyone’s favorite scruffy looking nerf-herder, Han Solo is a disruptive and versatile commander. He tears up trooper units at range 2 and has some excellent command cards, but he is weak in melee and extremely vulnerable to pierce weapons.
Welcome to our deep dive for Han Solo. Han is all about his command cards, so this article is going to be a little lighter on stats than the typical deep dive. We’ll also hit some list ideas at the end.
Strengths
- Powerful and disruptive command cards
- Strong pistol attack with gunslinger
- Good save (for a Rebel unit)
Weaknesses
- Vulnerable to Pierce
- Command cards are very timing dependent
- Weak in melee
Chewbacca
Before we get into Han’s stats, lets talk briefly about Chewie. Chewie helps mitigate some of Han’s primary weaknesses; he can soak pierce hits for him (especially sniper hits) and peel stuff off in melee with his 4-5 red dice. Chewie also lets Han recycle a command card with Notorious Scoundrels and share dodges/aims. Chewie is expensive, though, for what he does. We’ll talk about using Han with Chewie in a separate section, below. Don’t worry; Chewie will get his own article eventually.
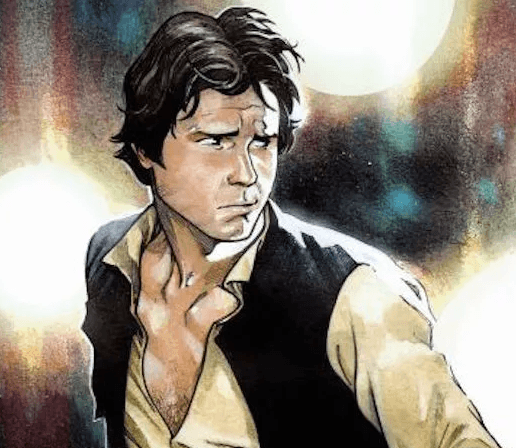
Han Solo

120 points. Almost right in between Luke and Leia in cost. So much of Han’s value is tied up in his command cards, it is hard to evaluate this objectively. He is not a clear value like Luke.
6 health, white/surge defense die, Uncanny Luck 3. They’re white die, but the’re re-rollable white die. A white die with a re-roll is slightly better than a red die without one (55%). As far as Rebels go, Han’s save is pretty reliable. He isn’t Pierce Immune, though.
Low Profile. If Han has cover, he has heavy cover. He can have a suppression token and heave heavy cover by default; he also has heavy cover while being shot through an AT-RT or other vehicle. More on that later.
Gunslinger. Attack two different targets. Han isn’t going to be eliminating an entire unit in one turn like Luke, but his pistol is still very consistent if you can get two targets in range.
Sharpshooter 1. Reduce target’s cover by 1. Extremely necessary for Han’s damage not to suck, since he is only throwing two dice. If you are shooting stuff in heavy cover (reduced to light), obviously it is still better than not having Sharpshooter at all, but it cuts your damage in half.
DL-44 blaster pistol. 2 red dice, pierce 2, surge to crit. Han’s pistol is pretty solid. Against targets in the open or in light cover, you’ll probably be picking up two minis.
Brawl. 3 white dice. Han is garbage in melee. Try not to get tied up.
Command, gear, training slots. I find myself using the command slot the most, but there are viable uses for all three of these.
Command Cards
0 Pip – Sorry About the Mess

Yeah, it doesn’t have any pips on it. Han shoots first. He also gets an aim and a dodge (so does Chewie if you are running them together). The aim token actually helps more than you might realize (see Offense below) and it is hard to complain about a free dodge.
The primary use of this card is to guarantee going first. This works great on the tail end of a last-first with Han. Hold him until last the previous round, move in and pop four trooper minis. Play this bad boy, ice four more trooper minis, and move back into safety.
My favorite uses of Sorry About the Mess, however, aren’t even with Han. If you are running what I like to call “Sorry About the Barbecue” (see Han list ideas, below), you can trip an HQ Uplink on a flamer AT-RT and have it go first. You can also use this with Improvised Orders and smart list construction to pull a Corps token from your stack and make a Fleet Trooper unit go first.
Bear in mind that Sorry About the Mess gets hard countered by Palpatine’s Give In To Your Anger, which is really like a -1 pip card, since the Palpatine player can choose which of your units goes first (presumably not the one you actually want to go first).
2 pip – Reckless Diversion

Reckless Diversion might be in the conversation for best command card in the game. Does your opponent want to shoot something besides Han? Probably. Too bad. He’s just so damn distracting. I’m surprised they didn’t put a hair flip on the card art.
Han excels at creating opportunities for other units. If you are playing Reckless Diversion, you need to fill the space this creates with a hard hitting unit; my personal favorites are Fleet Troopers and Flamethrower AT-RTs.
The “if able” part of this card text is very important. Your opponent will be able to shoot something else if their unit is not in range or line of sight of Han or the other order receiving trooper unit.
Reckless Diversion is so important for Han’s utility, it has its own section below: Making a Good Diversion.
3 pip – Change of Plans

Does your opponent really want or need to play a specific command card? Too bad, so sad. Put it back.
There are so many uses for Change of Plans I won’t go into all of them. Timing is obviously important with this; if your opponent doesn’t need a specific command card on a given turn, it isn’t a good time to play Change of Plans.
Depending on your list construction and the battlefield situation, the following cards are all good targets for Change of Plans:
- Coordinated Bombardment, Maximum Firepower
- Any of Boba’s weapon cards
- Give In To Your Anger
- And Now… You Will Die
- Son of Skywalker
- Reckless Diversion
- Master of Evil
- New Ways to Motivate Them
- Implacable
Depending on the situation, literally any other command card could also be something you want to counter with Change of Plans.
Of course, if your opponent doesn’t play what you want or expect, you can still just keep the card and give out some orders.
Keep in mind when you discard Change of Plans you are permanently putting yourself down one command card, so you are going to have to play Standing Orders at some point unless you follow Change of Plans up immediately with Notorious Scoundrels. Most of the time, when I am playing Han/Chewie, I am playing Change of Plans and Scoundrels back to back. This potentially allows you to delay a bombardment until Turn 3, since you can play Change of Plans turn 1, get it back immediately with Notorious Scoundrels, and then play it again turn 2.
Err on the side of playing Change of Plans to counter something early. There are two reasons for this. 1) Early actions define the game state for late game, and 2) a Change of Plans saved for an opportunity that never comes is wasted.
Offense
Dat Pistol Tho
With Han’s offense, it is all about the pistol. By itself, it is reliable but not amazing. With a second target for gunslinger, it becomes very solid. Han will tear up trooper units given enough time and multiple targets, but he lacks the burst damage of Luke, since he has to choose two separate targets and only has two dice.
Here are the expected outcomes for the pistol against troopers, with and without an aim token. Note it is functionally the same against white/surge and red defense die trooper units, due to the Pierce 2.
No cover (or light reduced to none)
| Wounds | No Aim | Aim |
| 0 | 1.47% | 0.01% |
| 1 | 21.56% | 3.06% |
| 2 | 76.97% | 96.94% |
Most of the time, you are going to be doing two wounds to a non-armored, non-pierce immune target. I was actually surprised when I ran this at how much of a difference an aim token makes. With Han, you really want to make sure you are getting maximum value out of those red die. I don’t think you generally are going to have the luxury of taking an aim action, but its comforting to know that the aim from Sorry About the Mess is good insurance against whiffing on one of your die. A 22% chance to not do two wounds is higher than you would like for as much as Han costs.
Cover (heavy reduced to light)
| Wounds | No Aim | Aim |
| 0 | 17.08% | 2.15% |
| 1 | 76.65% | 89.88% |
| 2 | 6.27% | 7.98% |
Well that pretty much cuts your damage in half. The surge/crit helps marginally, but Han is still going to have a really tough time pushing two hits through cover. Han really needs to be targeting trooper units where he can get a clean shot.
In short; Han mulches trooper units in the open (or in light cover, which he reduces to none). You want him in the action and shooting things, if you can manage it. Be careful with range though, because he is very weak in melee…
Melee (Know Your Ranges)
I’m not going to even throw Han’s melee stats in here, because they are bad. Terri-bad. It isn’t just melee specialists you have to worry about either. If a unit of Storms get into melee with Han, they are going to tie up his valuable pistol for a long time. This is partly why Chewie (or Luke) are good compliments to Han, so they can peel targets off of him.
The best thing to do is just stay out of melee range of everything. Make sure you are Range 2 or more from any threatening unit leaders. If you must shoot a unit leader (that you aren’t likely to wipe), measure such that you are exactly range 2 from your target(s). Put the tool on the table and nudge Han right up to it. Two speed-2 moves are just shy of Range 2, so you should be able to shoot something with Han’s pistol and keep him just out of melee range if you are measuring carefully. Just be mindful of Vader’s New Ways to Motivate Them and Palpatine’s Pull The Strings, both of which can extend a unit’s melee range beyond Range 2.
Don’t do this:

Do this:

The other thing you can do is melee blocking. If you aren’t familiar with this term, it means using terrain, objectives, or other minis to lengthen the distance between a melee unit and its target. Impact X has an excellent article on this topic here. You can also bubble wrap, which means literally surrounding Han with other minis so that he can’t be engaged in melee.
Defense
Like most Rebel units, Han has a white/surge defense die. Unlike most Rebel units, Han is also a lucky bastard. The re-rolls he gets from Uncanny Luck 3 give him a save that is functionally slightly better than red die save (about 55% chance).
This means two things. First, Han is pretty durable, especially given his access to better cover with Low Profile. Second, Han is really vulnerable to Pierce, especially snipers. You want a source of guardian for Han, whether it is via Esteemed Leader or Chewie, to pull those Pierce hits from him.
Below are the wounds by attacker for various attack pools with Han as the target. These numbers account for Uncanny Luck. The color scales are inverted, so red is most damage/most threatening while green is least damage/least threatening.

It should go without saying that you want to avoid Fleet Troopers, Wookiees, and lightsabers.
Using Han with Chewie
Speaking of snipers; Han could use a big walking carpet to take those pierce hits for him. Chewie shores up a lot of Han’s weaknesses. He can take ranged pierce hits for him, he provides a melee threat, and he can give Han a second use of one of his excellent command cards.
It should go without saying, but keep Han and Chewie close to each other. Guardian is only range 1, and teamwork is range 2. I’ve actually found it difficult to consistently get extra dodges and aims outside of the Sorry About the Mess turn, as you typically are moving and attacking. However, if you are in a good position and get a chance to take an extra action (or can’t attack), dodge is probably your best bet. Both Han and Chewie benefit quite a bit from dodges, while the aim helps Chewie a lot more than Han.
When to use Notorious Scoundrels? I find myself mostly using it back to back with Change of Plans to get a second consecutive use out of Change of Plans. One Reckless Diversion turn is generally enough, and Sorry About the Mess tends to be a mid-late game play, by which time you’ve probably burned your other command cards. It really depends on your list and your play style, however. All of Han’s command cards are worthy targets for Notorious Scoundrels.
Reckless Diversion: Making a Good Diversion

There are good diversions, and there are bad ones. A good diversion successfully protects the unit(s) you want protected while removing your opponent’s ability to game line of sight or weapon range to shoot the target they want.
Positioning is very important when you play Reckless Diversion, due to the “if able” part of the card text. First, you want to have in mind a specific unit or units you are protecting with your diversion. Second, you want to make sure Han and your second choice for your order token (Chewie or a Rebel Trooper unit in cover are good targets) are near the unit(s) you are protecting, preferably closer to the enemy. You also want to be mindful of Line of Sight blocking terrain, to make sure your opponent can’t move such that Han is out of their sight.
Managing intervening terrain
Consider the following example. For fun, let’s pretend people actually use ion. You are trying to protect your flamethrower AT-RT from that MPL-57i unit. How should you position Han on the previous turn to properly protect your RT?
Note the piece of line of sight blocking terrain. If Han is to the right or behind the AT-RT, the MPL unit can move to their left to hide Han with the terrain and shoot the RT, like this:


That is a wasted diversion, right there.
How should you position Han instead?
Make sure Han is on the opposite side of the AT-RT from the intervening terrain, like meow:

This way the ion unit doesn’t have a way they can move to only see the AT-RT.
Also don’t forget you get two order tokens. Use the other token to bracket the unit(s) you want to protect. This can facilitate the diversion even when there is intervening terrain that enemy units would be able to use to ‘scope’ Han out of line of sight, like in the below:

Even though the ion unit can use the barrel to hide Han, they won’t be able to avoid being able to see Chewie, since Han and Chewie bracket either side of the AT-RT.
Also note that if a unit can attack Han, they must, even if the attack is sub-optimal. For example, suppose a unit of Snowtroopers would like to flamethrower something that is range 1 away from them, but Han is within line of sight and at range 3. The flametrooper has to use his E-11 and shoot Han. Sad flametrooper.
Useful Upgrades
Command – Esteemed Leader

Han gets focused, a lot. You are going to want some form of guardian for those sniper shots and for your Reckless Diversion turn. If you aren’t running Chewie, it is worth finding the five points for this.
Command – Improvised Orders

Improvised Orders is a grossly underrated command upgrade. This isn’t for fishing for a token you want; it is for throwing back something you don’t.
If you are running a list with a good token mix (i.e., mostly corps), you will be able to throw back a non-corps token once a turn with this. I don’t always pull non-corps tokens from the bag, but when I do, I flip Improvised Orders. This helps hold back your important activations, and can also be used on a Sorry About the Mess turn to go to your bag and nearly guarantee pulling a corps token (ahem, Fleet Trooper) from it.
Training – Duck and Cover

Duck and Cover will guarantee Han getting heavy cover, even if he is shot in the open. What it won’t guarantee is Han getting two actions on his next activation. Be careful not to abuse this; you only have a 55% chance to clear a suppression token if you have two. Han really needs to have both his actions available.
Generally I find myself skipping Duck and Cover, as I don’t generally find that I have trouble keeping Han in cover (especially when using RTs) and I would rather spend the 8 points on something else. It’s definitely not the worst choice if you can spare the points, though.
Gear – Emergency Stims

If you have only 8 points to spare, I generally choose Stims over Duck and Cover, since this is much more likely to be useful. Don’t think of stims as extra health; it is an extra activation (potentially) which is still amazing on someone like Han.
List Ideas
I didn’t have this section in Luke’s commander article, and it won’t be in Leia’s, because both work in a variety of fairly “standard” builds. However, Han lends himself to specific builds more than his other Rebel counterparts. Han’s command cards are really begging for another high threat, high burst damage unit to support. Reckless Diversion and Change of Plans both provide windows during which you are dictating the pace of the game. You need to dive through those windows with as much force and violence as you can muster to really make the most out of Han.
You’ll notice all of these Han lists have Fleets, Flamer RTs, Luke, or some combination thereof.
Sorry About the Barbecue
This is my favorite Han list and the one I’ve personally had the most success with.
| 797 | |
| Han | 120 |
| Chewie | 110 |
| Tenacity | 4 |
| Rebel Trooper w/ Z-6 | 62 |
| Rebel Trooper w/ Z-6 | 62 |
| Rebel Trooper w/ Z-6 | 62 |
| Naked Rebel Troopers | 40 |
| Fleets w/ Scatter | 67 |
| AT-RT with flamethower | 80 |
| HQ Uplink | 10 |
| AT-RT with flamethower | 80 |
| HQ Uplink | 10 |
| AT-RT with flamethower | 80 |
| HQ Uplink | 10 |
Alright, so if you run into an AT-ST or Vader, you might just be screwed. This is a straight up armor skew.
Basically, you want to get the flame RTs in the action as quickly as possible, and you want to be barbecuing trooper units. Han’s command cards facilitate this.
My games usually look something like this:
Round 1: Change of Plans, Notorious Scoundrels
Round 2: Change of Plans, Reckless Diversion
Round 3: Sorry About the Mess
In your barbecue utopia, all three Flame RTs reach a target on turn 2/3 and get one or more rounds of barbecuing. Usually one of them dies.
That’s okay though, because after your opponent has finally dealt with your big scary flamer RTs, you have Han, Chewie, and some Fleets and Z-6s right behind them. Use those RTs for cover; Han gets heavy cover from them due to low profile. Hopefully they are all at decent health, Chewie having stripped a sniper shot or two off Han and the Fleets.
The idea of this list is to make so many threats that your opponent can’t deal with all of them.
Han/Leia/Chewie (Superfriends)
| 797 | |
| Han | 120 |
| Leia | 90 |
| Chewie | 110 |
| Tenacity | 4 |
| Rebel Trooper w/ Z-6 | 62 |
| Rebel Trooper w/ Z-6 | 62 |
| Rebel Trooper w/ Z-6 | 62 |
| Rebel Trooper w/ Z-6 | 62 |
| Fleets w/ Scatter | 67 |
| Fleets w/ Scatter | 67 |
| Sniper w/ hooks | 47 |
| Sniper | 44 |
There are quite a few different variations of “Superfriends.” Endless infamously used a list like this in Invader League Season 2 (and coined the list nickname), and he is the only one I’ve witnessed having success with it. Personally I’m not a fan of character heavy lists, because you really need to use the characters’ abilities to maximum effect to make up the efficiency gap between them and regular units. This is a very difficult list to play.
It can work though, and it is certainly thematic. Obviously you want to keep Han, Leia and Chewie close to each other, so Leia can feed dodges to Han and/or Chewie and duplicate them via teamwork. Don’t forget about protecting Leia, though. If you get all wrapped up in ZOMG FREE DODGE TOKENS and give them all to Han and Chewie, Leia probably isn’t going to have any, because this trio also needs to be advancing up the table. Your opponent then just shoots Leia. Even if you pass those hits to Chewie with Guardian, your opponent has just bypassed your stack of free dodge tokens.
Generally you want to just give one dodge to Han/Chewie from Take Cover, and give the other either to Leia or to a nearby Rebel Trooper unit (yup, they still need those too). One dodge is generally enough for Han and Chewie.
The real workhorses in this list are the Fleets; hopefully your opponent is so focused on your shiny characters and their free tokens that they forget about your Fleets. This is a great list to do the Sorry About the Mess – pull a Corps token from the bag combo.
Han/Luke (Flyboys)
| 795 | |
| Han | 120 |
| Esteemed Leader | 5 |
| Luke | 160 |
| Push | 10 |
| Stims | 8 |
| Rebel Trooper w/ Z-6 | 62 |
| Rebel Trooper w/ Z-6 | 62 |
| Rebel Trooper w/ Z-6 | 62 |
| Naked Rebel troopers | 40 |
| Fleets w/ Scatter | 67 |
| Fleets w/ Scatter | 67 |
| Sniper | 44 |
| Sniper | 44 |
| Sniper | 44 |
The Han/Luke template is another one with a lot of variation. It’s becoming more popular due in large part to the arrival of Palpatine. Palp offers Luke some challenges he hasn’t previously had to deal with (between Imperial Royal Guard and Give In To Your Anger). Han helps your list deal with Palpatine. A timely Change of Plans is very important here.
You will definitely miss Leia. If Han can deliver himself and Luke safely into the fray, though, they are going to tear up some trooper units.
Summary
Cast off the shackles of Skywalker. Give the scoundrel a shot. He excels at creating opportunities for other units and disrupting specific command card combos of your opponent. His pistol isn’t bad, either.
Chewie is a natural complement to Han, but be careful not to load up too heavy on heroes. Three character lists can work, but they are difficult to play. Make sure you have a plan for the rest of your list.

