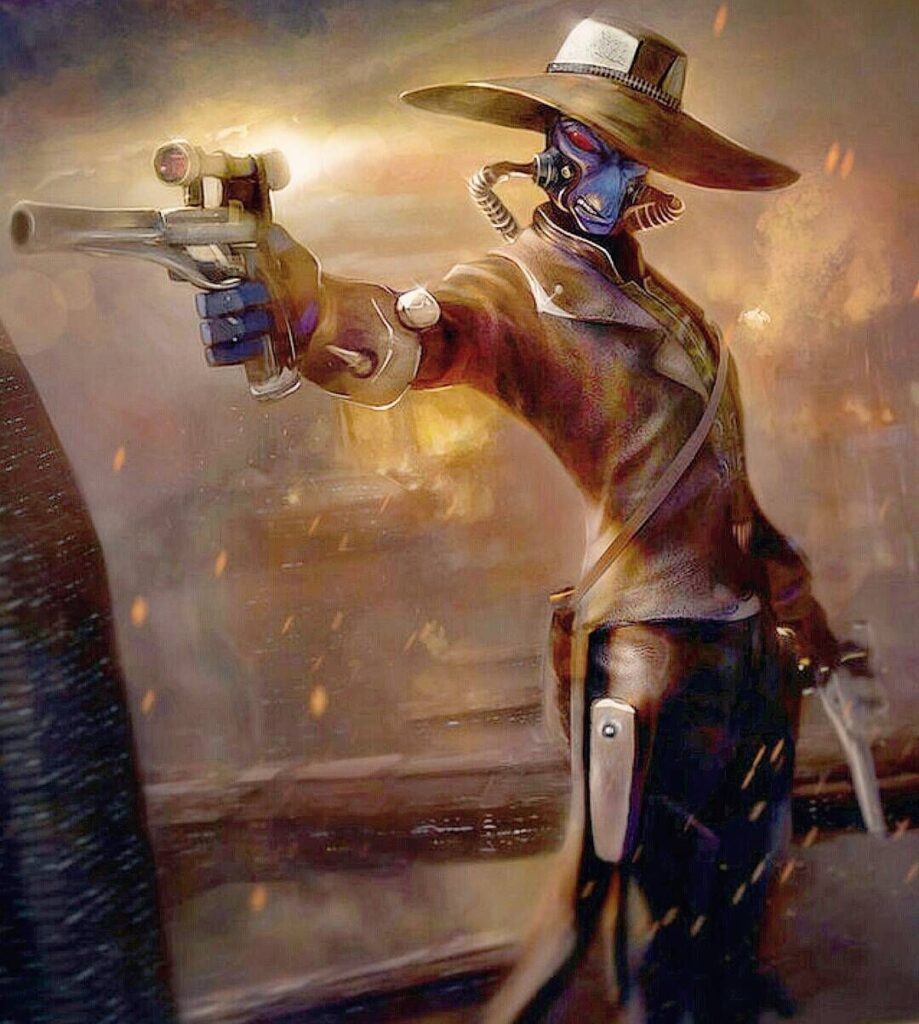

In this unit guide we’ll look at the (newly refurbished) Cad Bane for Star Wars: Legion.
Cad Bane is more than just a Duros with a fabulous hat. He is a flexible and disruptive threat on the battlefield. With his newly upgraded unit card that accompanies the Shadow Collective wave, he’s also very durable, making him a strong piece for objective play.
Before we go any further, a slight disclaimer; some of this content might be similar to that found in the (slightly outdated) Cad Bane strategy articles on the FFG site, which you can find here and here. Don’t worry… I checked with the author first.
Strengths
- Mobile
- Durable (for a white save unit)
- Disruptive abilities
- Chance for extra VP with bounty keyword
- Has a nice hat
Weaknesses
- Relatively low damage output for cost (and compared to the other Bounty Hunters)
- Short range
- Box only comes with one hat
Overview
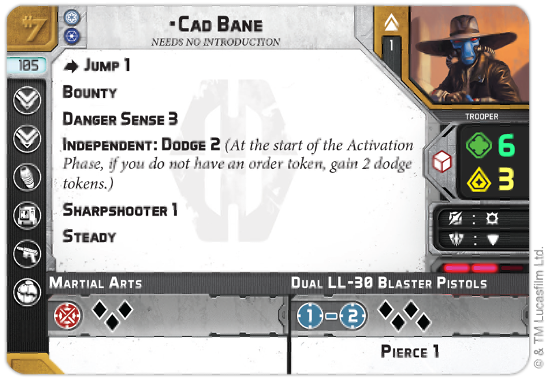
105 points: Quite a discount from his previous cost, this is a bargain for what you are getting now. The same cost as (new) Bossk and 15 points cheaper than (new) Boba.
Defense: White/surge save, Danger Sense 3, Independent: Dodge 2. Between the Danger Sense increase and Independent: Dodge 2, Cad Bane got a huge upgrade to his defense in the Shadow Collective update. Cad Bane is extremely durable now; and you can build in more ways to pile on dodges with some new upgrades, like Up Close and Personal or Prepared Supplies. The opportunity cost on Independent can be quite high (Cad Bane is timing sensitive) if you aren’t playing CIS. More on that later.
Offense: Dual LL-30 Blaster Pistols. Four black, surge/crit, sharpshooter 1, Pierce 1. This is decently reliable, but nothing special. Bossk and Boba both do quite a bit more damage, but this isn’t really the primary reason you are taking Cad Bane.
Offense: Martial Arts. Three black, surge/crit. Not a terrible melee profile, though hopefully you are using his gloves instead if you find yourself there.
Mobility: Speed 2, Jump 1. Cad Bane is quite mobile with Jump and Speed 2.
Courage 3: Very solid. This gives you some leeway to charge Danger Sense and not worry about losing actions.
Slots: Two training, one comms, one gear, one armament, one grenade. This is quite the bevy of slot variety. I can’t see ever using the grenade slot, but the rest of these all have excellent options. At minimum you will almost certainly be filling both training slots.
Bounty: Extra VPs stronk.
Steady: One of the best keywords in the game, Steady allows Cad Bane to do peekabo attacks (pop out from behind line of sight and then back) and also extends his effective threat range, if you want to double move before attacking.
Command Cards
Before we get into any specific tactics, we’ll hit these, because they sort of define how Cad Bane works. Especially when he decides to make the rules.
I Make the Rules Now
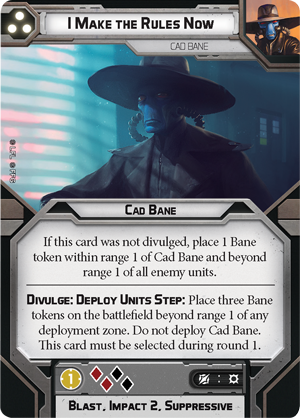
You reveal I Make the Rules Now at the start of the Deploy Units Step, and you are then required to play it as your command card in round 1. Alternatively, you can choose not to reveal it, and just play I Make the Rules Now like a normal command card, in which case you place just one Bane Token instead of three.

Bane Tokens are placed face down on the battlefield, beyond Range 1 of all deployment zones. When a unit moves, deploys, or is placed at range one of an enemy Bane Token, the effect is resolved. There are three possible effects:
Here I Am: The Bane Token is replaced with the Cad Bane miniature and he issues himself an order. This token can also be revealed voluntarily at the start of any command phase, without an enemy unit having to trigger it. And yes, he does get his dodge tokens from Independent if he doesn’t start on the table.
Kablamo!: The token detonates using the area weapon on the I Make The Rules Now command card.
Smoke and Mirrors: The token is removed and nothing else happens.
Basically, the token can blow up, spawn Cad Bane, or do nothing.
The most important of these effects is the one that places Cad Bane on the table. Like units with the Infiltrate keyword, Cad Bane can deploy almost anywhere on the battlefield, excluding in your opponent’s deployment zone. One key disadvantage relative to Infiltrate is the Bane Tokens are placed before any units are placed, which means A) you have to decide where Cad Bane is going to be before your opponent deploys any units and B) your opponent can respond to your token placements with their own deployments, including potentially revealing the tokens during the deployment phase with abilities like Scout or Infiltrate.
The first couple of times you play Cad Bane, make sure to place the Here I Am token in a location where Cad Bane will be safe when he is revealed. It is okay if it ends up being obvious to both you and your opponent which token is the Here I Am token. It’s easy to get cheeky and aggressive with your token placements, but if Cad Bane is revealed prematurely in an exposed location, he can get quickly eliminated before he has a chance to impact the game. I generally place the Here I Am token behind a line of sight blocker near the center of the table, so he can react to how my opponent deploys.
There is a bit of tension between the two effects on these tokens; you want the Kablamo! token to be in a spot your opponent is likely to go, while you want the Here I Am token to be in a useful but not exposed position. I usually use the “Smoke and Mirrors” token as bluff for Cad Bane’s location, placing it in a plausible spot he should be, and then put the Kablamo! token near one of my opponent’s objectives or in a key lane they need to advance through. You could also use the Kablamo! token as a third bluff for Cad Bane’s location. I tend to do this most against opponents that either have a lot of scout moves and can thus reveal closely placed tokens early, or have access to mechanics that can mitigate the damage on the Kablamo! token before walking into it.
Instead of Divulging I Make the Rules Now, you can also just hold it in your hand and deploy Cad Bane normally, dropping a Bane Token sometime during the game. If you do this with a Here I Am token, Cad Bane will appear at that token’s location when it is revealed, regardless of where he currently is on the battlefield. This can be handy for getting Cad Bane out of trouble, or running away with an objective.
If you are playing against Cad Bane, keep in mind two things 1) make sure your opponent is doing all this correctly (it’s a lot of rules that Cad Bane players themselves often mess up) and 2) always reveal a Bane token with a unit’s first action (or something like scout move). This second bit is very important; if you reveal the Here I Am token, you want to make sure you have another action to (probably) attack Cad Bane or otherwise react to his deployment. If you blunder into the Here I Am token with a unit’s second action, Cad Bane will be able to immediately go, shoot something, and then bury himself safely in melee with your unit that just went.
I’m In Control
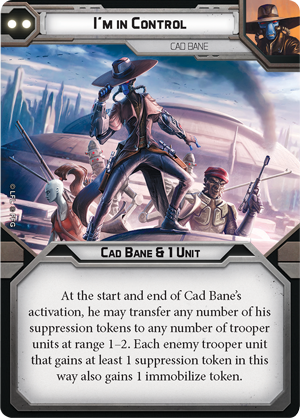
I’m in Control is an effective way to shed suppression while disabling nearby enemy units. “At the Start of Activation” effects occur before a unit’s rally step, so I’m in Control can be played when Cad Bane has a large stack of suppression to avoid him panicking or losing actions. Note the targets do not have to be enemy trooper units; Cad Bane can pass suppression tokens to friendly units if necessary (not a bad way to charge Danger Sense on some friendly Pykes).
Enemy units that receive suppression from this card also gain an immobilized token, further slowing them. I’m in Control is a great card to play to thwart your opponent’s plans when one or more of their units are trying to reach an objective. It also allows Cad Bane to disengage from melee when he is equipped with his gloves (whether they are exhausted or not) if you give at least one immobilized token to the unit he is engaged with.
I’m Your Worst Nightmare

I’m Your Worst Nightmare is a simple but very effective card. It allows Cad Bane to make two attacks, while improving his defense with Uncanny Luck. If Cad Bane already has a couple of suppression tokens to enable Danger Sense, he can be very difficult to take down on the turn you play this.
Combined with Steady, Cad Bane can move, attack, move, and then attack again. This can be a very effective way to claim a Bounty, especially if Cad Bane is equipped with Hunter, which would provide an aim token on each attack if his target is wounded.
If you are already engaged with a target when you play this, you can zap them with the gloves, disengage, and then shoot them (or something else) off your move.
Upgrades
Armament
There is really only one choice here. Should you take the gloves, or not?
Electro Gauntlets
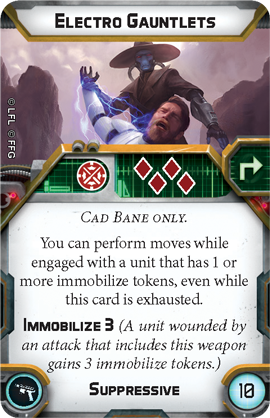
Cad Bane makes use of these things repeatedly against some of the most competent Jedi in the galaxy (Ahsoka and Obi-Wan, among others)… by grabbing their limbs with his hands. Seems like that would be somewhat more difficult than hitting those limbs with a bladed laser sword, which Darth Maul could never seem to manage.
Anyway… this thing slaps Cad Bane’s target with four red dice and not one, not two, but three immobilized tokens, which is enough to fully immobilize any unit in the game, Burst of Speed or not. It’s also Suppressive, which feels sort of niche, but suppressive melee weapons are rare and somewhat useful against Jedi for stripping melee standbys which otherwise are rather difficult to strip.
In addition to all of the above, it also allows Cad Bane to perform moves while engaged with a unit that has one or more immobilized tokens… regardless of where those tokens come from. It could be these gloves, obviously, but it could also be I’m In Control, Boba’s Whipcord, Din Djarin’s rifle in melee, a Pyke or Magna whip… there are a lot of options.
For the overall utility and melee counter capability they offer, the gloves are absolutely in the “take them unless you really don’t have the points” category, and even then you might want to consider finding those points somewhere else.
Training
Training is of the most flexible upgrade slots in the game and one of the most useful for Cad Bane. There are quite a few strong options here. Your choice of training upgrades will really lean into how you end up playing Cad Bane.
Duck and Cover
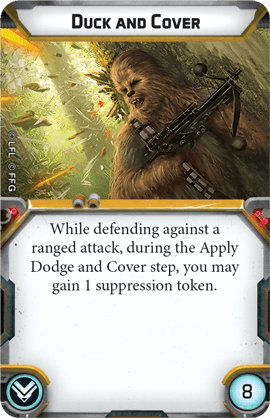
There aren’t many characters that actually like suppression, but Cad Bane is one of them. It charges both Danger Sense and I’m In Control. If you are planning to use Cad Bane primarily as a durable and annoying objective unit, Duck and Cover is going to be a good choice.
Situational Awareness
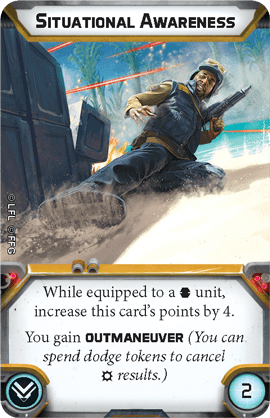
Another strong choice for a defensive Cad Bane, Situational Awareness really leans into those free dodge tokens he gets from Independent (or from other upgrades like Up Close and Personal).
Up Close and Personal
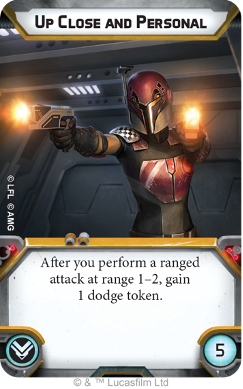
Speaking of dodge tokens… Up Close and Personal won’t give Cad Bane quite as much value as it does on a unit with Gunslinger like Han or Sabine, but free dodge tokens are free dodge tokens, and Cad Bane does love him some dodge tokens.
Hunter
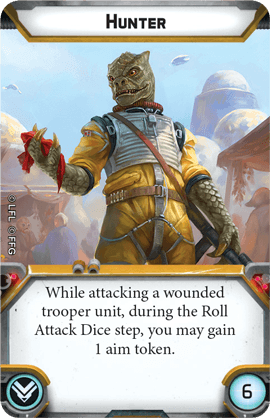
Cad Bane’s ranged attack is not exactly inspiring compared to his colleagues Bossk and Boba Fett. Hunter raises its reliability quite a bit, especially on Cad Bane’s one pip turn when it is potentially two aims.
Offensive Push
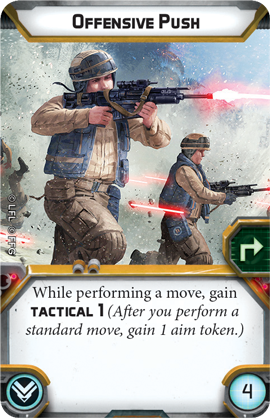
Another great card for an Offensive focused Cad Bane. Bane can actually get more uses out of this than some other characters; Steady affords some potential chances to Recover (which also refreshes his gloves and potentially other upgrades like Ascension Cables). There is a cheeky combo here with Ascension Cables and Steady; Scale gives you a free move action before or after a clamber action (which could of course be another clamber action), and Steady gives you a free attack after a move action (which could be a clamber or Jump action). You can Jump or Clamber to the top edge of a building (popping both your Offensive Push and Ascension Cables), make a free attack with Steady, clamber back down off your free move action from Scale, and then you have an action left to Recover, refreshing both the Ascension Cables and Offensive Push to do it again next turn.
Comms
Another very useful slot for Cad Bane, and not one that many characters have.
Comms Relay
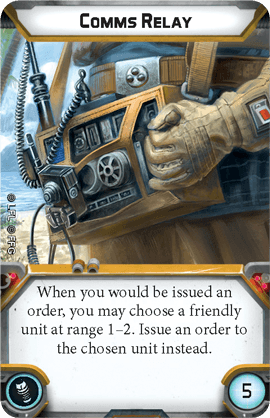
Comms Relay allows you to trigger Cad Bane’s Independent keyword even on turns when you play his command cards. Just be sure you don’t need order control on Cad Bane on the turn you bounce his order away.
This is particularly suited to utilizing Cad Bane in a Separatist list, where you can just reverse sort your pool and have Cad Bane in the bag all by himself. I don’t think droids can eat cake, but if they could, they would have it and eat it too.
Comms Jammer

A solid choice for a Cad Bane that is likely to be up in your opponent’s face early and often. This is going to be a lot less useful against lists like Shadow Collective where the important units are mostly just ordering themselves, but it’s potentially devastating against droids or other lists that require a lot of faceups.
Emergency Transponder
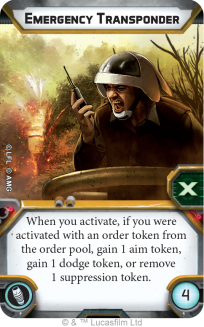
An extra token on one those turns when Cad Bane doesn’t have an order. Hard to go wrong here if you have the points.
Gear
Prepared Supplies

More dodges. Prepared Supplies would pair quite well if you are also running Situational Awareness and/or Duck and Cover, for an extra durable Cad Bane.
Ascension Cables
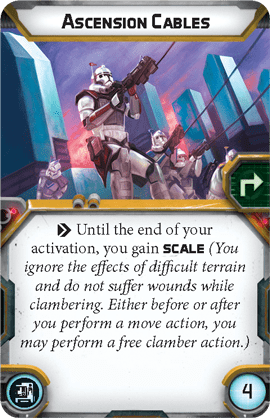
This pick leans directly into the Scale-Shoot-Scale-Recover combo discussed above under Offensive Push. I would run this together with Push for that combo or not at all.
List Ideas
Bane Spiders
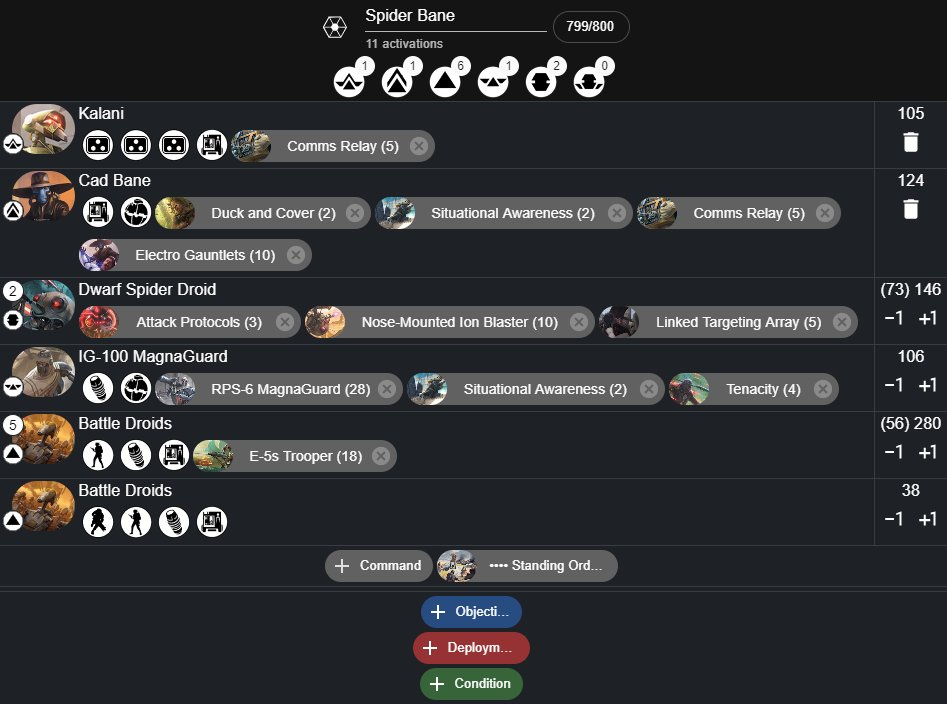
This is basically the “standard” Kalani/Spider template with Cad Bane instead of a second magnaguard. I think the demise of spiders has been somewhat exaggerated, and it’s left an interesting hole that A-A5s (with Black Sun) has charged right into. A list like this would be an interesting counter counter-meta pick.
STAPs Double Bounty

Now this makes for a nasty objective deck, along with the potential to score an extra VP or two. Just make sure your T-Series doesn’t get bountied himself by an opposing Bounty Hunter. STAPs are still very solid, including against the new hotness Pykes (those dodges disappear pretty quickly when they are flanked and cover isn’t stripping anything). They’re just bad into Ion Spiders, but no one is playing those right now anyway… right? Right?!?
Empire Double Bounty
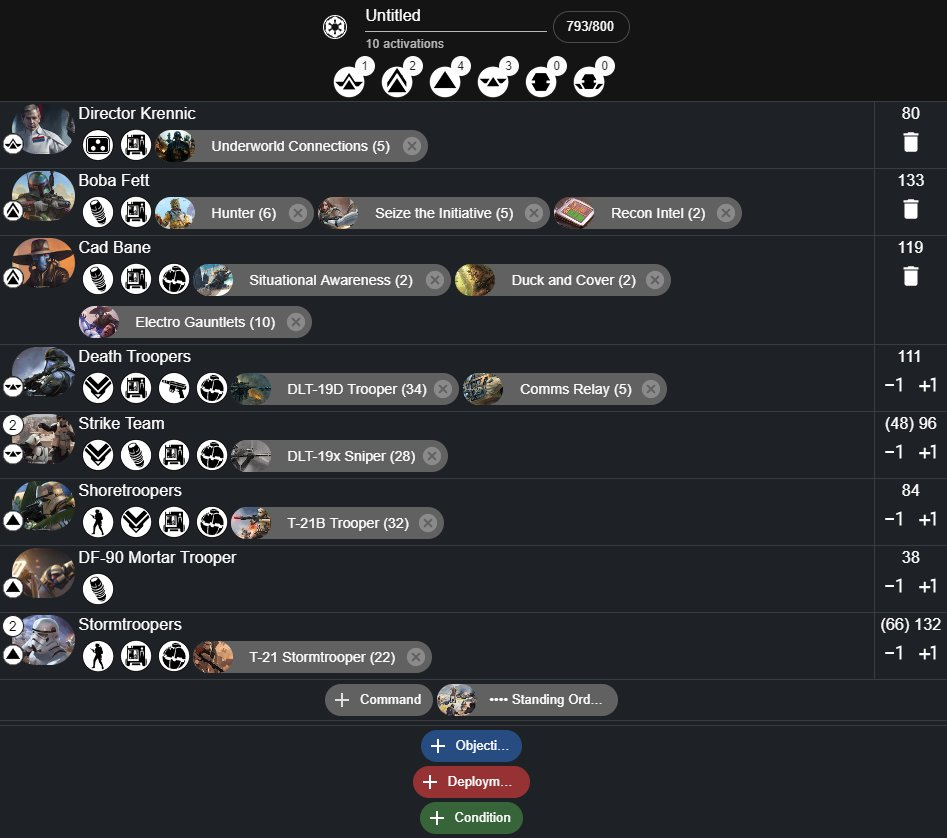
There are countless different ways to do Empire Double Bounty (Izzy just won GenCon with a very interesting Iden version). I went with Krennic here because I like a bit of trooper beef, and Krennic gives you that roundabout way to proc target on at least one unit of Shores every turn (via Entourage and the Deathtrooper comms relay). You also have the Deathtroopers themselves to push hits past all those Pyke dodges and a couple of High Velocity snipers to boot.
Cad Bane and Boba together make for a very mobile and disruptive objective-focused duo.
Shadow Collective Double Bounty
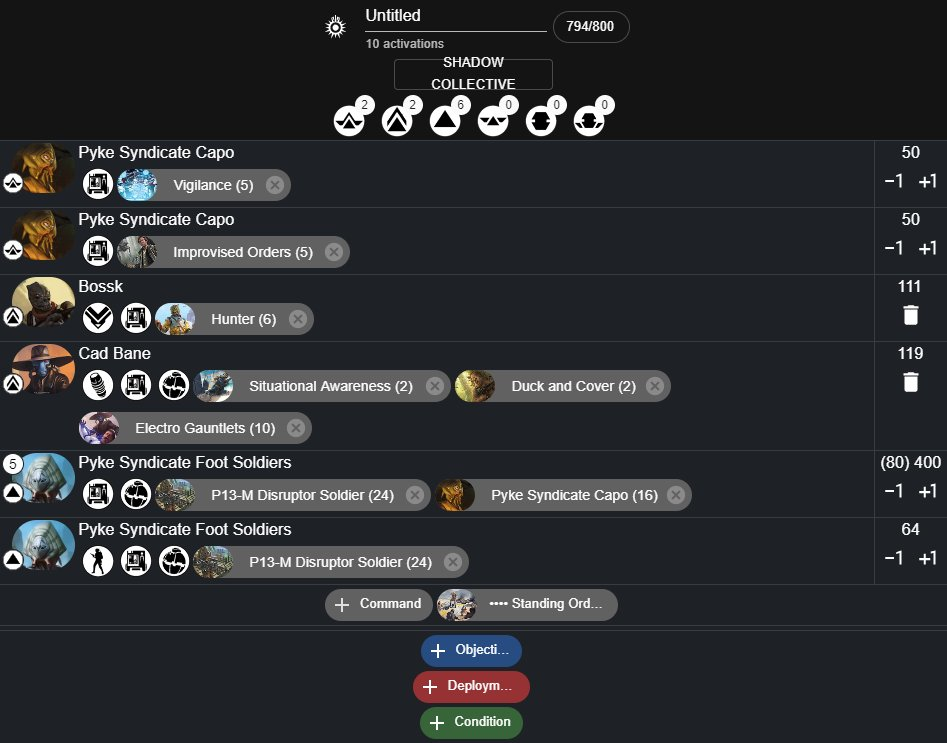
Simple, effective, lots of Pyke beef to support your two Bounty Hunters. In case you don’t have seven(!) Pyke boxes for all the Capos in this list, you could certainly shuffle around some of the personnel upgrades or incorporate some Black Sun Enforcers.
Summary
Cad Bane has a new look and a new card, and he’s hitting tables again with his (also new and improved) bounty hunting colleagues. Give him and his iconic hat a shot.


6 Responses
Oh my goodness Kyle, thank you so much for this article! I’ve been waiting for a Cad Bane unit guide for ages! Thank you so much!
Thank you for the article. I have two questions if I may?
1) For “I make the rules now”, where are you reading it needs to be the start of Deploy Units? I read “during” as “any time”, so could be at the end
2) Please could you review and expand on the example of combining with Ascension Cables, as I don’t follow what’s happening (and to me it sounds like you’re triggering of things you shouldn’t):
There is a cheeky combo here with Ascension Cables and Steady; Scale gives you a free move action before or after a clamber action (which could of course be another clamber action), and Steady gives you a free attack after a move action (which could be a clamber or Jump action). You can Jump or Clamber to the top edge of a building (popping both your Offensive Push and Ascension Cables), make a free attack with Steady, clamber back down off your free move action from Scale, and then you have an action left to Recover, refreshing both the Ascension Cables and Offensive Push to do it again next turn.
Cheers!
1) The card has Divulge: Deploy Units Step. If you check the Divulge keyword in the RRG, it must be at the start of the referenced phase or step, not during (which in this case is Deploy Units)
2) Scale allows you to take a free move action before or after a clamber action. A clamber action is itself a move action, so you can clamber after a clamber as just one action with Scale. Steady also allows you to make a free attack after a move action (again, of which clamber is one). After your first move, you have two simultaneous triggers to resolve: the free move action from Scale, and the free attack from Steady. As the activating player you choose which order these effects resolve in, so you would do the free attack first, followed by the free move action (to clamber back down). At this point you’ve still only spent one actual action (as your attack and your clamber down were both free), so you have one action left to Recover.
Not sure I’m following. Scale allows free Clamber before or after a move – not a free move after a Clamber. You need to spend a move action to get the free Clamber… You don’t get a free move by performing a Clamber?
Clamber is a move action, so you can trigger Scale with clamber, or with jump.
Nice writing! Describes most of Cad tricks.
I love Cad as character, so was quite happy about his new refreshed card.
Not sure if now pickaboo trick without hq uplink(due to independent is worth as much as before)
I would also gladly read about tactics for certain objectives. Would be great to see Obj/dep/con decks for presented lists.
Duros seems as ideal character for beeing objective monkey. I wonder if he would make a nice duet with Maul(also nice obj. Monkey) instead of Bossk, any thoughts?