

This is a unit guide for Commander Cody in Star Wars: Legion.
Commander Cody, one of the first clones that we came to know as more than just a clone, forever following and giving orders to the last.
Commander Cody Overview
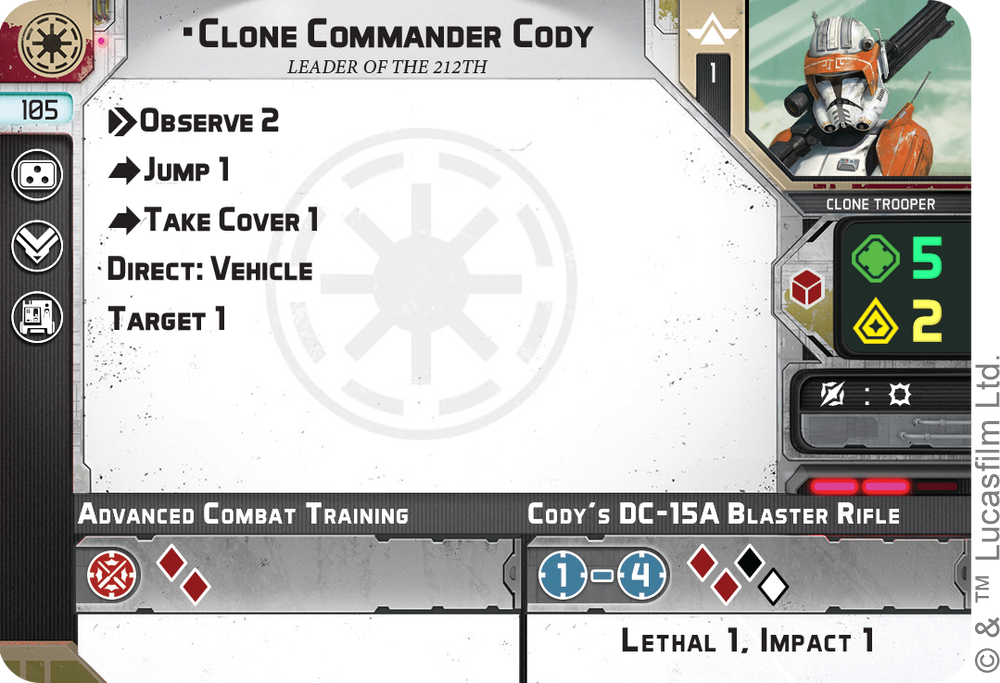
We start out with Cody’s unit card which is already a really solid card.
Keywords
Cody has a bunch of keywords on is card, let’s just remind ourselves what they all do before we continue.
Observe 2: This free action allows you to put two observe tokens (which each allow you to re-roll one die when attacking) on an enemy unit up to range 3 away and in line of sight.
Jump 1: Boing! It’s a jetpack, this one just lets you jump instead of moving over terrain up to height 1 without reducing speed.
Take Cover 1: This action lets you throw a dodge token on a unit at range 1 of Cody.
Direct: Vehicle: This keyword lets you put a faceup order onto a vehicle at range 1-2 (or further as you’ll see later) during the issue orders step.
Target 1: If Cody gets a faceup order token he also gets an aim, nifty.
Strengths
- Solid Offence
- Slew of Solid Keywords
- Survivable
Weaknesses
- Courage 2
- Can Die (Especially to Pierce)
- Unfocused
The last point here in weaknesses is just overall that Cody does a lot of things, and sometimes it seems, he’d be better buoyed by focusing on fewer things and doing them better.
Points
Commander Cody comes in at a respectable 105 points. You certainly won’t be throwing him into a list willy nilly at 105 but you can certainly make room for him in a variety of lists. This 105 will often be a bit more as you fit an upgrade or two or three onto Cody. He can 100% be run at base 105 though.
Offence
Cody’s offence is very good. Throwing a rainbow plus another red die up to range 4 with plenty of aim support and surge:crit you are sure to make dents in your opponent. Cody can act both as a mid range brawler, trading shots with your opponent or more like a sniper/artillery piece, lobbing shots from range 4 away. Cody’s offence is really only worth it when you bring enough aim support for him (which isn’t hard) to make sure he always hits something. Cody is also of course in the fire support faction which he is excellent at utilizing. Cody’s ability to start a fire support is so good because he has most critically surge:crit.
Defence
Cody is relatively survivable featuring 5 health and red saves. These red saves are usually surging as you should have not only aim support but also surge support. Cody can die though. 5 health is really not that much and he is quite susceptible to pierce with no protection from it. You will want to keep Cody safe through a combination of range and LOS control plus abilities such as dodge sharing or guardian to not have to roll many saves with him.
Support
Cody’s primary support ability is Direct. This, as always with clones, is a crucial keyword to help get order control and/or fire supports set up. Being limited to only directing vehicles isn’t ideal sometimes, but Direct is always good to have. When building your list you will want to figure out how best to utilize this keyword.
Observe can also count as a support ability, but usually you’ll be using those tokens to re-roll Cody’s own attack dice.
Upgrades
Cody has three upgrade slots, command, training and gear. This gives us a plethora of build options for Cody.
Command
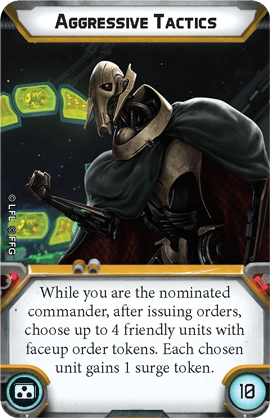
A great upgrade for clones in general, and Cody in particular is Aggressive Tactics. This card is particularly useful when you can always guarantee four faceup orders through a combination of command cards and Directs.
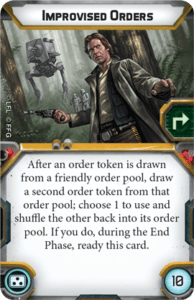
An almost always useful upgrade, Improv still is useful on Cody. To be fair you’d rather to have this upgrade on a character you’d have the luxury to recover to use multiple times a turn, often once a turn is plenty. Especially as Cody has Direct, you can often have only 2 types of tokens in the bag for instance, Improv really can help you pull what you need, or even more so, not pull what you don’t want.
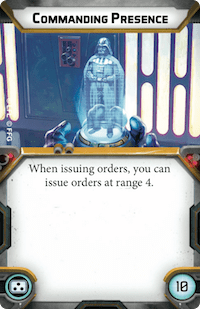
So remember when it was hinted about Directing orders at further then range 2? Well here is one way to do it. This is really useful when you have, for instance, BARC speeders which are harder to keep closer to your lines inherently.
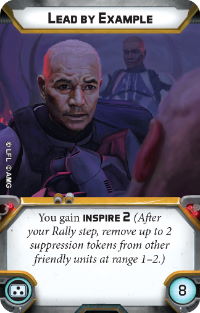
Lead by Example is quite a solid upgrade to add to any clone list. Clone units, by virtue of their defensiveness, often have quite a lot of suppression. Clone actions are super important to not lose so Inspire is really nice to have. Given all this, getting two actions with Cody is super important, therefore getting Lead by Example on another character beside Cody would be ideal.
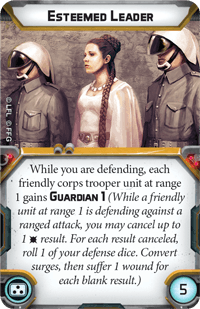
So you want to keep Cody alive? Why not a bunch of Guardian? Well why not just use Boil…
Really Esteemed isn’t the worst idea but you have better ways to do it.
Training
Cody’s training slot really doesn’t have the best options right now.
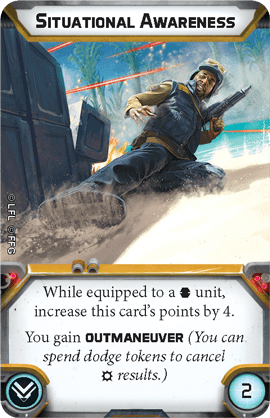
If your list is based on sharing dodges to keep your clones alive then SA is probably a good idea to keep your commander alive. SA is four points though and that can quickly turn into a lot of points if you have many copies of it.
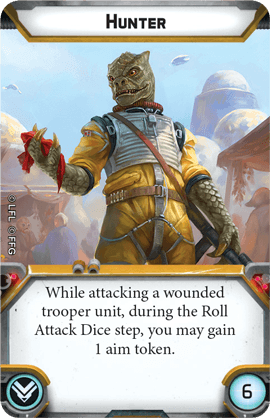
As Cody relies so heavily on aim tokens why not get a few more? Cody often acts most like Bossk when he is getting into combat, lobbing heavily aimed shots from far away. Hunter is very much a meta choice. If you anticipate facing a lot of multi wound units then hunter is rather good, otherwise very meh.
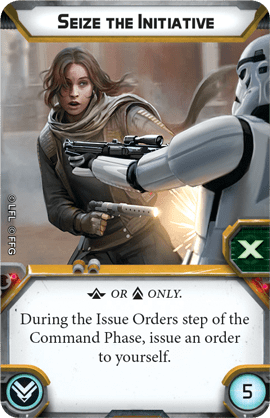
Seize the Initiative is as always a solid upgrade to bring for characters to help fill the gaps of faceup orders, particularly for Cody where he depends on Target to get at least one aim, making sure he has a faceup order is super important.
Gear
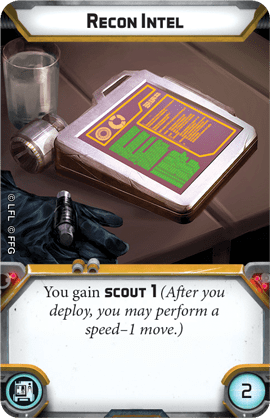
Scout? Always solid. Not very required on Cody, but a solid two points to spend if you have em. Probably put Recon Intel on a full unit before Cody.

Portable Scanner gives you Take Cover 1, this gives Cody a total of Take Cover 2. Two for the price of one is usually a good deal. In this case, This upgrade is really more of a trap then anything. Using Cody as a dodge generator is just not good value.

If your game plan counts on big fire supports then Targeting Sopes can make a lot of sense to absolutely ensure that your shots hit incredibly hard. This upgrade is really only worth it if Cody is your absolute primary fire support starter.
Command Cards
3-pip
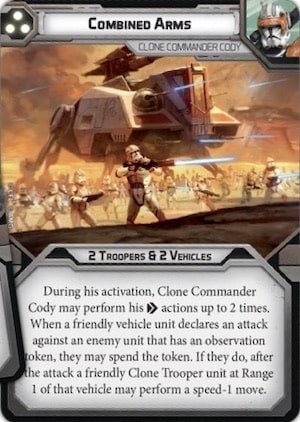
There’s a lot of text on this card….
TLDR version. Cody can observe twice (for a total of four observe tokens). The other part is that if a vehicle attacks a unit with an observe token, that token can be spent to make a Clone unit at range 1 of the vehicle move speed-1.
This card can do some tricky things, out of sequence moves are always good to have. However the move is really a very situational card. The observe effect of this card can be combined with the 1-pip for some great last-firsts.
2-pip
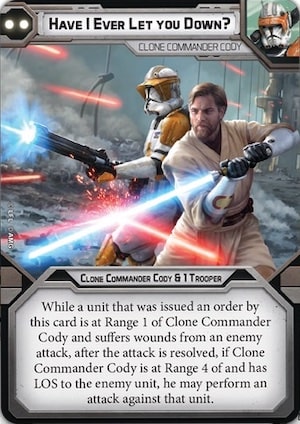
This card also has a lot of text. Basically if Cody or a friend get injured then Cody can shoot back.
This card has two main uses. The biggest way to get a lot of offence out of this card is to pair it with Boil so that anytime Boil Guardians (and takes a wound) Cody can shoot back. This effect does force Cody to stand in an area where he is vulnerable though so it turns into a distraction carnifex.
The other use for this card is as a way to affect your opponents target selection. It just adds another potential cost for your opponent shooting who they want to shoot and you don’t want them to shoot.
1-pip
Again, plenty of text.
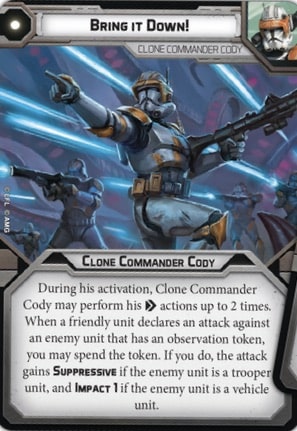
TLDR: Cody can do the double observe trick again with this card. The thing you can do with those observe tokens if you don’t spend them for re-rolls is get Impact against vehicles or Suppressive against Troopers (Dark Troopers just sneer at this card.) This effect is actually quite useful if your opponent has a centerpiece vehicle like an AT-ST. This card can get an additional Impact 4 into that vehicle over four attacks.
The last-first trick you can do with Cody is as follows. Turn X, you play Combined Arms and go last with Cody who should start the turn hidden. During Cody’s activation you pop him out of hiding to range 3 of something important and double observe that thing and shoot it. The following turn you play Bring it Down! This reverses the process and you go first with Cody. This combo gets great quality shots out of Cody while keeping him quite safe. This last first technique is something to be used often with Cody.
Special Shout Out
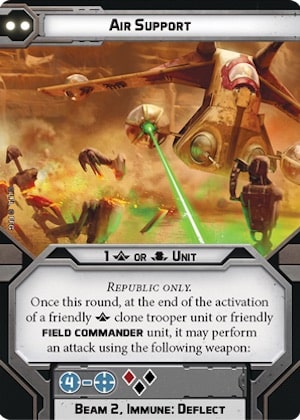
Air Support isn’t most optimally used by Cody, that honour still goes to Rex as Rex features Sharpshooter. One thing that Rex can’t do with this card that Cody can however is target the same unit twice. If you’re shooting a unit in the range 4 band (ie outside of range 3 but closer than 5), Cody can then use both his Rifle and the Command Card weapon to target the same unit. This might not be the most optimal depending on the situation, but if you need suppression down or really need to try and kill something this can be a way to do it.
Lists
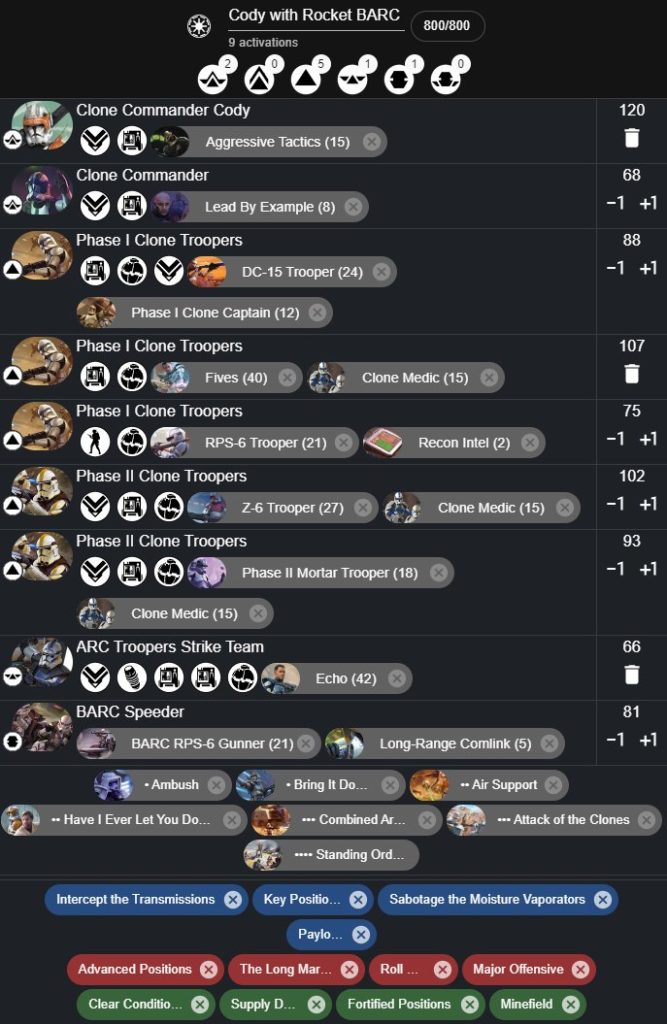
So do you want a ton of clones who will just point at an enemy line and swamp it with fire? Look no further.
This list is one that I played for a decent chunk of time and just leans into more guns is better guns theory. This list doesn’t even bring any exemplar shenanigans or anything, just straight up clones (and a BARC.) One critical weakness of this list is that if melee units, especially Force Users ever touch your lines you’ve probably just lost. As with any pure gunline you have to very carefully manage your ranges to ensure that melee units can’t get to you. The way you deal with melee threats is by throwing many handfuls of dice at them.
One trick to note with this list as well is that the Rocket BARC instead of having a great upgrade in the form of Linked Targeting Array has Long-Range Commlink instead. This allows Cody to Direct the BARC from anywhere on the field allowing it to operate anywhere. Also, because Cody has Aggressive Tactics, the BARC always has a surge token which makes it actually fairly survivable, and something that your opponent has to put real resources into dealing with.
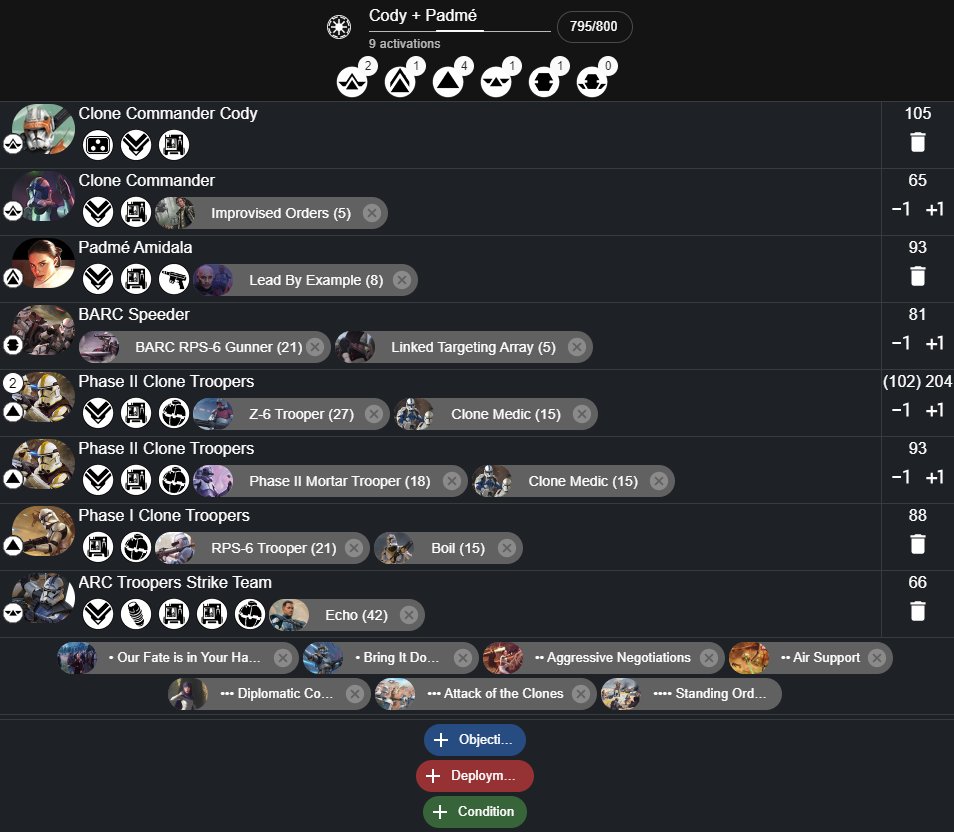
A similar list to the last one, but this time incorporating Padmé to get you some Exemplar action. This list does basically what the previous one did but now with Exemplar to get even better shots and better defensive tech in place. This list still has the problem of dealing with melee threats and force users. It does gain Padmé’s 2-pip which can help with your range control.
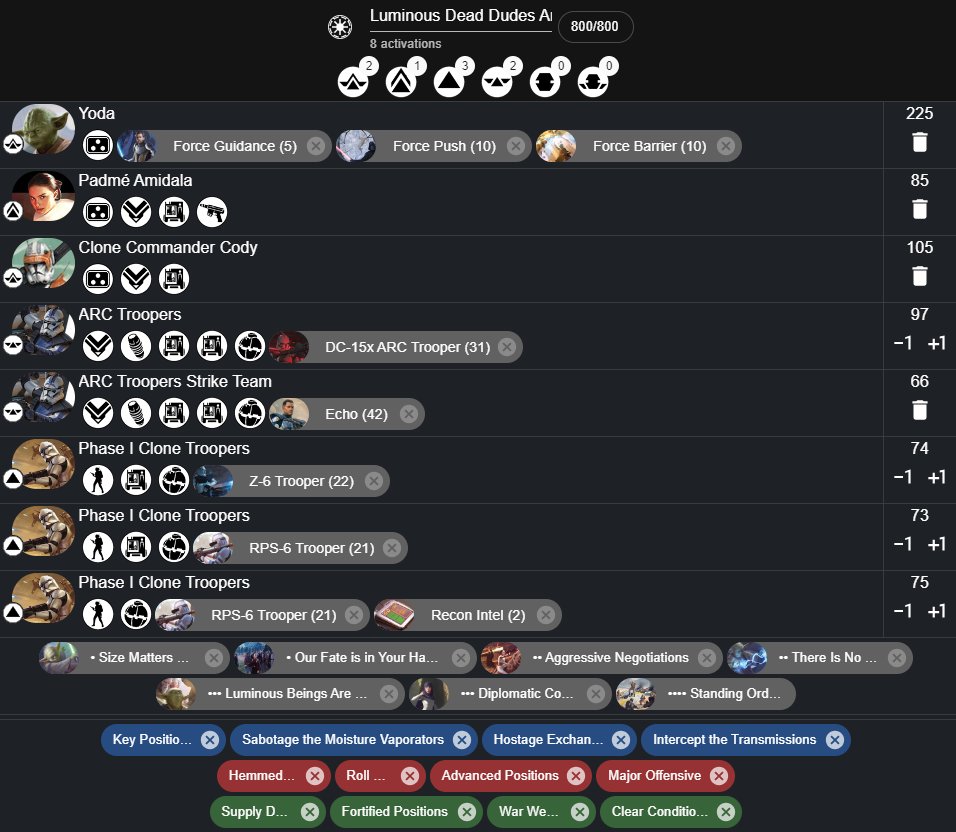
A special commendation should go to this list which recently placed 3rd at PAX: Unplugged. This list piloted by our own Michael Barry (Dashz) features over 400 points of characters, wild.
The thing that Cody is doing in this list is acting as a Bossk/another ARC sniper. This is particularly effective as Cody is often getting upwards of 4 or 5 aims to ensure that his shots and fire supports really hurt the opponent.
This list also avoids the gunline problem of not being able to deal with melee threats by having none other than Yoda in the midst of the army to beat back anything getting close. This list is very powerful and expect to see it or others similar becoming even more prevalent in the meta to come.
Final Thought(s)
Pew Pew!
Cody is a good commander who is able to act as a pseudo Bossk/Sniper while helping to tie together many a list. Making sure your Cody is doing stuff (mostly attacking) is critical to getting back the points you invest into Commander Cody.

