

Learning to Count In Star Wars: Legion
One of the largest goals of Legion 101 is to help new players understand the fundamentals of “good Legion play.” I put “good” in quotations here because it’s a catch-all term for a set of ideas about how to play the game that, random factors willing, produce a positive result.
The number one way to begin to improve is becoming more deliberate about the way the game is played. These articles are written in the hopes of taking some portion of one’s Star Wars: Legion play off autopilot. How many times have certain game states caught me unaware, and victory slipped from my grasp?
So, that said, what does the title phrase “learning to count” actually mean? There are multiple parts of the game where pausing for a moment to gather some data about the board state will help you make better decisions. That’s a complicated way of saying that counting up certain aspects of the board will make you more aware of your win condition, and can guide you towards the next best move.
Counting Activations
Legion is a game played by alternating activations. This means it’s advantageous to have more activations than your opponent. You should always count up, and be aware of, the number of activations that either player has.
Generally speaking, moving towards your opponent’s unactivated units is not good. You are simply moving units into harm’s way because those units are likely to shoot back and punish you for your aggressive move. You need to be aware of what units on your opponent’s side have activated and what units have not. If there are no activations left on your opponent’s side, you are free to make the best moves with no immediate fear of reprisal.
When there is activation disparity in your favor, winning priority is not always the best tactic. Instead, you can leverage this disparity by trying to lose priority, which amounts to “going second,” to strengthen your advantage. This is something that is commonly seen in the first turns of a game where both sides play a high-pip card, such as Assault or Standing Orders. The goal is to create a situation where you can act last, and therefore safely.
Here’s an example: You have nine activations, and your opponent has eight. By going second, your eighth and ninth activation happen after your opponent’s eighth and last activation, increasing your advantage from one to two.

The greater the disparity in activation count, the easier it will be to make “safer” moves. “Safer” in this instance means moves your opponent cannot do much of anything to counteract, or at the very least, not immediately punish you. The last few activations of a turn where there is a great disparity can be so safe, you could almost call them “free” because the risks are close to nothing.
Question: “If I have 11 activations and my opponent has 9, how many “free” activations will I get if I lose priority?”
Answer: “Three”
This advantage is often connected to the start of the following turn, when it becomes relevant to win priority and act first. These two ideas together are referred to as a “last-first attack.” This is great for units that are fragile, short ranged, or important to protect, like Boba Fett or Luke Skywalker. These are the times when you want to win priority above all else so you can make a crushing attack and then retreat to safety.
What if you are on the side that is short of activations? You are under the gun, and need to make aggressive moves to close the gap, but they must be tempered by prudent measures, as mentioned above. You do not want to risk too much, because it may result in making the situation worse. It can be a tough balance to strike, but it is not impossible to overcome. Lists that bring very high activation counts sacrifice unit quality to do so, and these units can sometimes be easily defeated by a focused effort from your army.
Core lesson: Having more activations than your opponent is advantageous, and even more so if you go second. Favorable activation disparity allows you to make moves your opponent can’t punish. If you have fewer activations, you need to think about ways to make things equal.
Counting Command Cards
Knowing when to lose and win priority is critical, but how do you execute? Priority is determined during the Command Phase. You can use counting to help navigate this part of the game, too.
There are three large consequences of the Command Phase during a game of Legion. First, there is priority. The player whose card has the fewest pips wins priority. If there is a tie, it goes to a die roll. If there is a tie but the nominated commander has Cunning, that commander automatically wins. Second, there is the assigning of face-up order tokens based on the card being played. Third, there is the command card’s effects.
Your opponent’s command hand is hidden information, but you can use counting to make an educated guess at its contents. First, look at your opponent’s list to see what commanders or operatives they have brought. The presence or absence of certain characters means you won’t have to worry about their commands. Additionally, it’s very strong to defeat a commander or operative early in the game, denying the use of their command cards.
Next, look across the table and see what command cards your opponent has played. You can rule out certain cards based on what pip levels have already been played, and if you see two cards of the same pip level have been played, you can determine that no more cards of that pip level will be coming your way.
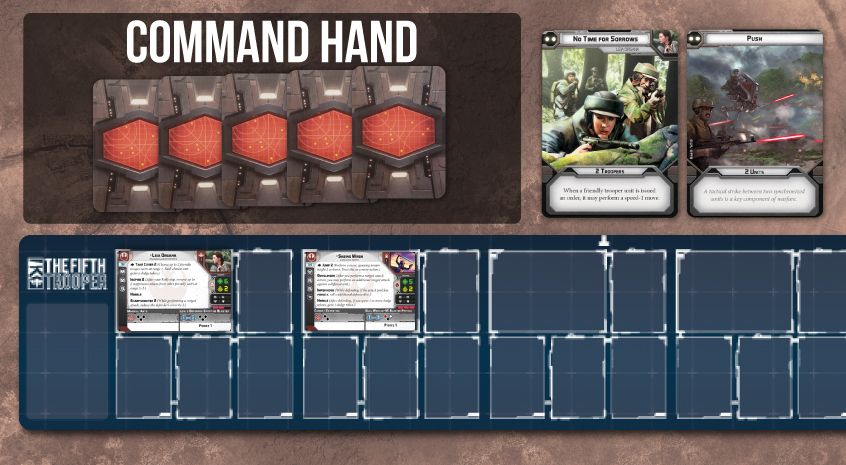
Question: Your opponent is playing Leia and Sabine. Looking across the table, you notice that the “Push” and “No Time For Sorrows” command cards have already been played. What card(s) can be ruled out here?
Answer: “Symbol of Rebellion” and “Turning the Tide”
Knowing this will help determine whether you can make a successful bid for priority. In the previous example, we saw that both possible two-pips had been played. This means that only a one pip could beat your own two pip, if you had one to play.
Remember that if you tie, you’ll usually have to roll for it, the Legion equivalent of flipping a coin. It is not a good idea to hinge victory or defeat on this coinflip, but sometimes it cannot be avoided. Cunning (Director Krennic, Count Dooku) and command cards like Give In To Your Anger (Palpatine) and Sorry About the Mess (Han Solo) break this rule, though, so take care if you see one of these commanders across the table from you.
“A well placed unit with the element of surprise on its side can turn the tide of an entire battle.” – Ambush fluff text
Counting Writ Large: Actions, Unit Leaders, Points Destroyed
We’ll finish out this article with counting on a larger scale. The three concepts in the title are highly intertwined. Understanding this section can really help develop your tactical acumen in Legion. It will also help hone your understanding of what your win condition is at any given moment during the game. I’ll start with a fun example from a game I played at the 2019 Continental Championships.
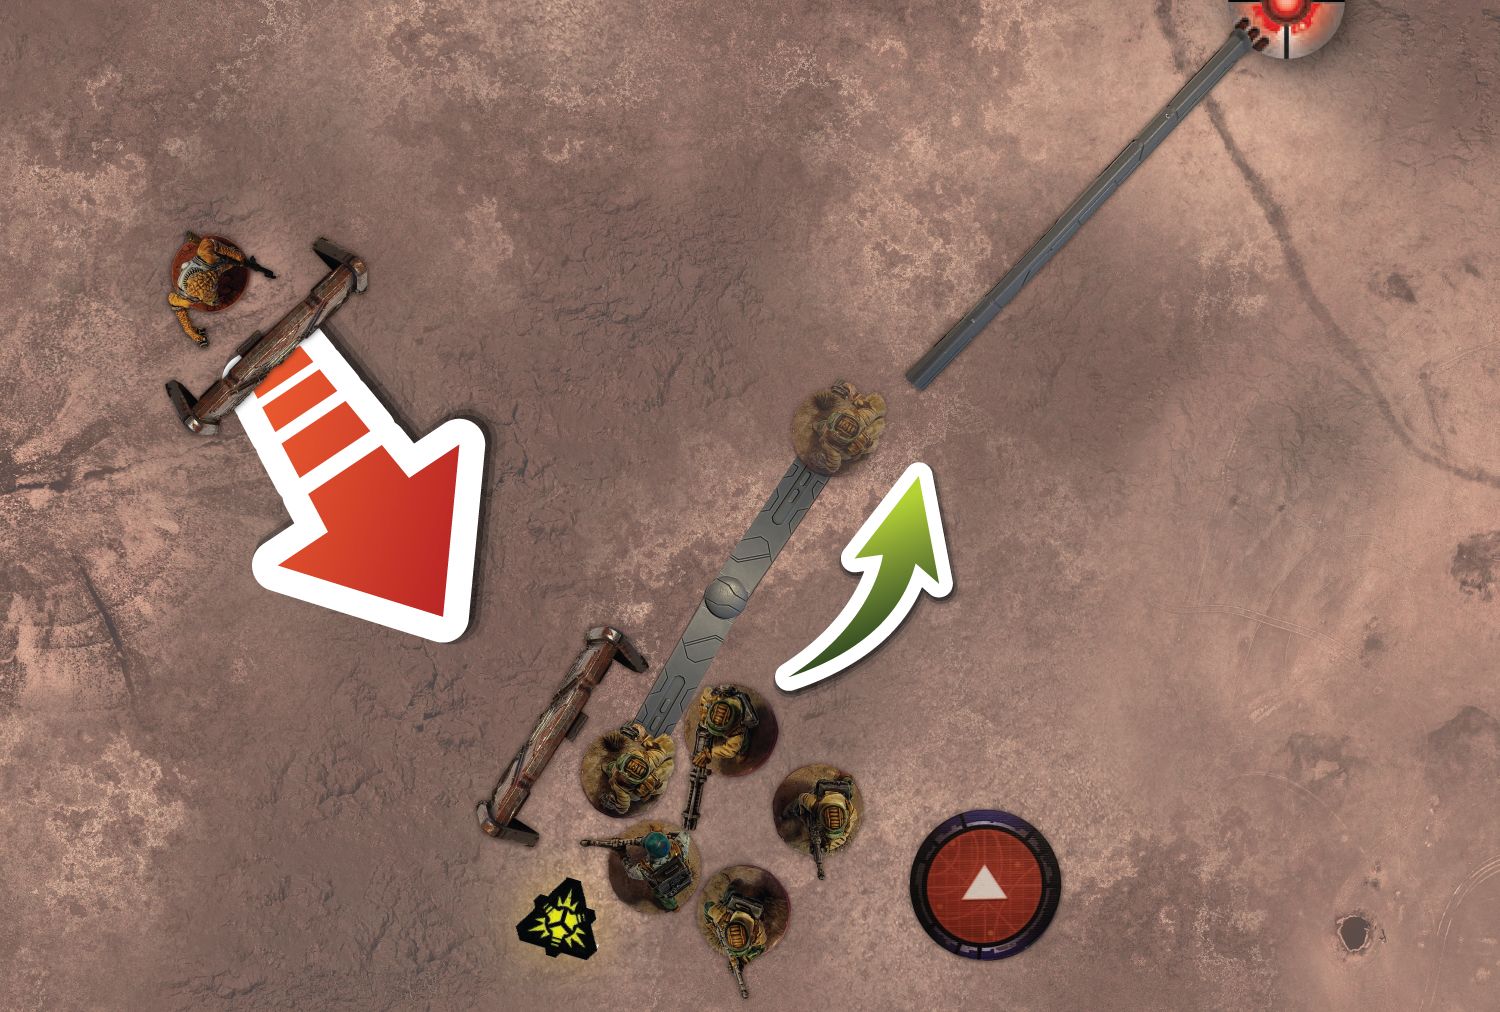
It was the second game of heat 1A, and the scenario was Breakthrough. As the game wound down into the final rounds, it became clear to me that my opponent had more units that could potentially break through than I did, 5 to 4. I took my range ruler and did some measuring – I knew that if I could move into melee with one of those breaking units, I had a chance to create a tie on Victory Points and force the game to go to Points Destroyed, where I had a small advantage.
It appeared as though a unit leader that had lost its squad could start a melee with an enemy unit that had four minis. The major wrinkle was that I needed to engage this enemy unit before it activated, which meant risking losing my unit leader. I knew that withdrawing wouldn’t allow the enemy unit over the line, and if my opponent wanted to move, he couldn’t take an aim token and attack me, risking “losing” that unit’s activation if his attack failed. Leia fed my lone unit leader a dodge token and in he went, successfully engaging. In hindsight, this was a very dangerous maneuver – if my unit leader died, it would feed my opponent more victory points and potentially shift the balance towards him. If my unit leader survived, mission accomplished. If nothing else, this was a way to make my opponent’s unit waste an action handling my unit leader and fail to break through. It was, admittedly, a last ditch effort to avoid a game loss. Thankfully, my opponent blanked his attack roll, freezing that unit out of my deployment zone and leaving my points intact. We later discovered that another unit we believed would break through for my opponent could not actually do so, and this risky move was the winning move, enabling a 4-3 victory for me.
In the above story, I was keeping count of several things. First, I was tracking the number of actions remaining for each of my units and each of opponent’s units. I was aware of what each unit could potentially do during their activation, and how they would have to spend their actions. I knew which units had to move twice to break through, and which units were free to do other things.
Second, I was aware of what units had and had not activated, and what timing was required to accomplish my goal of stopping my opponent’s breakthrough.
Third, I was keeping count of Points Destroyed, in case the game ended in a tie.
Many objectives require you to spend actions accomplishing them. Recover the Supplies and Moisture Vaporators require you to spend an action to Claim or Sabotage/Repair. Breakthrough, Intercept and Key Positions require movement. If you see an unclaimed objective, a vaporator that is not fully finished, or units that need to move, you have an opening to interfere with your opponent’s plans.
I mentioned in the article on suppression that, generally speaking, units in Star Wars: Legion only get a maximum of twelve actions per game. Suppression robs you of these actions, and enemy units engaging you in melee can also degrade your actions, like the example above. These are tools you can use to deny your opponent opportunities to score points.
Counting activations and actions during the current turn is good, but if you really want to turn this strategy up to 11 (see what I did there), you should start counting the turn before. Look at the board and see what units are available to act on the objectives. You can know based on the relative position of your opponent’s units what plans your opponent might have for them. You can make a determination such as, “If I can keep this enemy unit suppressed, they will have to spend two turns to move and repair this Vaporator,” or like in the story, you can measure with your range ruler and know that a unit will need to move twice over the next two turns to score Breakthrough. This tactic is half counting and half making an educated guess. Be aware that your opponent is also looking at your army and making a similar determination.
In the story, I was also aware of the Points Destroyed situation. The Legion rules say that in case of a tie on Victory Points, that tie is broken based on Points Destroyed – the total value of all units that have been fully eliminated. It will be important at some point in the game (near the end of the third turn is usually good) for you to add up the points destroyed so you can determine how best to proceed.
This is especially important since many objectives in Star Wars: Legion end up tied. Sabotage the Moisture Vaporators is notorious for ending in a tie if both players can find “safe” locations for their Vaporators. Intercept the Transmissions generally ties at 6-6 if the player that is behind captures the center on the final round. Breakthrough often ends in a 0-0 or a 1-1 tie. Key Positions can end up tied if the central point is contested with equal unit leaders. Recover the Supplies often shifts to a tie when the leader with the central box dies at the end of the game, yet no one else is eligible to pick it up.
Because Points Destroyed is so often a win condition, knowing the score informs whether you need to attack or defend. If you’re ahead, defend your lead and protect your units. If you’re behind, you need to concentrate on destroying enemy units to make up ground. There are some lists that try to gain the upper hand here right away with a strong “alpha strike,” concentrating all their fire on a single target until it is obliterated, then retreating to a strong defensive position, putting you on the back foot. Some lists utilize risky flanking units like Speeder Bikes which will ultimately be destroyed. It’s important to know if your list has these units and make a plan to equalize. It’s also good to rescue single unit leaders and move them out of sight to preserve your points, or find a safe place to camp them until they can score objectives.
It has been useful, in my experience, to know some common points values by heart. For example, Rebel Troopers with a Z-6 are 62, Stormtroopers with a DLT-19 and Medical Droid are 87 points, and Luke Skywalker with Force Push and Emergency Stims is 178. You don’t have to memorize all that, but it does minimize the time you spend on this step. Knowing by heart also means you can make better and faster decisions on what you decide to trade for. Raw points alone are not always the best determinant of what to trade, but it’s useful to know if there’s an upside there.
I’ll end this section with a final caveat. While using Points Destroyed to determine “attacker” and “defender” is a good rule of thumb, there are often game states where the best course of action departs from this rule. You can be behind in points, but you should always check first whether you can influence the objectives, and then pay attention to Points Destroyed. There are times where you are absolutely beaten in a head to head fight, but you have the objectives locked up. Plus, single attack roll can swing the win condition to a completely new place, so it pays to be agile enough to change your plan. Float like a probe droid, sting like a tauntaun.
That’s all for now. I’ll be back next month with more Legion 101. Please let me know if you want me to cover subjects in specific detail by leaving a comment, or send me a PM on Discord @Endless#5055. If this article helped you in some way, leave a comment and share this article with a Legion player you know. Thanks for reading!


1 Response
Thank you for this phenomenal article. I’m totally new to the game -and wargamming in general- and this was not just a fun read but a transformative one for my games.
Thank you!