
Welcome troopers! We present the next installment in our hobby series. One of the reasons that I hear people say they avoid the hobby side of the game is that they worry they will have to buy a whole bunch of unnecessary tools and materials in order to achieve the image they have envisioned. The goal of this article is to show you that with just a few simple items, you too can achieve great looking models.
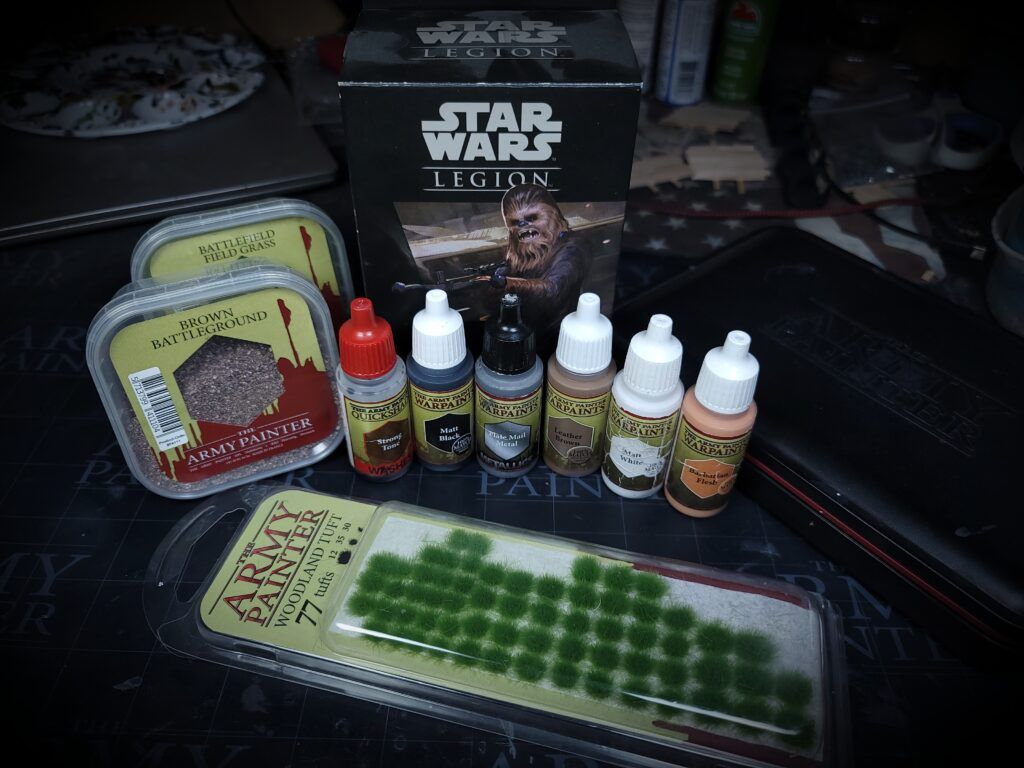
To get started, you will need the following supplies:
Warpaints Starter Set – https://thefifthtrooper.com/product/warpaints-starter-paint-set/
Woodland Tuft – https://thefifthtrooper.com/product/woodland-tuft/
Brown Battlefield – https://thefifthtrooper.com/product/brown-battleground/
Steppe Grass – https://thefifthtrooper.com/product/battlefield-steppe-grass/
That’s it. No need to make a massive initial investment. Rather, just four simple products. You will need a brush of your choice (I use The Army Painter Regiment brush primarily), primer, superglue, and some white glue or pva glue.
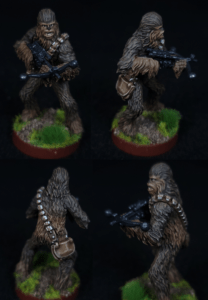
You will also need a miniature. For this guide, I am using Chewbacca from Fantasy Flight Games Star Wars: Legion.
To start, prime your model however you choose to. I use an airbrush and prime indoors, but that is not necessary for this. You can use spray can primer or brush on primer if you so choose.
Basing
While the primer is drying, I went ahead and began working on the basing. This base is going to be a simple plains or woods base.
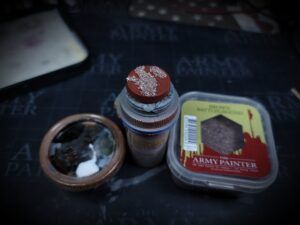
The first step is to take your white (pva) glue and apply it to the base. I use a coffee stirrer to do this, you can use an old brush or anything else you do not care about. Add as much or as little as you want. Once the glue is applied, I turn the base over and press it down into the container of Brown Battlefield. Easy peasy.
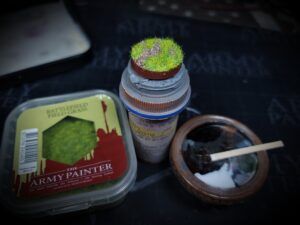
Next I take that same glue and I apply it to the base where I want my grass. You can use any grass flock you want based on what color you want it. I pick up a pinch of grass and press it down in to the glue. Once that is done, I blow off all the excess grass from the side of the base. I find this helps the grass stand up.
For the final steps on the base, I apply the strong tone wash to the brown battlefield areas once the glue is dry. To help dry glue (and wash or paint) faster, I use a hair dryer. It helps me to move through my models faster by reducing drying time, the number one thing that slows me down. I let the wash bleed a little in to the grass to help blend the grass and the gravel areas.
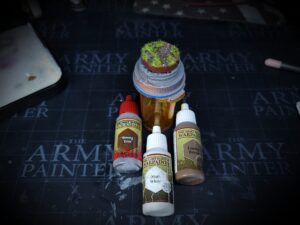
Once the wash is dry, I take a drybrush and drybrush on some leather brown paint to the gravel areas. This little detail will help your bases pop. Finally, choose a grass tuft and stick it to the base. They are self-adhesive, so you shouldn’t need glue, but a dot of white glue can be helpful sometimes.
Chewbacca
Now that our base is finished and set to the side, let’s turn our focus on to our model. Every paint you need will be included in the Warpaint Starter set.
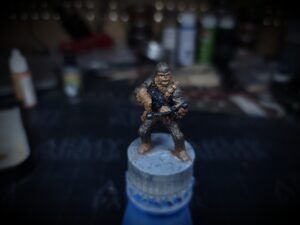
To start, begin by applying a basecoat across the entirety of the model. This does not need to be super clean, as we are just trying to block out the colors on the model. I used reference photos from online to determined where to apply each basecoat. Apply the following colors:
Dark fur – Leather Brown (4 parts) mixed with matte black (roughly 1 part).
Light fur – Leather Brown
Bag and Strap – Leather Brown
Bowcaster – Matte black (4 parts) mixed with matte white (1 part)
Apply the colors as listed above. You do not have to wait for one area of fur to dry before applying the color next to it. The wet paint touching each other will naturally blend a little and make the transition smoother. Let the paint dry (or help it with a hair dryer) and then we are on to washing.
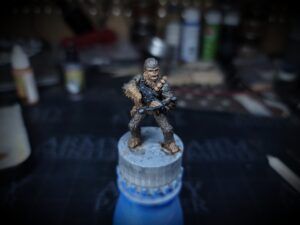
Simple step – Apply Strong tone everywhere. Literally everywhere. Do not let the wash pool too much as you are applying. Go back and clean up with a brush as you are working. Let the wash dry, then on to step 3.
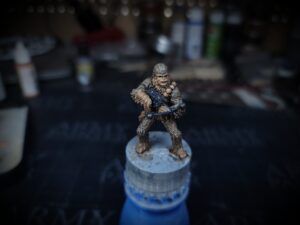
Next, pick your favorite small drybrush. I use The Army Painter Masterclass Miniature Drybrush. We are going to use drybrushing to blend our colors and highlight the fur. Use the following colors to drybrush the fur:
Dark fur – Leather Brown
Light Fur and Face – 50/50 mix of leather brown and barbarian flesh, followed by a light dusting of pure barbarian flesh
Once that is done, on to the final step, details! You could stop here if you want and you would have a very well done, tabletop ready, model. If you want just a little more, then pick a fine tipped brush and keep reading.
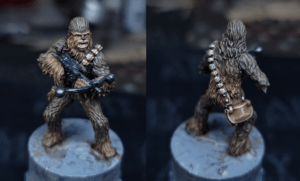
The final step, and the one to spend the most time on, is the detail step. There is where you take your mini to the next level. I used the following paints to paint different areas:
Face – I lined areas with pure barbarian flesh. I also added eyes with matte white. I used a small amount of matte white for teeth as well. I also added some matte black for the nose.
Leather bag and strap – I used pure leather brown for highlights and gradually moved up to a 50/50 mix of leather brown and matte white for the highest, smaller highlights. I then went and added plate mail metal for all the boxy things on his bandoleer.
Bowcaster – I used my Matte Black and White mix, mixed in one part plate mail metal, then hit some highlights on the bowcaster.
That’s it! The model is done. Really. This guy can be painted in about an hour and a half using these steps, not including drying time. All that is left to do is use superglue to add him to his base and take pretty photos.
All of the paint and basing materials can be found in our web-store if you would like you follow this guide exactly. You can also find the wet-palette I use over there, and I cannot recommend a wet-palette highly enough.
Hope this article is helpful for those of you wanting to dip your toes in to the hobby world of the game. Putting models that I invested time and effort in to on the table helps to increase my level of connection just that much more. Get out there and experiment, there is no wrong answer to how you paint something!


1 Response
Realy great article, Dustin! Though bigger or enlargable photos would really help – it is hard to see now the details and the difference.