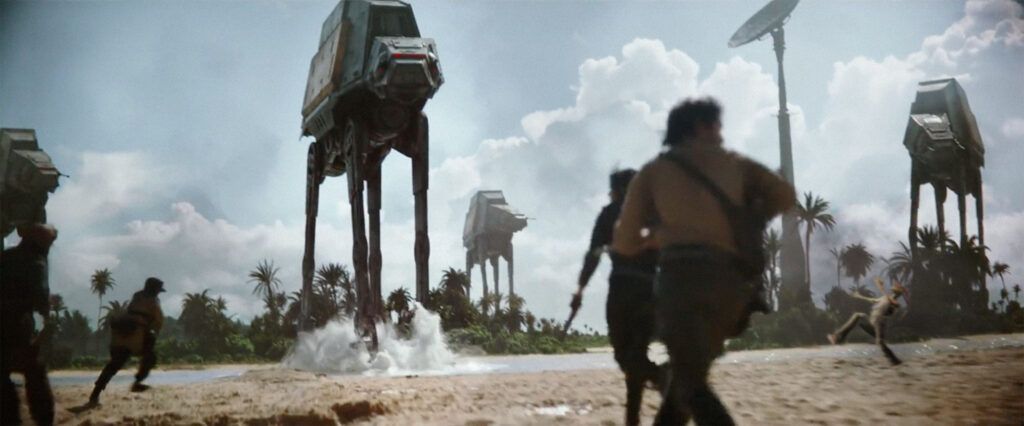

This guide will cover the use of the Rebel Pathfinders: special forces that can infiltrate deep behind enemy lines and wreck havoc on infantry and vehicles alike. Originally appearing around the same time as the “Rogue One” set including Cassian and Jyn these guys started in a rather ignominious position of being considered one of the worst in the game. Since that time they have risen quite a few notches and occupy a place as a niche unit that can demonstrate excellence on the field when played to its strengths.
Strengths
- Capable of taking down or weakening a variety of unit types
- Can drop in almost anywhere on the field
- Is extremely difficult to pin down for the enemy
Weaknesses
- Their survival is largely luck based and relies on suppression
- Until close range their attacks are very swingy
- Need to be supported, not easy when dropped in too far from your army
Overview
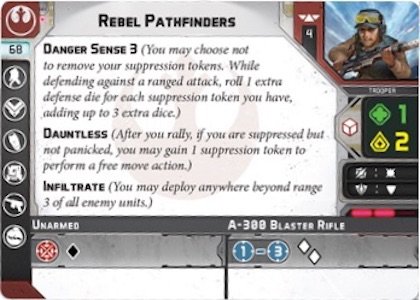
56 Points: Originally 68, making it one of the steepest price drops since the game’s launch, particularly for infantry. They are a unit with a lot of equipment overheard, which causes them to get pricey pretty quickly, so 56 is a pretty fair price to be paying.
Defense: White die with surge, like most rebel infantry. With Danger Sense they can gain additional dice to protect against pierce or simply high levels of fire. At the end of the day you’re still rolling a bunch of White Dice though so try not to get cocky.
Offense: A-300 Blaster Rifle 2 White dice at range 1-3, it’s basically the Fleet Trooper pistol with better range. They also have their own unique equipment, for free, that gives them 1 white die at Range 4 or 1 Red Die at range 2. We’ll go into the specifics of how best to use that in the Equipment section.
Courage 2: As opposed to the rebels corps slot, these guys have much more respectable courage and that is going to be clutch. They often want at least one Suppression for Danger Sense and due to their role as covert deep strike units they can often find themselves stranded far from the rest of the squad.
Danger Sense 3: This does two things. The most important part is that it lets you roll extra defense dice based on your suppression, up to 3. Which works for you because if it goes above that they’re probably going to start panicking. The other half of this ability is that you don’t have to pull all (or any) of your suppression tokens. The rules reference does clarify you can make this choice any time you would remove suppression tokens, not just the end of turn Suppression removal. So for example if you rally with 3 suppression, you can roll the dice and if you roll 3 symbols then choose to only remove 2.
This leaves you in a difficult position of needing to balance your suppression. You want suppression as it’s one of the best ways to keep yourself alive, but if you overdo it they will bolt. Danger Sense is a potential way to avoid the increasing proliferation of Pierce attacks, if you manage to roll really well so it elevates this ability beyond simply increasing your odds of survival into straight up being able to avoid shots that you normally could not.
Usually I keep one Suppression on regardless as it both gives cover and an extra die. If they get shot at one more time that can make them Suppressed but we have a partial answer to that in the form of Dauntless.
Dauntless: In the event you find yourself suppressed this can offer a potential out. After rallying, if you are suppressed but not panicked (i.e. 2-3 Suppression) you can take an extra suppression to make a free movement, which will help compensate for your lost action. You can use this to dive into cover, rush an objective when not doing so could lose you major points, or flee.
A key point to remember is this happens after rallying, which means even if you have 3 Suppression and decide to run, you will not panic this turn. The check for Panicking is done after the rally step, so even if it is exceedingly dangerous you may have situations where it’s worth it to run for a key position and risk the panic next turn.
Infiltrate: When deploying your armies you can ignore your usual deployment zone and drop them in more than range 3 from all enemy units. As the only rebel unit that isn’t a character capable of doing this, we stumble on one of the Pathfinders’ unique roles within the army. You can do a lot with this, create a firing line early on that dissuades your opponent from pushing up, or put yourself on the objective early to establish a beachhead. We’ll discuss some deep strike strategies later in the article but you’ll almost always want to use this.
Upgrades
Pathfinders are very equipment hungry. As independent operators, often separated from the rest of the army, they are essentially required to bring a lot of extra gear that you otherwise might not spend on infantry. They also rock a fair number of upgrades exclusive to them that are considered mandatory to take.
Weapon
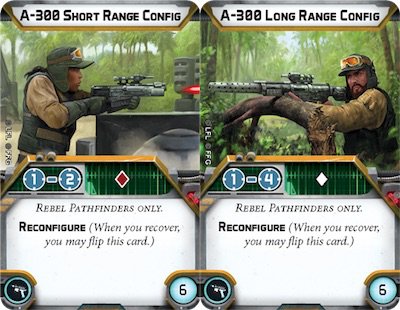
A-300 Short Range/Long Range Config
Previously a 6 point cost, it’s now 0. Since nothing else goes in here, there’s literally no reason not to take it. It’s free!
A dual sided card, you can choose which side you want to use at set up, and then swap whenever you recover. In most cases I start at range 4, you really don’t want these guys to get up close and while one white dice per model is pretty bad, it allows you take potshots from a mostly safe distance. Most firefights happen within the range 3 band so you can make some judicious decisions to hang back and not engage in fights you can’t win.
The short range config is fine if you end up finding yourself in close combat. With a single red die, compared to the two white dice on your basic weapon, you’re trading volume of fire for more guaranteed shots. This makes it better for taking out undefended units with fewer models, but generally volume of fire wins out, especially if you can spruce it up with aim tokens. Without any special abilities like pierce there just isn’t a lot going on with the short range config other than the safety of knowing you’re more likely to get a fewer number of shots, rather than the swingy randomness of two white dice.
Trooper
The big one, as both trooper options are vastly different and change the role of the unit substantially. Both have 2 wounds, which adds an extra ablative bit of wounds to the unit and adds a powerful weapon to the attack pool.
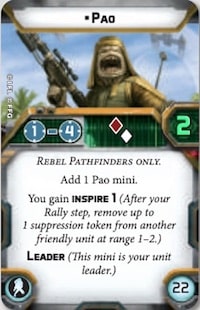
Pao
Pao is…an odd one. He immediately becomes leader of the unit, which means he can’t be taken out unless he’s the only one who can be seen. He also grants Inspire, letting him remove suppression from a unit within 1-2. Otherwise, he’s just got a pretty ok weapon at range 4 with a red and white. If you’re playing the pathfinders as a unit taking potshots from a distance that’s pretty alright but that’s not using the unit to its strengths.
Pao can be argued if you have multiple Infiltrate units, as the ability to pull suppression off of another unit that is heavily suppressed, like a Commander who joined with them, can make or break them. Otherwise, you’re probably too far out to make the best use of a range 2 ability like that.
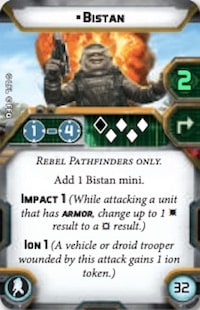
Bistan
Oh Bistan, now this guy we love and basically who you’re here for. His gun is range 4, letting you sit comfortably further back from the action. It has one black die and 4 white dice, Impact 1 and Ion 1. Combined, this makes Bistan excel at dealing with multiple threats.
Naturally, these keywords mean he is excellent at combating vehicles. Impact 1 isn’t much, but it’s something and if you’re rolling 8 white dice and a black die (or 4 more white dice if you’re feeling bold and get in closer) you’re bound to get at least one hit in, and a few crits to bypass it. Ion will help disable a vehicle (or droid!), making it safer to approach for whoever fights after you.
With so many dice in the pool it makes it a decent anti-infantry weapon as well. It lacks Pierce or Suppression, or anything else you might associate with anti-infantry weaponry, but its a lot of dice that can be thrown relatively safely from range 4.
The big downside is Bistan is Exhausted after use, which makes using him pretty tricky. Pathfinders often need to be set up in a safe place where they don’t need to move (so they can spend a move on a refresh) or need to be accompanied by Cassian. Luckily, he works well with them. Bistan is essentially a mandatory take with Pathfinders, they don’t really have much to stand out without him, and once he joins the part he is a serious threat.
Training
As I’ve said in the past, Training may be the best equipment slot short of Force Powers and there is no shortage of great options for Pathfinders to take.
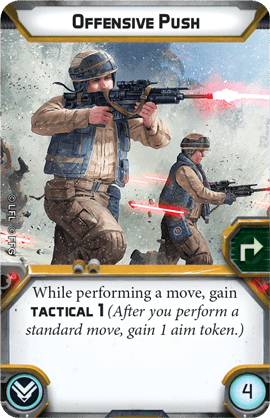
Offensive Push
Up until recently I considered Training the “offensive push” slot, with tenacity sometimes winning out depending on the unit. It’s still a really good card. Since you’ll be refreshing with Bistan a lot you might as well just refresh both while you’re at it. Offensive Push is effectively 2 actions in one, with a move and aim together and that helps maximize your action economy. Particularly on a unit like Pathfinders throwing a lot of white dice, you want as many aim tokens as you can get.
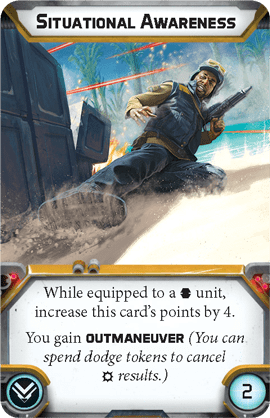
Situational Awareness
With the proliferation of critical hits in the game as of late, this is a top competitor for the slot. No amount of cover or suppression is gonna save you when the crits start flying, and at the pitiful cost of 2 points, you might as well if you dont need anything else on this list.
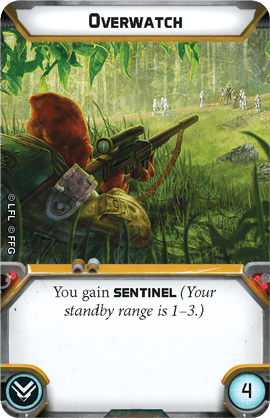
Overwatch
Pathfinders are uniquely positioned to be great Overwatch fodder. Their guns have great range and can set up in a nice sniping spot early. They may not be as devastating as some units but if you wanna lean in on this strat, it’s not a bad idea.
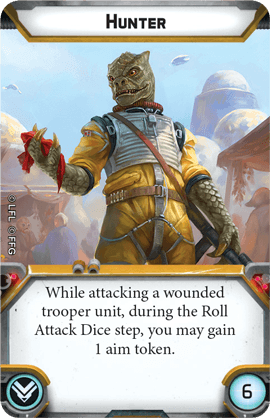
Hunter
An alternative to Offensive Push but doesn’t require a move. It won’t help if your plan is to have Bistan take out vehicles which is why its a bit further down the list, but for infantry? Potentially viable.
Duck and Cover
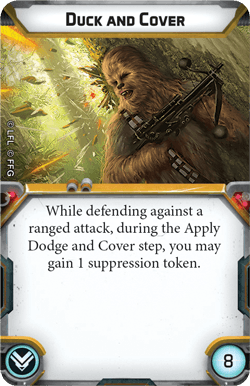
Duck and Cover works well with Danger Sense, giving you an extra suppression to power it. Just be careful you don’t use this too much and get into panic territory.
Comms
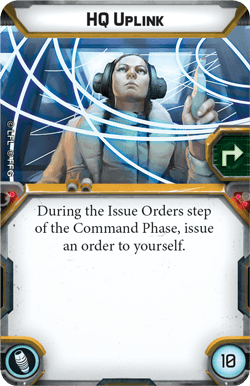
HQ Uplink
Probably the ideal choice. You’re stuck far away from the rest of your army so you need a way to get orders and you’re refreshing a lot anyway so not a huge inconvenience.
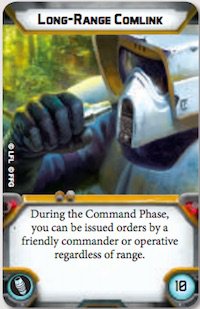
Long Range Commlink
A budget choice if you really need 5 points. For much the same reason as HQ, you need a way to get orders out from further away from your group. This means you are taking an order away from another unit (rather than getting your own) but again, if you really need 5 points…
Gear
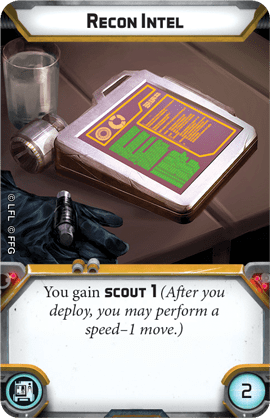
Recon Intel
Probably an obligatory slot option, though the choice is not as simple as it was in the past. Infiltrate is good but having to deploy more than range 3 from the enemy can be more of a hindrance that you’d think. With this you can drop in at exactly range 3, and then move closer to some good line of sight blocking terrain or cover.
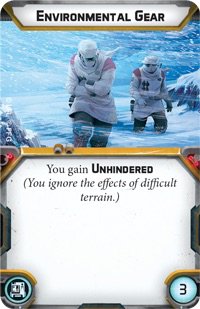
Ascension Cables/Environmental Gear
You want these for basically the same reason, which you choose is more personal preference. As a unit stuck behind enemy lines you’re often going to need a way to move to hard to reach places without getting slowed down. Ascension cables let you rappel up on top of buildings, while Environmental Gear lets you trapse through forests unhindered.

Targetting Scopes
One other viable option. With a lot of white dice, you need aim tokens. At that point you’re basically imps, so why not play like an imp and bring targetting scopes? I’d put this pretty low on the list of priorities but I can see some fringe use.
Grenade
You can basically ignore this slot, as you already get a gun for free that will do a red die at range 2. If you’re feeling spicy you can bring some EMP or Impact Grenades and charge in and throw them in with Bistan to up your anti armor power, but I wouldn’t put such a valuable unit at risk like that.
Strategies
How Pathfinders Got Good
I’m going to derail a bit to explain why this unit went from a bit of a joke to a strong niche unit. This is important because it helps contextualize what the unit excels at. When the unit launched it was considered DOA by many: it cost too much, its survival was very luck based and it took up the valuable special forces slot, which at the time was usually run with triple Strike Teams for cheap activations.
Over time the cost has gone down significantly. Making their exclusive gun free massively boosted their flexibility and making the unit cheaper allowed more equipment options to kit out the unit to be the special forces operators they were always supposed to be.
As vehicles and droids become more popular in the game, Bistan’s role is much more important. Rebels can often struggle to deal with armor, they’re pretty delicate. Someone coming in from behind to jam some Ion creates a second distraction, forcing the enemy to divide their attention. When the dice are in their favor they can be pretty resilient and hard to remove, which makes them a popular pick for those who don’t mind playing for a bit of luck.
You shouldn’t overestimate their survival but don’t be afraid to push with them either, they need to wreck havoc to do their job well.
Proper Infiltration
Infiltrate is a hard ability to pull of. Its very tempting to just slam them up the field as far as you can but I’m begging you, do not do that. These guys aren’t going to be able to take the hit and you’ll watch a whole lot of points go up in smoke. Here’s some tips.
Send Company – Pathfinders really want to have a Hero with them who can support them. Jyn, Cassian or Lando can all Infiltrate alongside them, if you’re willing to make them operatives. Jyn has a superior Courage which can keep them from panicking and for all 3 giving another target makes gunning them down a lot less obvious, since they’ll leave themselves open to a counter attack from another hero.
Exploit the Terrain – This goes without saying but survey the board. Are there good line of sight blocking pieces you can hide behind? If the boards pretty open, maybe don’t do that and just deploy them normally (or a few inches up). If you leave them alone they will gun for you.
Does your opponent have infiltrate? Depending on the deployment zones, you can usually wait to drop Pathfinders as one of your last deployment, so you can make sure you put them in a place your opponent cannot counter-drop. There is a major exception, and that is if your opponent has infiltrate as well. Especially if it’s a character like Op Vader or Maul, they probably will attempt to drop in. If you drop Pathfinders early, not only do you prevent them from blocking you, you screw up their deployment too.
Conclusion
Pathfinders are a bit of a niche unit, but personify the rebel playstyle well. Delicate guerilla warriors who can harass your opponent from the forests and slink away. These guys can, if played right, take down infantry and armor alike. Consider packing them into your next gunline list if you want to really mess up your opponent from another angle.


1 Response
Great write up, thanks! I remember when this unit first dropped I was so bummed out with how overpriced they were. Plus, triple snipers were just better. I’m excited to try them out again!