Trending Today
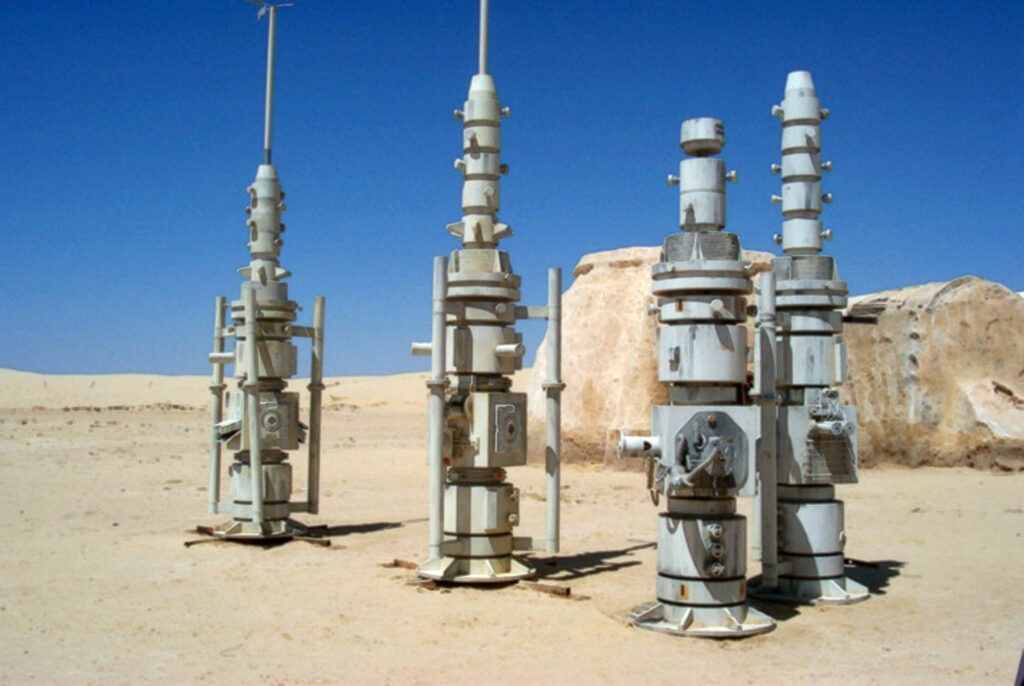
Hey there, everyone! It’s been way too long since the last time I wrote a battle report, mainly because things just aren’t the same just yet but we’re getting there! However, Mike Syrylo and I were talking last week and we thought why not play a game and put it onto page from both players perspectives. It’s going to be somewhat of a unique journey discussing this game for a lot of reasons so let’s just dive right into things.
Battle Cards
Sabotage the Moisture Vaporators/Major Offensive/Clear Conditions
Deployment
Okay what’s the first thing you see here? I’m down two activations against a hero heavy list, featuring Guardian, and playing 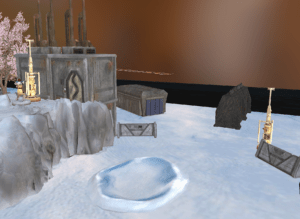
Round 1
Command Cards: Standing Orders v Standing Orders, Mike wins roll off
Standard par for the course for turn one on Vaporators. I put my order on Kenobi, from Rex for that surge token!, and Mike put his order on Cassian. We both have orders on the two pieces we wanted to go last with, we both know Mike will get his last shot with Cassian, who was threatening a move/shoot on my Vap on the hill at the very end of the round.This almost solidified my audible I had formulated in my head, but I did some shifting on my backside before pulling off the hill completely out of line of sight (losing a model to a sniper squad in the meantime), but in a decent place for some ranged shots in upcoming rounds.
My Clone ball is pretty safe behind the cliff, R2 is beep booping with an escort service in the form of an ARC sniper team, a Phase II unit and Rex if I need him to go that direction. (The jetpack on Rex is a helluva drug) Now it’s time to put Kenobi on the hill and tap the Vap. On the face of it you might think to yourself: Why put Kenobi on the Vap? Don’t you need to move Kenobi towards Mike’s army (deployed very far away) because you are the red player? You just entered….the R2D2 twilight zone. I knew, in some sort of manner, that Mike would need to shift his army in a way to deal with R2D2 and that meant I didn’t NEED to be aggressive right away. Also, I thought putting Kenobi (immune pierce) on the hill instead of losing Clone bodies might benefit me in the end.
Mike ended up moving Cassian up for the shot on Kenobi at the end of the round, his activation count coming up big early on, and he marksman’d three crits through. Kenobi took two wounds, unfortunately, but it felt a lot better than losing 3 clone models. Besides, it was all worth what happens next………..
Round 2
Command Cards: Knowledge and Defense vs Return of the Jedi
The shot heard around the planet. Keeping the Phase II’s behind the cliffside, rather than moving towards where R2D2 needed to start motoring towards, was a major thing for me. I decided to play Knowledge and Defense, despite knowing Kenobi would only get one dodge, for two reasons: Getting that one dodge was still good and getting priority was even better. I left an Offensive Push squad in a position for a move/aim/shoot on Cassian at range three in light cover. This shot was mainly on the premise of putting some wounds on Cassian and force him to move away from my army and hole up until later in the game, perhaps. But what if I told you….I ended up putting six hits through cover? What if I told….wait…there’s more? Cassian completely blanked. The game was just spun on its head.
I never expected to kill Cassian. This was completely massive. I don’t even think it’s a mistake by Mike, I know he feels differently, but I saw the opportunity to take the shot and it paid off. It left three cards completely unplayed from Mike’s hand, which is massive, and now it allowed me to kind of backup and make Mike come to me. Which is arguably the worst possible place for him to be in. Down 100+ points, Blue player with no R2D2 of his own, entering the gauntlet of a Clone Ball. I’m not saying that the game was over, there’s always a chance in any game, but the game was practically over. It was really moving through the motions.
We exchanged some sniper shots on each other, my ARCs said not today. I continued to move R2 with the Phase II unit right near him as an escort. Rex got behind the hill to be able to Jetpack and hit the Vap later if he needed to. Kenobi retreated from the hill after hitting the Vap again. Mike started to advance Luke, Chewie and K2S0 because he absolutely HAD to. I knew that Mike needed to send Chewbacca and K2 over towards the R2 danger zone and his Luke Skywalker needed to come threaten my Vap on the hill. Which is all fine for me, I was in a position to sort of handle both choke points he was heading towards.
Round 3
Command Cards: General Kenobi vs My Ally Is the Force
With Cassian dead it was very apparent that Mike had to play My Ally is the Force here, especially with Luke in a vulnerable spot to take some shots before he could activate him. Mike is in that awkward spot nobody really wants to be in: he has a unit that he wants to go absolutely last with, in a vulnerable spot, that will need to activate sooner than he would like, perhaps. Still being at ten activations to my nine, however, still gave him the wiggle room he needed if Luke were to survive the volley of shots coming his way.
All in all I want to say that Luke took two Z6 shots, one in light cover, the second in heavy cover for a total of four wounds. He was able to medbot one wound off, though, and leverage that. The only other shot I ended up taking was a range three ARC shot which put the fourth wound back on. I kept everything well out of range of Luke (very edge of three), the R2D2 parade continued to move but make sure that K2SO wasn’t able to start pulling his slot machine, and I dodged/moved Kenobi up towards my Vap as a defensive stalwart for when Luke made his arrival. I positioned myself in a spot where if Mike didn’t A: rally his Luke with 3 suppression on him or B: choose the right path to me, he wouldn’t be able to charge me. Luke, still going last despite the position he was in, was able to rally two suppression off and was in charge range of Kenobi. However, Mike’s path on his first move ended up blocking him out of base to base contact with Kenobi on his second move, which resulted in a move/force push into base contact. Setting up a classic Jedi duel in the making. The master against his pupil.
Round 4
Command Cards: Hello There vs Son of Skywalker
I’m sure this comes to absolutely no surprise to anyone. I was in range of Chewbacca, Luke, and K2 which allowed me to take two dodges and a stand by token….which was a complete oops move because I TOTALLY forgot Luke had Jedi Mind Trick. It was totally fine, a complete innocuous moment in the game, but a gaffe nonetheless. Mike won the roll off and was able to attack my Kenobi, which ironically I could kill Luke with Soresu mastery if I were to roll well enough or Luke could kill my Kenobi and all of a sudden this game was changed. Alas, my Kenobi was able to survive. Instead of going with Kenobi first, I aimed and stand by’d a Phase II unit on the cliff side to prepare for a Force Push trigger of the stand by on Luke, that way Kenobi could go off and do other things rather than try and kill Luke. I was able to do enough damage to kill his Luke on the stand by shot and we called the game.
Afterthoughts
I have to admit, after deployment I wasn’t really a fan of my set up and that second vaporator might have been a mistake. To my credit, I didn’t really have the best of options available to me so I’m not sure I would change that position in most games. It’s one of those things that sometimes with the deployment you get, you won’t always have the best positions for your Vaporators.
Despite a deployment I wasn’t too happy with, I think I was able to leverage R2 enough for it to matter. Now, I don’t think Mike needed to be as aggressive as early as he was with Cassian (this is not a hindsight comment, I mentioned to Mike in deployment when he was researching areas to deploy Cassian that an aggressive deployment might be hard to circle back from) but I totally understand WHY he would put Cassian in the spot that he did. I assume, typing this up completely unaware of what he has written up, was that he could take a few of my Phase II models off with snipers, Cassian could move up with his pistol and maybe clean them up, then he doesn’t need to worry about points and just focus on stopping R2D2 from getting into his endzone.
I happened to see the opportunity and get very, very, very lucky. It’s not a shot that’s going to happen often, and I know that. That said, the moral of the story is this: Legion is a lot like sports. The first person to make a mistake could be what sets another person up for the rest of the game. It’s things like this, as competitive players, that we need to see and evaluate as the game is going on to capitalize on an opponent’s mistake. In fact, it’s arguably one of my biggest attributes to this game. I am a very, very defensive player that tries to find any kind of way I can to leverage my opponent and force them to come to me. I’ve always been that way, Clones just happened to play into that playstyle in a way that enhances it even more.
Mike’s Perspective
Battle Reports are fun right? Especially when you win; talking about your great plays and what went into the game is incredibly satisfying. But what about when you lose, especially early on? With that idea in mind, Zach and I thought it would be an interesting idea to present a dual sided battle report from our previous game, in which one of us made a crucial error early on and the other capitalized on it. Our hope is to present two sides of the same coin, and give some insight into thought patterns and re-strategizing when the tables flip early. Also, just for fun, neither of us are reading the other’s report until we’ve written our own already.
I’ve been experiencing quite a bit of success with this list so far. In essence, it has four hero units (all with pierce) that harass the opponent, three snipers to provide even more pierce, covering fire, and clone standby stripping, and then four rebel troopers to run objectives. One even has a medic! Oh, and there’s eleven activations and a ten point bid. Luke possesses both Emergency Stims and protection via Chewie, so it’s not unreasonable for him to take in excess of 10 wounds before falling.
It’s my favorite list to play, can you tell? Let’s move onto the game. Zach was playing the Nine Activation Kenobi Rex List, as he’ll tell you all about.
Battle Conditions
Major Offensive / Vaps / Clear Conditions
Deployment
Due to the nature of being the blue player on Vaps, I deployed slightly conservatively, keeping the vast majority of my forces in a ‘Long March’ style. The exception was Cassian and K2, which I left approximately range 3.5 from my opponent’s front vaporator positions. This uh, turned out to be a mistake.
Turn One: Standing Orders vs Standing Orders
Zach and I have played quite a few games against each other, and we very rarely have an entertaining turn one. The first turn here consisted of nothing but positioning for the first few activations, until I drew some snipers. I was able to potshot down a Phase II trooper with two sniper shots, and put two suppression on the squad, pushing them back from the advanced vap position. Then I got cocky.
Zach made an interesting move towards the end to move kenobi forward twice and touch his exposed front vap. Myself, seeing a Cassian opening, gathered three aims on him and fired three crits (thanks, marksman) into the General, resulting in two wounds. I was feeling good.
Turn Two: Knowledge and Defense vs Return of the Jedi
Man, did I ever mess up. I played a three pip, with an exposed Cassian, against a two pip clone army. Cassian took six hits after cover, and failed every save. This scenario here is why I really wanted to write this dual report with Zach. I basically gave up here. I had three burned command cards, a dead power unit, and was not close to even on activations. So what did I do? I was tilted for an activation, exposed a sniper unit, and then recovered to try and make an attempt.
The second half of the round was a masterclass in positioning from Zach. He was able to shift Rex, the ARCs, R2, and a Phase II down south, and create a dual flank, with Kenobi and three other Phase II squads to the north. I was forced to move Chewie, K2, and Luke forward in a desperate dive for victory, and ended up stuck in between the two flanks. I thought I had a small chance moving into round three, as Luke was in a decent position to threaten my opponent’s vap.
Turn Three: General Kenobi vs My Ally is the Force
I really didn’t have a choice here, I couldn’t play Son of Skywalker, and I couldn’t play Standing Orders. I threw the tokens onto K2 and Luke, hoping the dodges would keep them standing and ready to engage on the fourth turn. They didn’t. Luke was shot early and often, with two Phase II squads and an ARC inflicting four wounds and three suppression upon him by the time Luke activated. My tilt the previous turn came into play here. I didn’t select the proper entry route for Luke, and was *just* outside of charge range of Kenobi, meaning that I had to move, move, force push to engage Kenobi that turn. And uh, that’s what I did, knowing I needed a homerun.
K2 was kept at bay by Zach’s positioning, as he stayed exactly range three from my droid, meaning that I was unable to leverage his suppressive pierce gun to any effect, and was forced to simply double move yet again, in a desperate attempt to stop his advancing Rex and R2 ball. Chewie and the snipers were able to finagle some shots at the ARC troopers, but impervious and heavy cover were able to keep all the models alive and kicking. Turn four beckoned.
Turn Four: Son of Skywalker vs Hello There
It had to happen, my only chance, a total Luke beatdown of Kenobi. It didn’t. Kenobi took two dodges and a standby, I won the rolloff, used Jedi Mind Trick to strip the standby, and proceeded to attack twice, delivering…..two wounds total. Zach used his clone troopers to form a standby wall, Kenobi force pushed Luke into the standby pit, and he died on the first roll, at which point I conceded.
Final Thoughts
I got way too aggressive with Cassian, and paid the price for it. I knew that clones use their identity to roll phenomenal dice, and didn’t account for it. Especially when playing a list like mine, you have to be very conscientious of keeping your hero pieces in good positions, and I was unable to do so. I have to give a ton of credit to Zach, he pounced on the error and then used his positional skills to keep me at bay while I had to charge. It was a masterclass in clone play, and I look forward to reading his thoughts on it.
We hope this was a fun, unique way to bring you a battle report! We’ll probably try and do these a bit more often, whether it’s normal battle reports or a joined battle report like this! As the World starts to re-open maybe we can start getting real games in soon! Thanks for reading, as always!

Copyright © 2024 The Fifth Trooper. All Rights Reserved.
1 Response
I really like the dual sides battle reports, i learn so much about the game and the minds behind the strategy. keep em comming, i really apriciate them.