
[row]
[col span=”4″ span__sm=”12″]
[ux_products type=”slider-full” slider_nav_style=”simple” show_price=”0″ ids=”5675″]
[/col]
[col span=”8″ span__sm=”12″]
Fellow Legion players, I’d first like to thank the Fifth Trooper Network for giving me the opportunity to write this blog post and for sharing the love with you!
A couple of weeks ago I had a pretty fun game with one of my buddies, Sven. We played Minefield and were disappointed how unsatisfying the cardboard tokens looked among all the cool terrain and painted miniatures we had. We had to come up with an alternative.
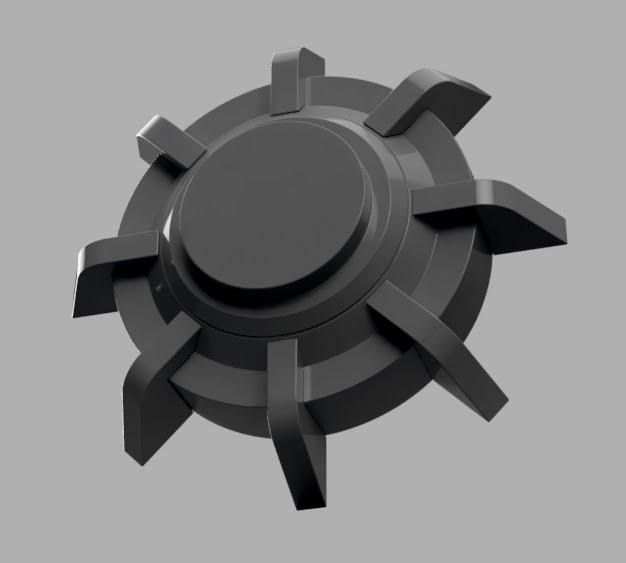
Designing a Mine Token
I started looking around the web to find something I could use as mines. I had little luck, since all the cool stuff was part of larger kits that were sold out everywhere. So we came up with the idea to design a mine ourselves and print it afterwards. If the community liked it, it could also be made available for everybody. Fortunately another friend of mine, Timo, is really into 3D design, so we started to work on a model that could be glued to a base and painted afterwards. We took inspiration from anti-personnel mines but wanted it to look a bit more interesting. Below you can see what we’ve come up with.
[/col]
[/row]
Modeling and Painting
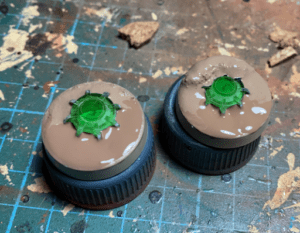
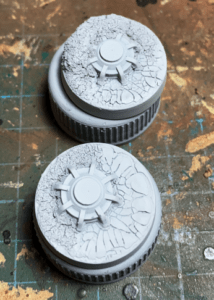
The mines were printed with a resin printer by a third friend of mine, Viktor. You see, we’re all a helping family! Unfortunately the scale is too small to be printed with a regular 3D printer, but resin worked perfectly. After playing around with different sizes, it turned out a 15mm total diameter looked just right. I glued the mines to official bases, since I wanted them to be usable in an official tournament, and “buried” some of them in Milliput, a 2 component sculpting putty. After that I applied two different technical paints from GW, Agrellan Earth, which gives a nice crack effect, and Agrellan Badland, which creates a gritty texture.
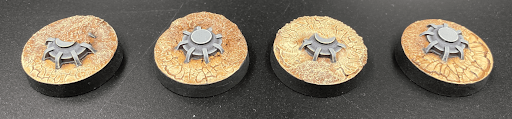
Since I own a Geonosis table, I decided to paint the base with my standard technique, using different sand and earthy colors. The mines themselves were painted with Scale75 paints. I like them because they have an ultra-matte finish, but other colors work perfectly fine as well. I chose to go for a very dark grey for the main body and then highlight the legs, the circumference, and the top to a lighter grey. The last step was an edge highlight to all the edges using a very light grey mixed with a bit of yellow to make them really pop.
Here’s a little tip on how to place the highlight. The finished mines look visually interesting because the highlights of the legs and the circumference have contrary dynamics. What do I mean by that? The legs become lighter as they get closer to the inside of the mine, the circumference becomes lighter towards the outside of the mine. Both highlights run in opposite directions.
You can see the finished mine below. I hope you enjoyed this post and I hope to see a lot of mines pop up in the near future on social media. Please share them with all your friends!
Happy Painting,
Kilian/Qraith


1 Response
Thanks so much for sharing 🙂