

This will article cover the basics of cohesion and how they interact with certain critical bits of Legion’s game mechanics. There are two elements that are critical here: 1) knowing the rules, and 2) building good habits. When I first started playing Legion, I thought to myself… hey, this move mechanic is kind of neat and easy. They clearly are saving time; you just have to move one dude and then plop all your other spacedudes down right next to him. Easy peasy. However, it is much more beneficial to think of it in the following way:
- Move your unit leader
- Move the rest of your minis. Each of said minis gets a free speed-1 move away from the position of the unit leader.
Units can get a lot of benefits from proper cohesion placement, or suffer significant consequences from careless placement. Understanding how units can benefit from being placed properly in cohesion first requires an understanding of all of the relevant rules.
Know your rules
There are few restrictions on placing trooper units in cohesion, except the following:
- Trooper minis must be placed such that they can make a legal speed 1 move from the position of their unit leader
In addition, there are several other relevant rules that interact with cohesion placement. They are as follows:
- If half a unit’s minis are in cover, the entire unit benefits from cover
- A unit is slowed by difficult terrain if any of the minis would move through difficult terrain
- Minis to which line of sight (LOS) is completely blocked from the attacking unit leader receive the benefit of heavy cover
- Minis to which line of sight is completely blocked from all minis in the attacker cannot suffer wounds
- Any attacking mini that can see a mini in the target unit can contribute dice to the attack pool
- A unit leader does NOT need line of sight to a target to declare it as a defender
- Range is measured from the unit leader to any mini in the defender for attacks
- For nearly every thing besides attack range, range is measured from mini to mini (and not unit leader to mini or unit leader to unit leader)
We will hit each of these in turn, as they all have different implications.
Cover
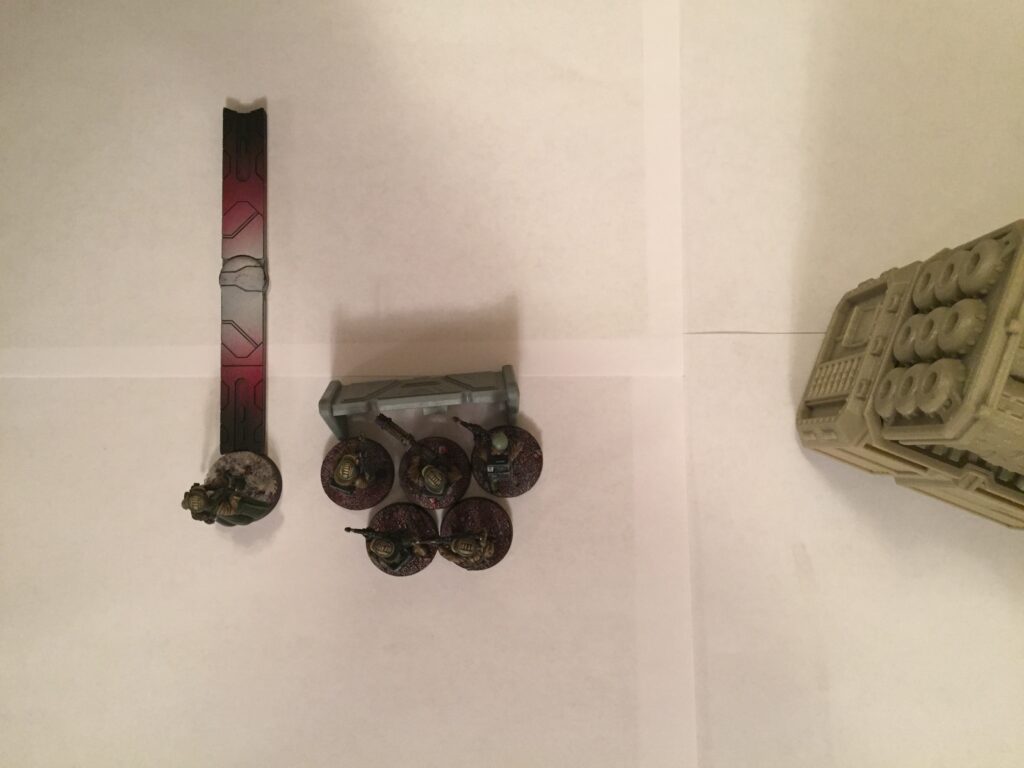
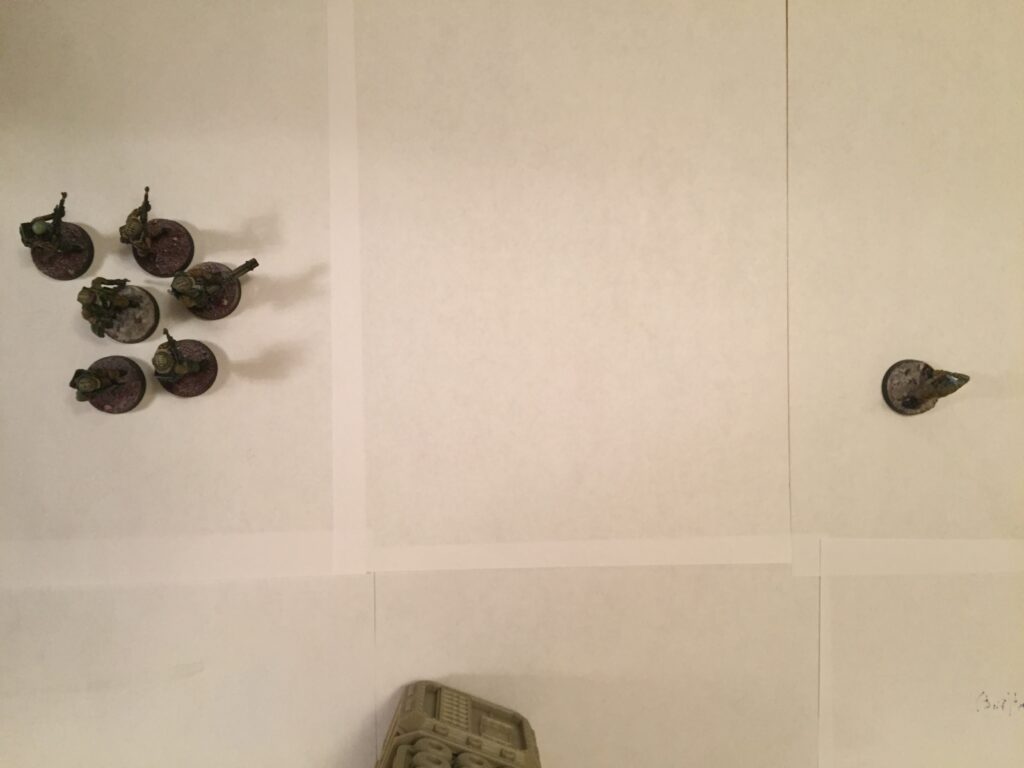
If half a unit’s minis are in cover, the entire unit benefits from cover. Generally speaking, you want your trooper units to be in cover. If you think of cohesion as a free extra speed 1 move for 80% of your unit’s minis, it starts becoming pretty clear when and where you should place those extra minis. First, let’s look at what NOT to do:
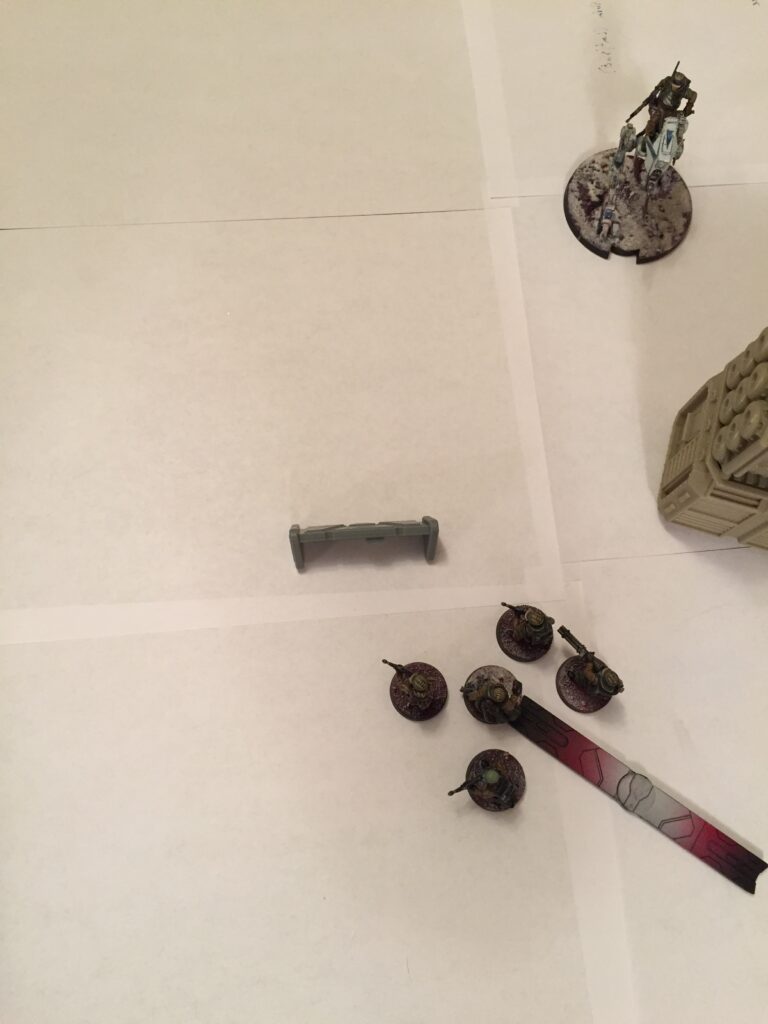
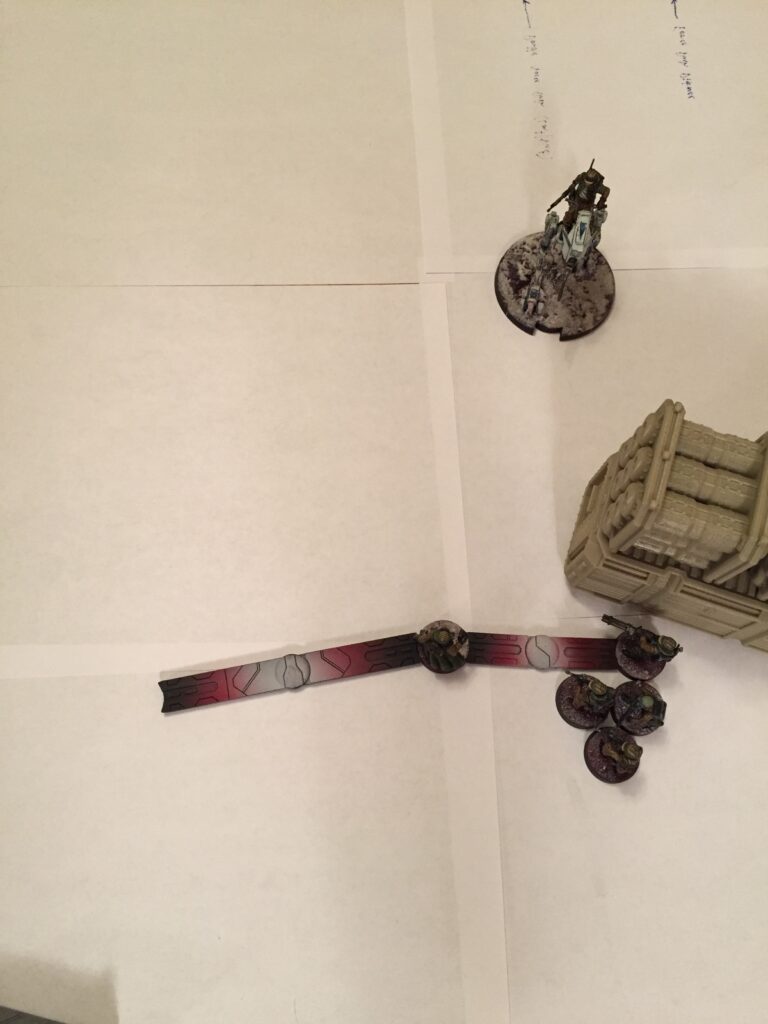
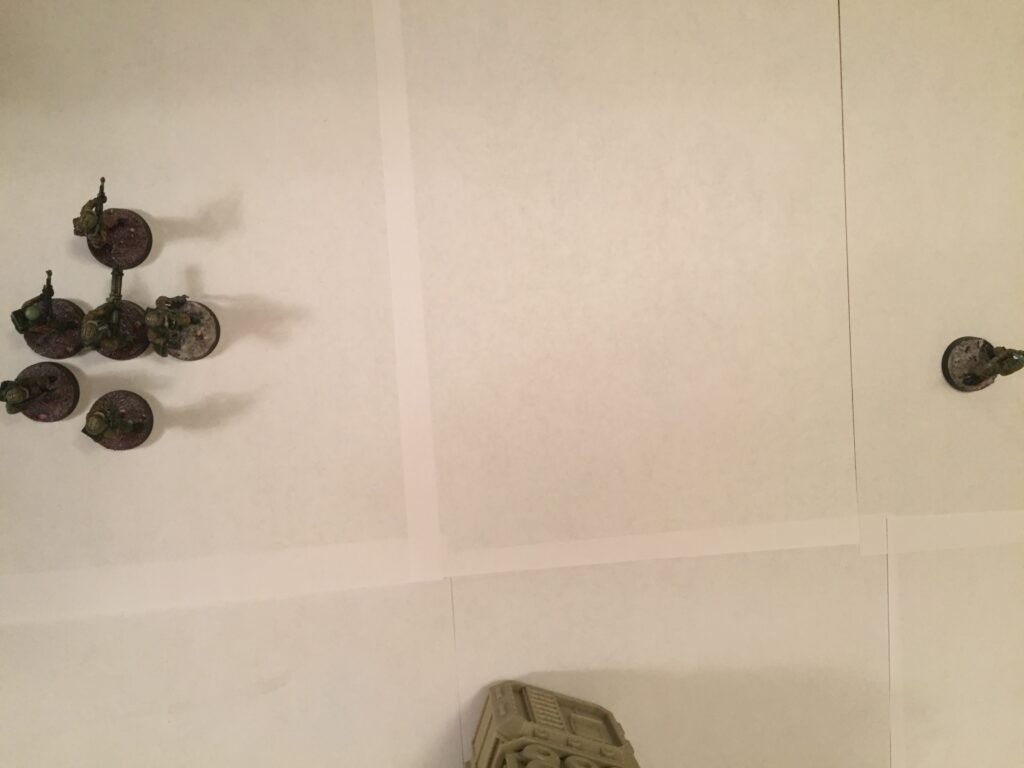
The unit leader couldn’t quite make it to that barricade. These minis have just been placed in a blob around their unit leader, and are not receiving any cover from that AT-RT. With your free speed-1 cohesion move, however, your spacedudes could make that extra distance and get behind the barricade. Utilize that speed-1 move tool and get them over there, like so:
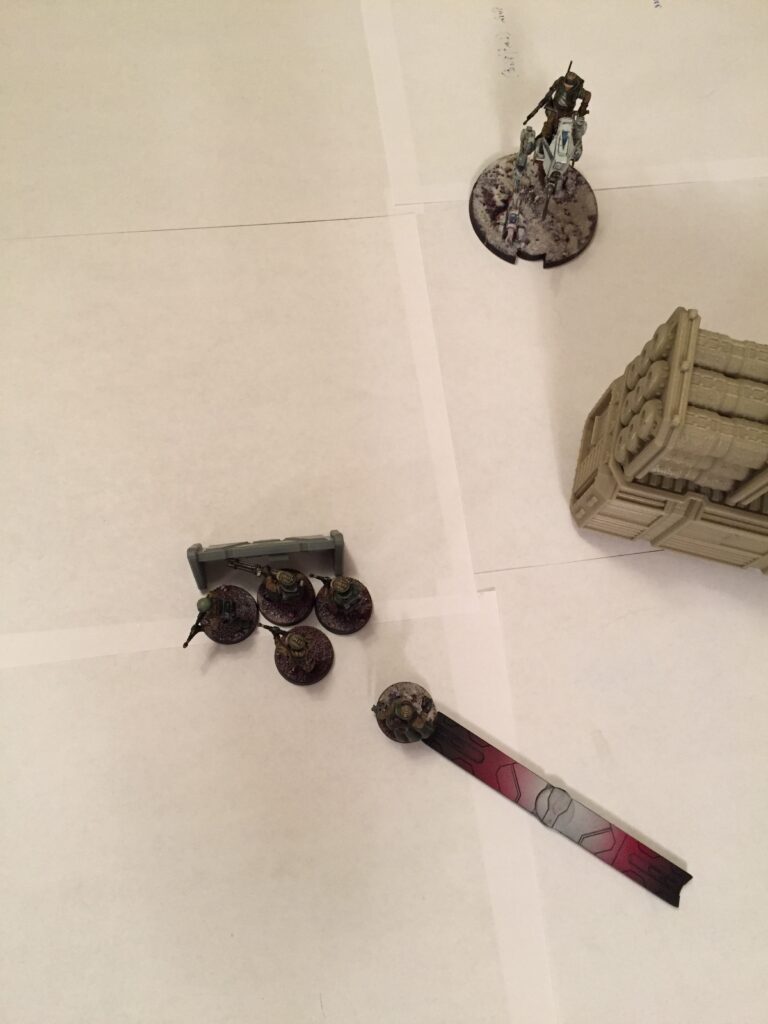
That may look kind of far. I did actually measure cohesion for all of these photos. Speed-1 is farther than you might think. Now that unit is receiving cover from the AT-RT. The at least half bit of cover can also be important if you have a unit that is being flanked. Suppose you have a trooper unit near a barricade that faces possible attacked from both sides. If you position them like so, they get cover from both directions:
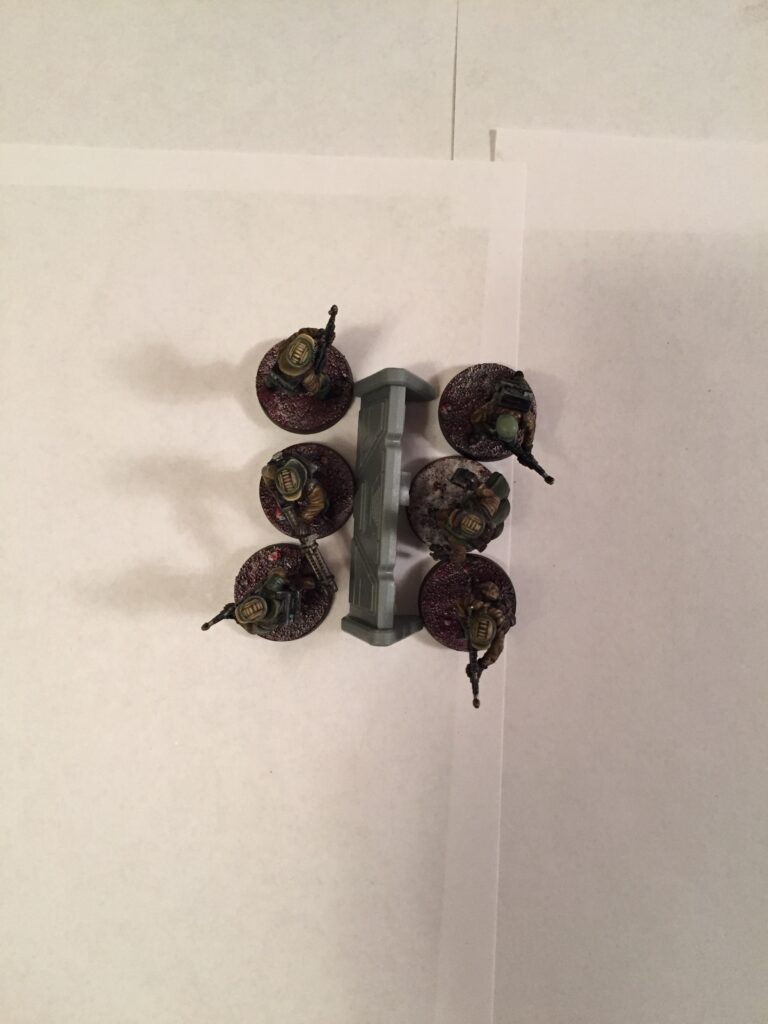
Note this only works with units that have an even number of minis.
Difficult terrain
The wording of the difficult terrain rule is important as it relates to cohesion and barricades. Here is the bit, straight from the RRG: While performing a standard move, a unit that would movethrough or enter difficult terrain with any of its minis has itsmaximum speed reduced by 1, to a minimum of 1. Note the only mini that can actually move through anything is the unit leader, since the non-leader minis aren’t actually moved; just placed in cohesion. The implications of this are especially interesting with respect to linear terrain like barricades. Let’s start off first with what NOT to do:
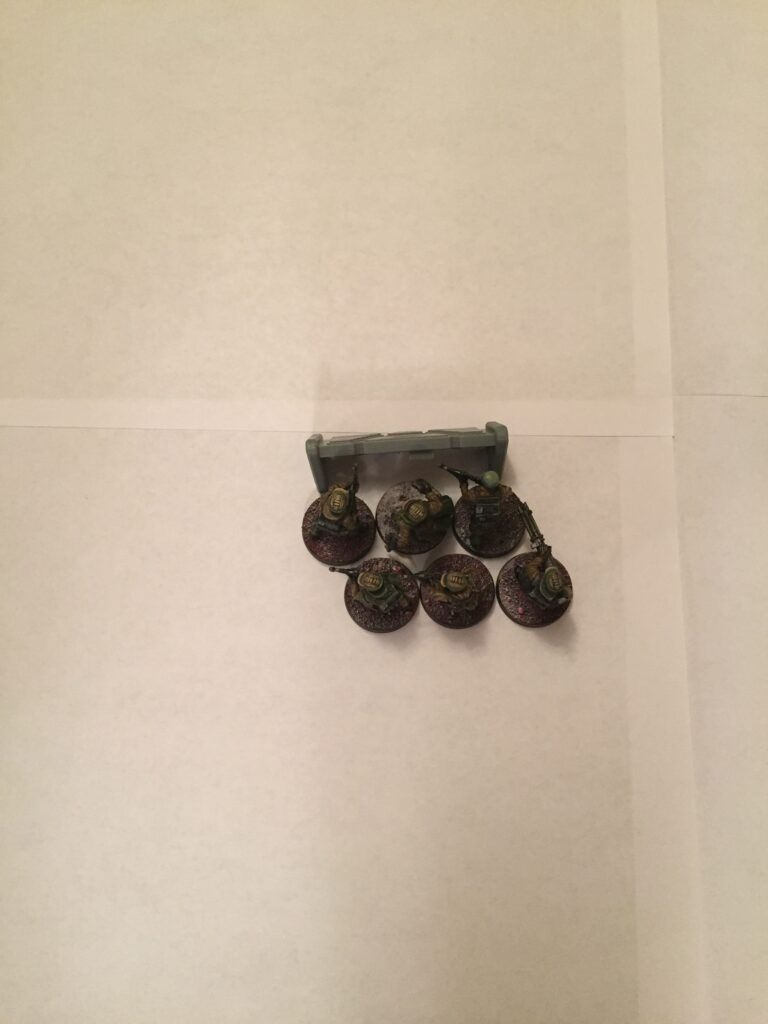
The unit leader and all his homeboys are behind the barricade. If the unit leader decides to advance and move straight out over the barricade, they would be slowed by difficult terrain. Instead, position your unit leader to be clear of the barricade if moving forward, while swinging your other minis behind, like so:
Now the unit leader is in a good position to continue advancing, while the unit still receives cover from the barricade.
LOS and heavy cover
Minis that are completely out of sight of the attacking unit leader always receive heavy cover. Use this in a pinch to swing non-leader minis behind LOS blocking terrain the same way you would with the barricade.
The unit leader could not quite make it to the LOS blocking terrain, but the other minis are able to get there thanks to the ‘free’ cohesion placement move.
LOS and wound assignment
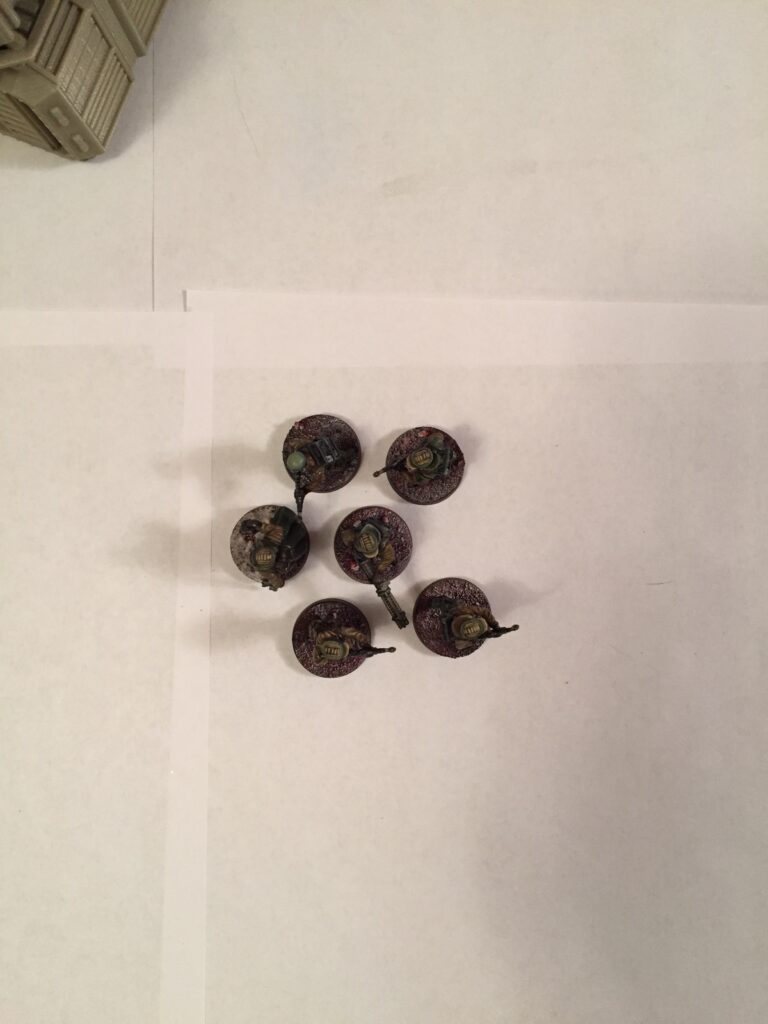
Minis to which line of sight is completely blocked from all minis in the attacker cannot suffer wounds. This is related to the LOS and heavy cover rule, but there is an important nuance. Cover is always determined from the unit leader. For wound assignment, as long as a target mini can be seen by any mini in the attacking unit, it can be removed as a casualty. This can be used defensively as well as offensively. Defensively, the implications should be fairly obvious; place minis you don’t want to die behind LOS blocking terrain. If you have a unit leader with an objective box, for example, place him behind LOS blocking terrain. If you still want to shoot something, even if your other minis in the unit get wiped by return fire, the box dude can’t be killed. Offensively, the implications are more nuanced but equally important. If minis out of LOS cannot suffer wounds, that also means the only minis that can suffer wounds are the ones your opponent can see. Say, for example, a heavy weapons mini. Line of sight can be used to do what I like to call “terrain scoping.” Basically this means you move or deploy an attacking unit to use terrain to block line of sight to all but a heavy weapon mini. If your target suffers wounds and you can’t see anything else, that heavy has to die before his comrades. So how do you avoid this happening to your heavies? Always, always place non-special dudes around your heavy. Your heavy upgrade minis should always be in the middle of your unit. Get in this habit; do it every single time you move (and when you deploy). Even if there isn’t an obvious terrain piece they are directly behind, heavies on the edge of a unit can still be terrain scoped, especially by long range weapons like bombardments and snipers. What NOT to do:

This Z-6 guy is on the edge and can potentially be terrain scoped. What to do instead:
Now the Z-6 is in the middle. Other minis can suffer wounds first if the opponent manages to use terrain to scope a particular angle on this unit.
Blind fire
Any attacking mini that can see a mini in the target unit can contribute dice to the attack pool. Take a quick gander at the attack rules in the RRG. Do you see anything about checking line of sight from the unit leader in the Declare Defender step? Me either. Yup, you can attack stuff your unit leader can’t see. Because of how cover works, the unit will receive heavy cover by default; but that doesn’t mean you can’t attack it. Sometimes you want to protect your unit leader and still shoot (if he has an objective box). Sometimes you can’t quite make it around the edge of LOS blocking terrain, but you want to shoot anyway. Swing those spacedudes around the edge in cohesion.
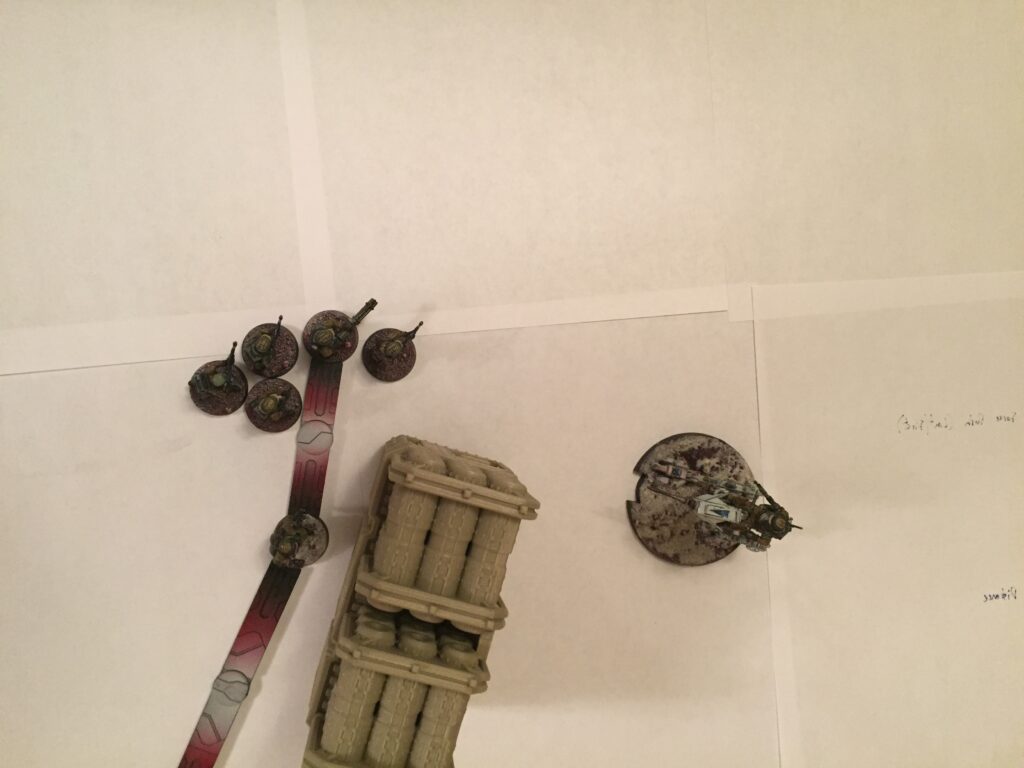
The unit leader won’t be contributing any dice to this attack pool, but the other five members of his unit will.
Measuring range
Range is measured from the unit leader to any mini in the defender. This is important as it allows situations where one unit can shoot another, but the other cannot return fire without moving forward first. For example, suppose you casually drop your dudes around your unit leader like so:
This is often called “forward cohesion.” Luke can reach the front dudes. He doesn’t have to measure to the unit leader. If this was another range 2 unit (pretend they are fleets for a hot second) this unit would not be able to return fire. Even though the squad is in range 2 of Luke (measured from Luke), Luke is not in range 2 of the squad (measured from the squad’s unit leader). Whoops. There generally is not a reason to put any non-leader minis closer to your opponent than the unit leader, barring other situations like we talked about already. Instead of just dropping them around the leader, make sure they are all behind him:
Now this squad could return fire without moving.
Forward Cohesion Exceptions
There are a handful of times where you want to cohere minis forward, in front of your unit leader.
Blocking
Sometimes you just need to block an objective with bodies, and the best location for those bodies is not always behind your unit leader. Suppose, for example, you want to block a Vaporator or Supply Box to prevent your opponent from interacting with it, but you can’t quite reach it with your leader; you can forward cohere your other minis and surround the objective token in question to body block it. You can do the same to prevent important units from getting attacked in melee as well.
Incognito
Range is measured from mini to mini, except for attack range, in almost all cases. This also applies to Incognito; let’s look at the relevant wording real quick:
A unit with the incognito keyword cannot be attacked by enemy units that are beyond range 1 of it.
Note the language says nothing about unit leaders here. If you want to attack K2 or some Sith Probes and can’t quite get your unit leader to range 1 of them, you can cohere a model forward such that the model is at range 1 of the Incognito target, and then make a legal attack.
Coordinate and Token Sharing
Since range is measured mini to mini on most things except attacks, you can use cohesion to extend the range at which you can do things like share tokens (Clones) or utilize coordinate. For example, the below B1s are at Coordinate range, even though their unit leaders are much farther the Range 1 of each other:
Those are still too spread out for my liking (check out the Dooku Unit Guide for more advice on good B1 placement and how to honeycomb) but they can at least check that Coordinate box.
This also goes for things like Medics and Repair droids. The extra cohesion distance can make it a little easier for them to reach their target.
Edge Case: Speeders and Hover
Speeder units and units with the Hover keyword (like Sith Probes) can cohere on separate heights after moving, as long as the cohered minis are within Range 1 vertically of their unit leader. Keep this in mind after moving things like Speeder Bikes, STAPs, and Sith Probes; sometimes this can be used to get extra cover or hide minis behind LOS blockers.
Summary
That’s it for cohesion tips. In short; think of cohesion placement as a free speed-1 move for your non-leader dudes. Use that move to get cover, deny shots, and avoid getting scoped. Build those good habits.


8 Responses
How come that whenever I read an interesting article on this blog with an in depth explanation, it’s always Kyle who wrote it! GG ! I wish we should be able to filter articles on this blog based on the subject, author, type (analysis, news,..) etc.
The part where the unit leader is blocked but the rest of the unit shoots…isn’t range range line of sight determined from leader? So if he is completely los blocked the until can’t shoot?
No; there is no line of site requirement in the declare defender step. Leader’s line of sight is checked in two later steps; cover (if the leader can’t see any minis, they get heavy cover automatically) and when each mini contributes dice to the attack pool, which is done mini by mini. So the end result is you can take the shot, but the target automatically gets heavy cover and the unit leader won’t be able to contribute dice to the attack.
Hi Kyle, im new to legion and notice the above article from your old site – there was a question there that i found intriguing but not answered: https://swlegionodds.com/2018/10/20/fundamentals-cohesion/
Just to do with placement around a piece of terrain – you would have to ensure the movement tool can be rotated in a way that the mini can be placed? I didnt think it to be true but would be great if you could clarify that query? thanks, T
Yeah; the mini has to be placed such that you could actually make a speed 1 move between the unit leader and the mini being placed in cohesion, so if you are cohering around the corner of a building or something you need to actually bend the movement tool around the corner.
Thanks Kyle! appreciate the answer. It’s tough for new players sometimes and these articles, videos and answers do really help! Thanks for all the articles and to the team too! Best of luck with Storm Tide
Hello There!
I’m reading this article and the reference images are broken. Can you link again them to fully understand the article? Thanks!
Weird, I will take a look, thanks for letting us know.