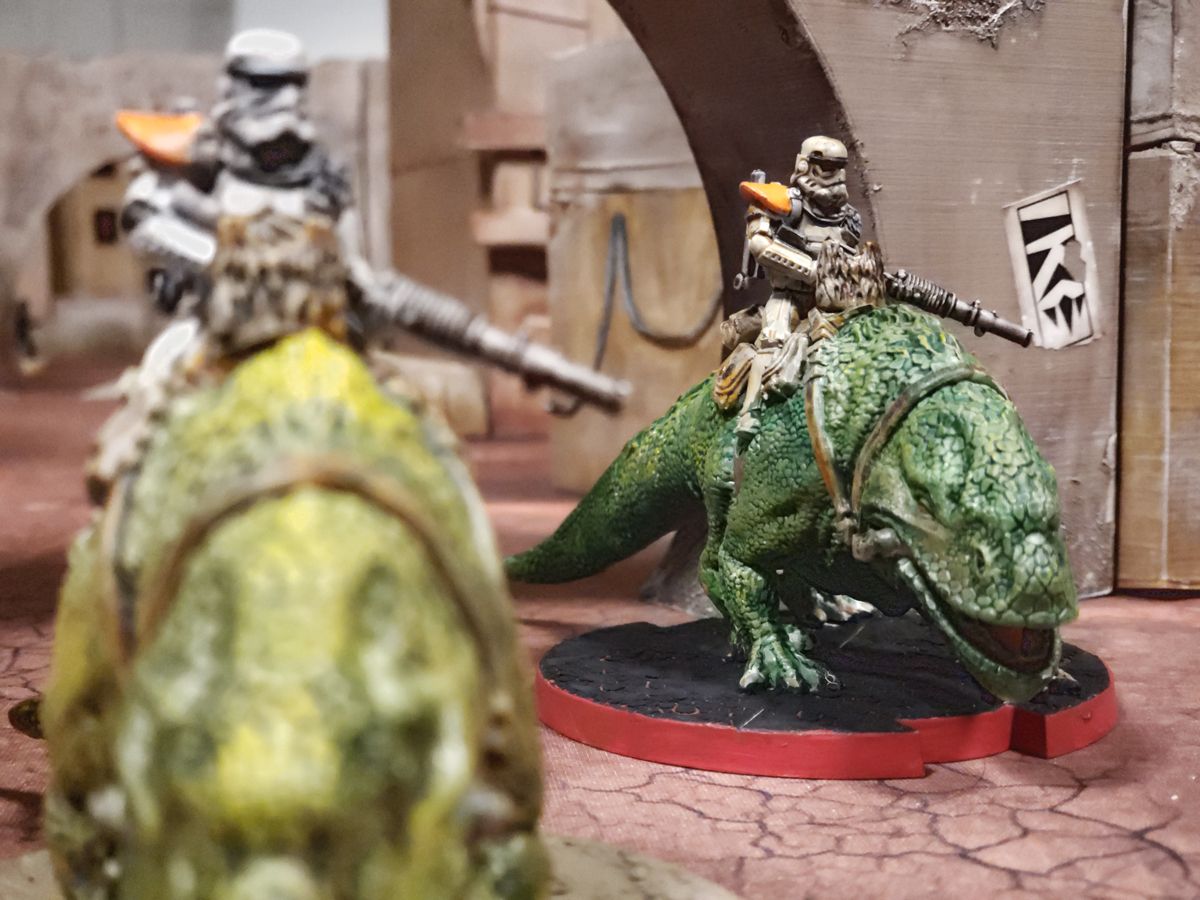
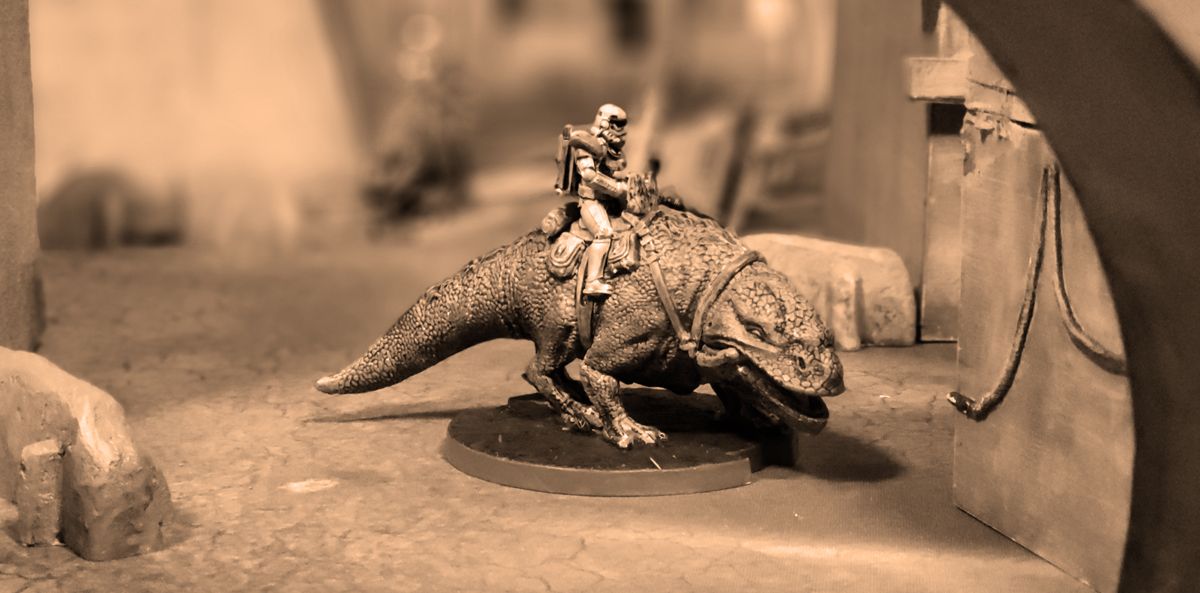
The Dewbacle has been looming over the Star Wars: Legion community like a star destroyer over a rebel blockade runner since August. The shadow has been there for so long that most of us had pushed Dewbacks from our memories as something we may never encounter. Well it looks like it may finally be at an end this week and with that I thought it would a good idea to talk about these scaly boys.
These thick-skinned reptilian mounts are exactly what the Empire needs in this age of creatures. The Dewback Riders are a tough no nonsense unit with several options, making them a perfect piece in any “all comers” lists. Evan and I talked about this on our recent live cast and it really dawned on me then just how good they are.
In this article I thought I would “dew” something a little unique with the unit analysis part of this post and use a SWOT analysis. SWOT is a generally used in business and stands for Strengths, Weakness, Opportunities and Threats. I think this is a great way to look at any unit and determine its viability in your list.
Let’s Begin:
Strengths –
 The Dewback’s strength lies in its abilities to be a chameleon (lizard joke), similarly to the AT-RT the Dewback with its Armament options and its natural attack can adapt to your list needs. From long range to up-close-and-personal these monsters can fit in at any party. Here is how I am ranking the weapon options:
#1 RT-97C Blaster Rifle – I believe that this weapon is highly undervalued currently and will see a huge spike in use when the Dewbacks and the Stormtrooper expansions start hitting the table. Any range 4 weapon throwing 4 dice with surge to hit is going to make some waves and force your opponent to think twice. Now add that weapon to a unit that has relentless and you have yourself a nasty cavalry unit that hits hard from all ranges and has three actions a turn.
#2 Razor Claws & Shock Prod – So you have been laying down cover fire all the way up the field and now its time to get to business? Once this lizard leviathan is in your grill its goodnight Irene. With 3 red and 3 white, Critical 2 and Suppressive these boys lay out the pain. Don’t forget relentless and spur, now you have an opportunity to aim, run around some LoS cover and be on top of something clawing and prodding faster than your opponent would like. Even heroes are going to struggle with a heavy hitter like this.
#3 CR-24 Flame Rifle – Why number 3 you ask? Remember a few months ago when the Han/AT-RT “BBQ” list was all the rage? Now give that to the Empire and see what happens. Though slightly different, the Dews have swapped out the second black die for a white and can flame 360°. This will require some finesse on your part to get these units range of something to flame, once you do you’ll be toasting marshmallows in no time.
#3 T-21 Blaster Rifle – Don’t get me wrong here this weapon is good and is only last because something must be last. The T-21 is a mid-range weapon with 4 white dice and Critical 2 helping you get around cover and armor. It benefits similarly as the 97c from relentless and is 5 points cheaper. The reason it goes last is because of the range, this is a mid-range weapon on a unit that needs to be out of range of your opponent and if you have to wait to until range 3 to start attacking, it’s a far greater hill to climb to get in close to your opponents.
Aside from the armament options the Dews strength is also in its keywords. Relentless, Reposition and Unhindered are requirements for this unit to be viable and worthy to join and Imperial lists. The Dewbacks can be a little finicky to run but once you work out how to get them into position by using LoS blocking terrain to your advantage you’ll see the value in these beasts.
Weakness –
The Dewbacks seem like tough no nonsense mounts that will rip your opponent to pieces and live to tell the tale, the truth is they aren’t as strong as they come off. The Dews have 6 health, Armor 1 and red saves, not bad right? Here’s the rub… the are big and odd shaped. It’s hard to get them clearly behind LoS blocking terrain and when you do it takes them sometime to get into position for their next move. They require a lot of thought and planning to make sure they survive long enough to do some damage.
This leads me into suppression. Like their TaunTaun counterparts, the Dewbacks hate suppression. Even though they have courage 2, it seems to be not enough between spur and enemy fire. You generally need to recover most turns to make sure they don’t get suppressed or panicked. This takes a lot of action economy away from the Dewbacks.
The final weakness that the Dewbacks face is: cost. You are already 90 points in before upgrading to an armament and I have found that you will want to fill the Comms and/or Training slot as well to help get the Dewbacks prepped for the battlefield. You will generally be looking at 115 points for one Dewback Rider.
Opportunity –
The Dewbacks have plenty of opportunity on the field in a variety of list options. They are a great flanking unit in an Imperial gunline list making your opponent fight on multiple fronts. They can also be used as a brute force murderball approach hitting your opponent hard pushing on and holding objectives.
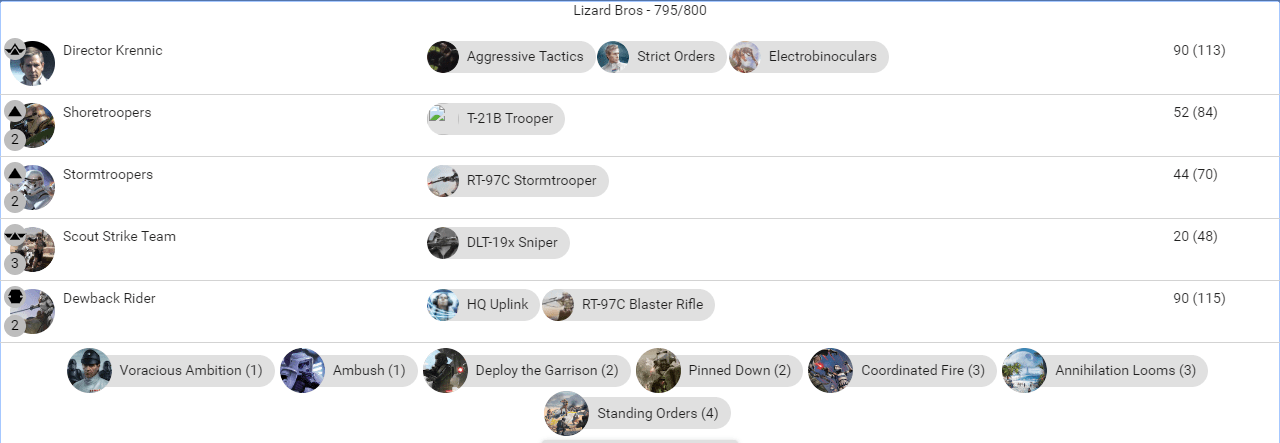
This 11-activation, range 4 list allows the Dewbacks to either get into position to take out a hero or troublesome unit or they can join in on the range 4 fun and help gun down incoming enemies. The HQ uplink is great here and utilizing that with recover allows you to do some first/last shenanigans with the Dewbacks.
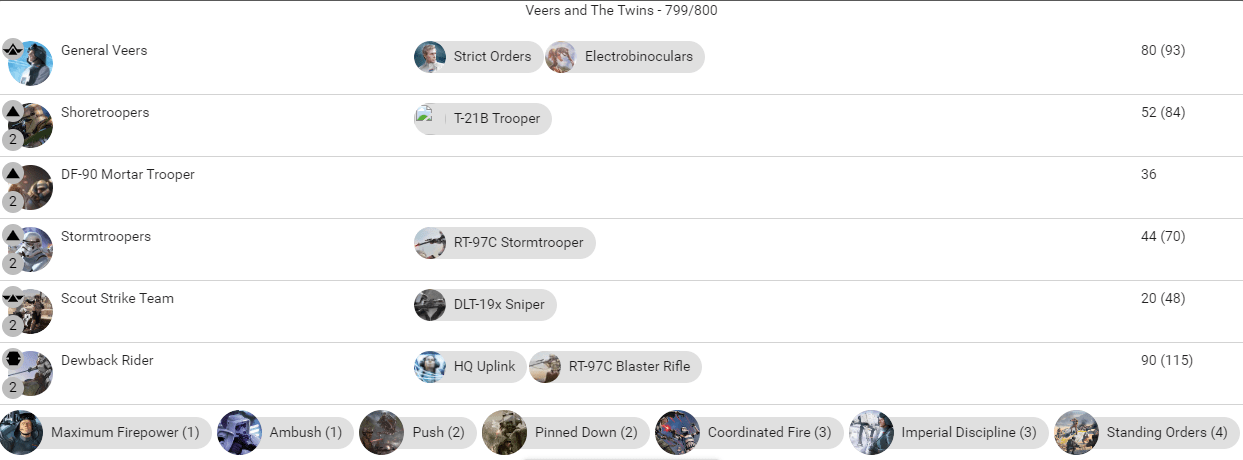
While Krennic is laying down the law on the command side of things the rest of the army in this list are laying down some serious fire. Another long-range list holding off your opponent then pushing forward when needed. The three sniper teams really help to create lanes for your Dewbacks and hold enemy units at bay.
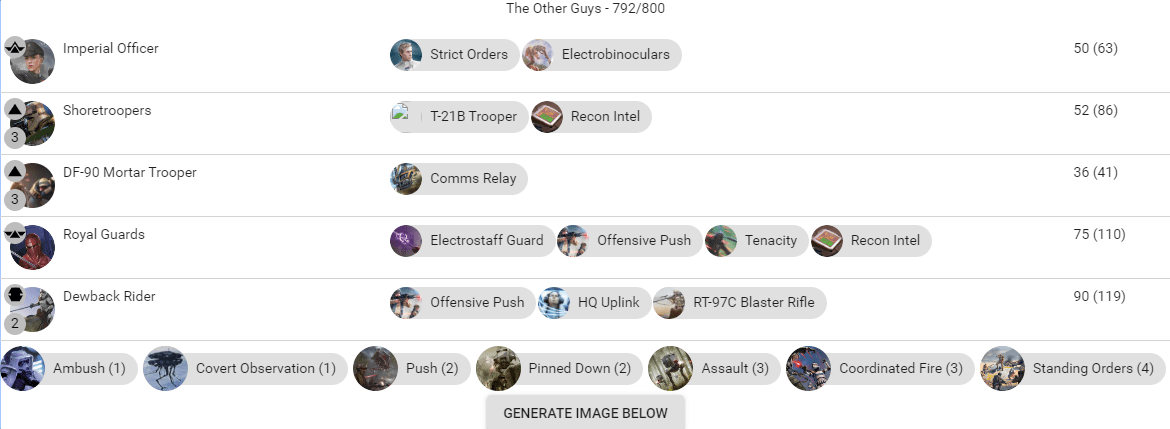
I like the idea of trying to use a generic commander and win out the day. This list is designed to be an all comers list and trying to make sure we have all our bases covered. Recon on the shores and guard let them all get into early position to turtle up. Using offensive push on the Dewbacks gives them some options during a suppressed turn or another action.
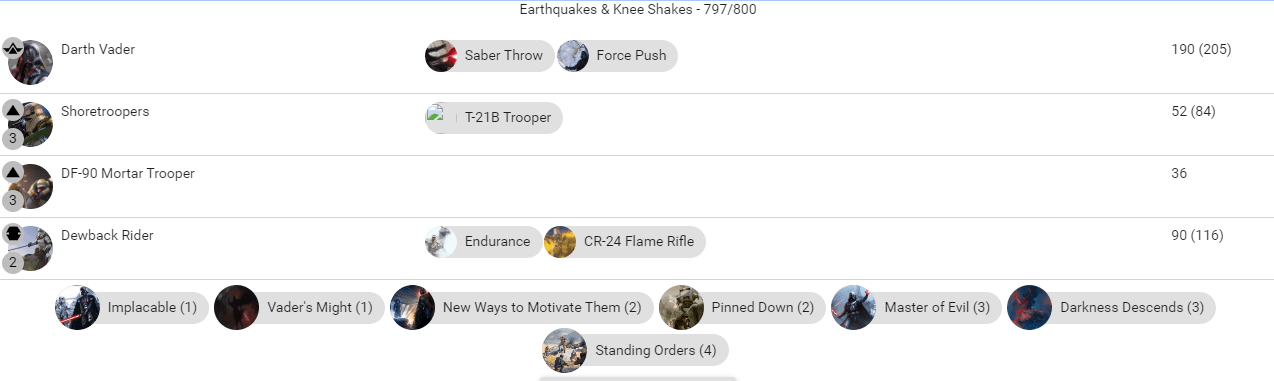
This list is just an insane mix of the scariest things one could face on the other end of the table. With the BBQ Backs and Vader coming at you will the Shores are laying down fire from range 4, any opponent will have some doubts on their survival.
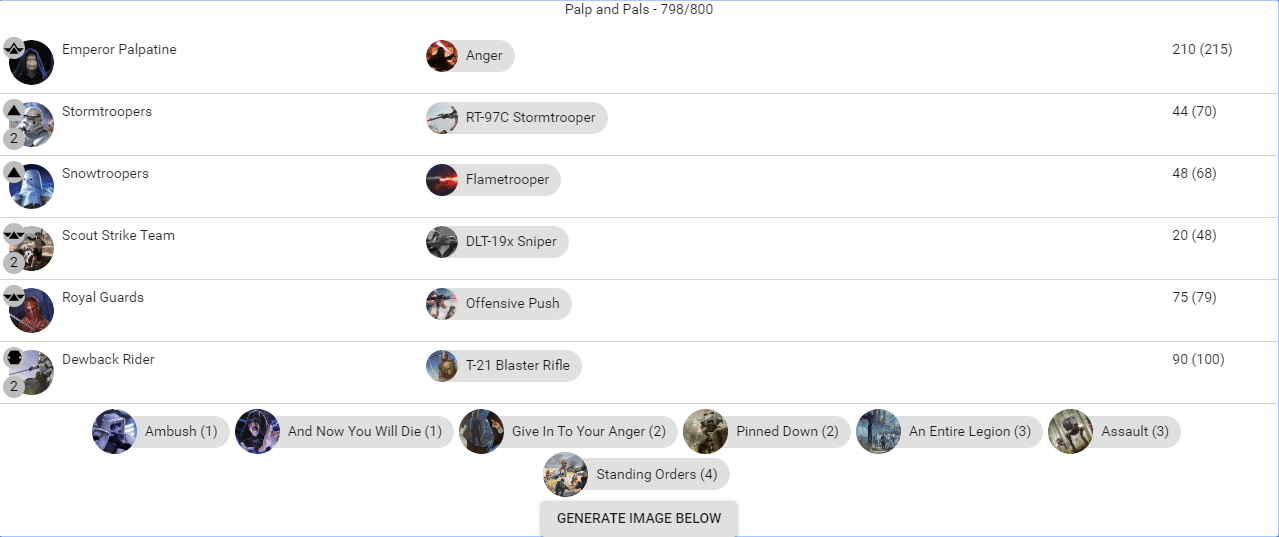
The Emperor needs some love and I just really like the idea of this list working. I don’t know how viable it is but I thought it looked fun.
I believe there are plenty of other list options that the Dewbacks fit into and it will really come down to what you as a player are comfortable with.
Threats –
The threats that face the Dewbacks are similar to the threats that face any unit really, but it is good to point them out and talk about each of them.
Suppressive Weapons – This is a big one. As I pointed out in the Weakness section above, the Dewbacks are not fans of suppression and the biggest threat they face in the suppression wars is Imperial Mortars, Shore gunlines and Bossk. The ability to lay down suppressive fire at range 4 is clearly super strong and these big, oddly shaped lizards are a perfect target for some long-range mortar shots followed up by a Shore barrage.
Fire Support – The Dewbacks seem strong but can wither quickly in the face of a 20-gun salute. Clone Z6 fire support into another Z6 fire support is a nightmare for the Dewbacks. If you do want to watch 100+ points
melt before your eyes, make sure to stay out of LoS of Clones and Rex.
Aggression – This means you their commander. You need to be safe and smart when playing these big guys. You can easily get them wiped out by leaving them hanging after a relentless melee attack or trying to
take a range 4 pot shot at an enemy unit. Be safe and cautious and pick the right time to make a push.
Turn Zero – Once again this is an internal threat. Make sure during battlefield selection and deployment that you are putting your lizard friends into good position to make a difference on the upcoming battle. Choose your strategy wisely and stick to it. Are the Dewbacks going to be a turn 4 flanking threat? Are the going to barrel head on as cannon fodder as a distraction? Make sure you have that thought out and planned.
This was a quick look at the Dewbacks and what they will bring to your table. I encourage everyone to get them on the table and experiment with what feels right to you. I think that the Dewbacks have a place in this world and will be a welcomed addition to the Imperial family.
Great article, I have an opponent that is maintaining Commander Vader’s no courage value can be transferred to Dewback in range 3 therefore they effectively cannot be panicked because of his Commander’s courage value of zero. Is this correct??