

Picture this: You’re playing in your local store/tournament/WOQ and you’re having a debrief with your fellow players about the game you’ve just finished. The conversation gets to you, and you say, “My problem is, I lost before I even rolled my dice, but I didn’t see it at the time.” It’s a highly common experience, one I hear very often, so in this article I’m going to go through a few examples and the thought processes behind them to hopefully help you reconsider the common pitfalls found during Turn 0.
The Big No-No’s
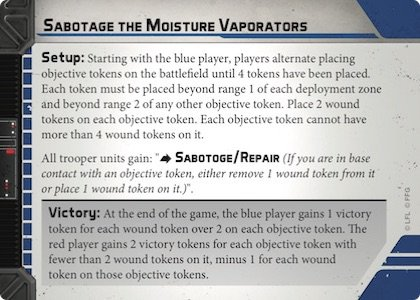
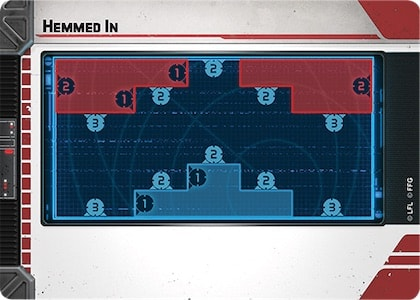
In my opinion, there are a few combinations that you should avoid playing at all costs. The first and most common is playing Hemmed In and Payload. Payload might be a mission that is not taken as much these days, but you need to especially avoid this combination as red player since it is essentially an automatic loss.

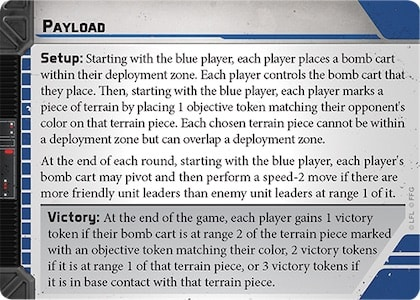
The reason for this is the blue player places their Payload in the middle of their deployment which is the middle of the board. If the terrain is not mega unfavourable, then the blue player should be able to touch the payload point in a maximum of 5 turns.
While red player has to pick one of their deployments for his payload then blue player will pick a piece of terrain at the other end of the board. It is often not possible for red player to score the full three victory points compared to blue player. There is also the issue that red will have to move their payload via blue’s army and deployment zone. Now this is not 100%-win rate for blue but is on the scale of 99% so don’t put your self at such a disadvantage.
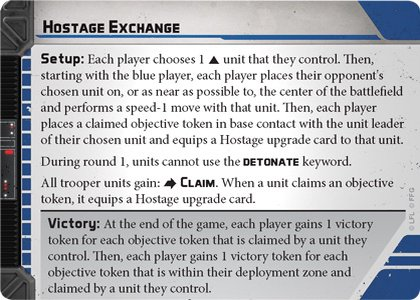
Another example is playing Hemmed In and Hostage Exchange when your opponent has scouting party. When playing against this combo your opponent will deploy their unit with scouting party and be able to move their hostage into their own deployment zone and therefore starting the game with two victory points. This then gives them an advantage since they can just focus on killing any unit and getting ahead on the tie breaker and not care if the opponent gets the hostage into their own deployment zone or not.
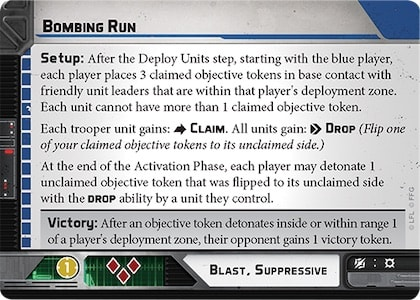
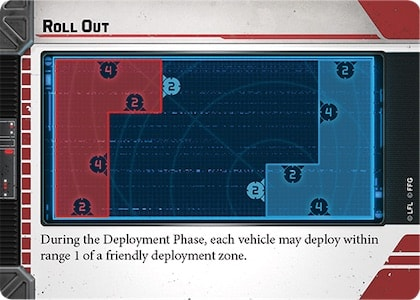
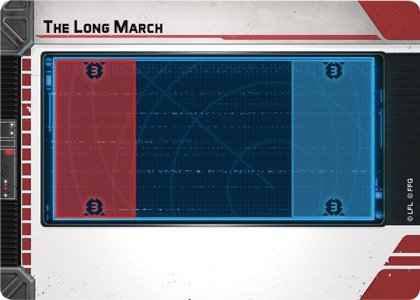
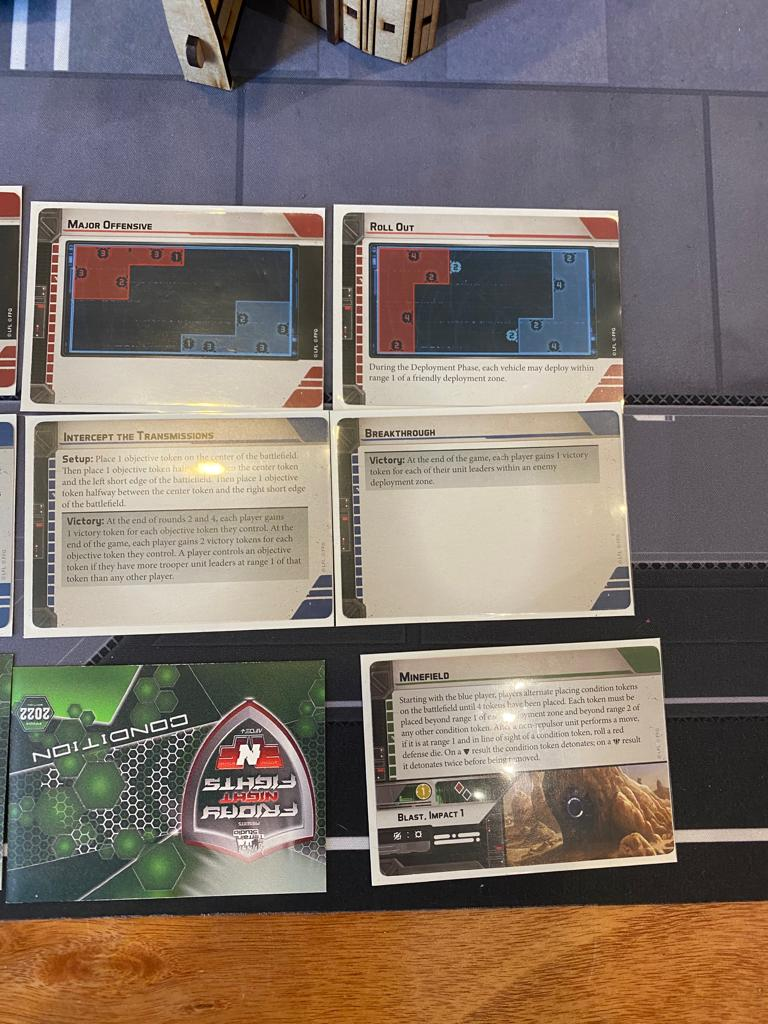
The final example to be aware of is when you are playing Bombing Run on any long deployment (Long March, Roll Out and Major Offensive) and your opponent has 3 fast-moving vehicles or full armour and you have nothing that is fast or full armoured to counter it. If you have a full troop army of speed two troops vs three speeders,hey can triple move to your double in a turn. They can’t be suppressed and they can move farther than you, so it doesn’t often end well. The caveat to this would be that you have three speed three units with jump like any Mandalorians in your list. You’re not as fast but you have at least a plan for playing this mission.

Example 1
The first thing I will look at when doing turn 0 is I look for the best-case scenario for my list what mission is my strongest from the possible options and what is the worst.
This highlights the mission I need to avoid no matter the cost and highlights the mission I want to try and get.
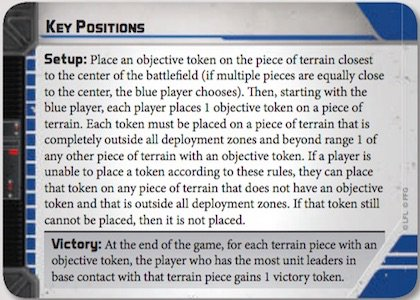
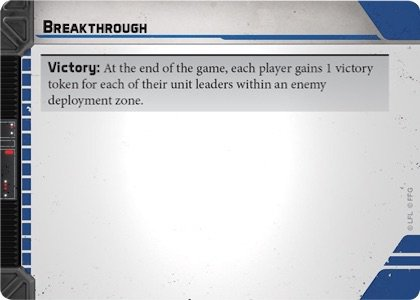
In a recent game vs Blizzard force with my Palpatine list. Looking at his battle deck the worst-case mission to play would be Bombing Run due to not having any fast units vs his four fast units. The best case would be Hostage Exchange. The middle ground is Key Positions, and I can play Breakthrough but would like to avoid if necessary. The deployments for me in this match up are less important since I can lose the game before it starts with the wrong objective.
The flop came down as Bombing Run, Key Positions, Hostage Exchange and Breakthrough…which is perfect! Being Red player, I can control that we only play Key Positions or Hostage Exchange.
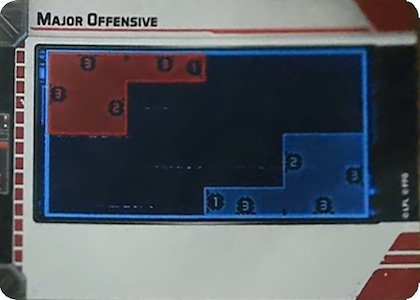
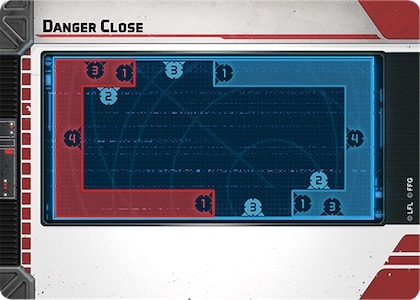
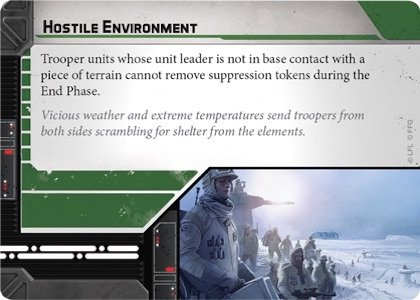
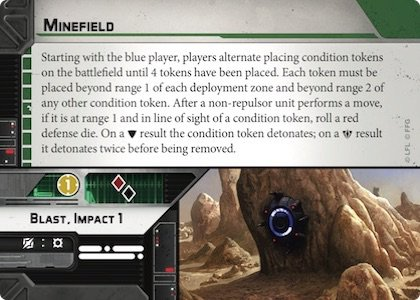
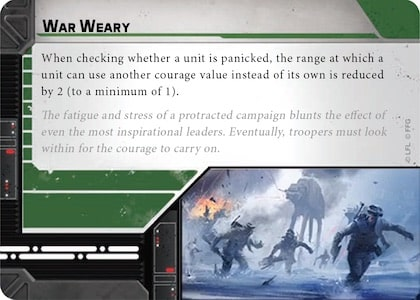
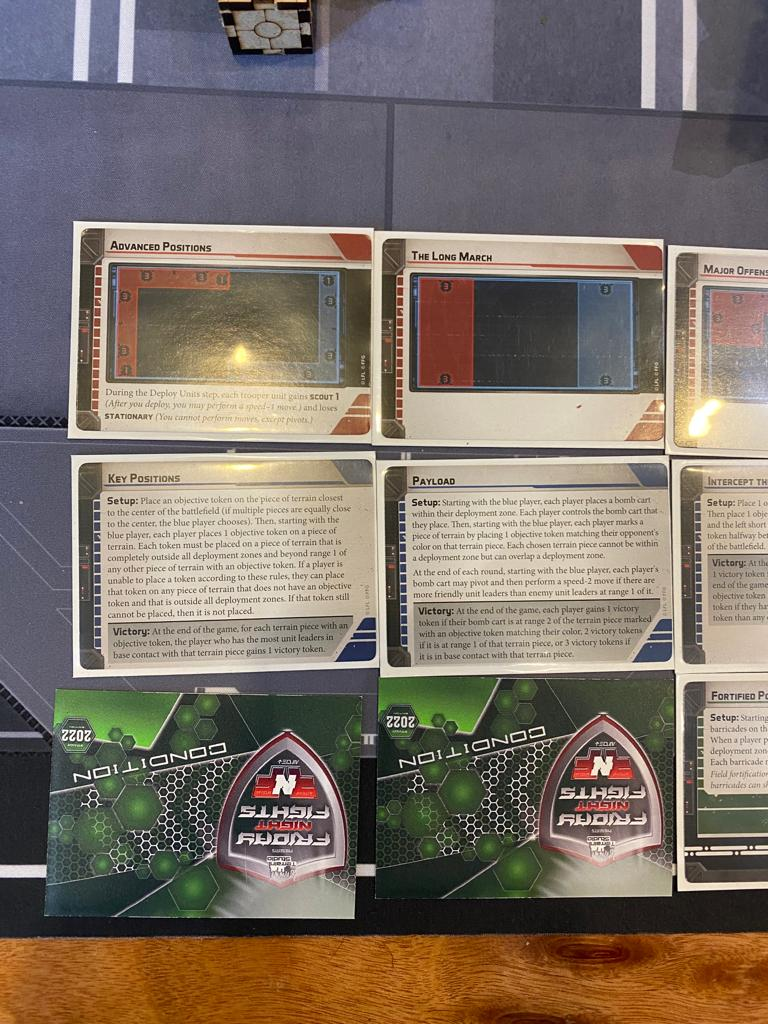
The deployments where Advanced Positions, Hemmed In, Major Offensive, Danger Close and the conditions came down as Hostile Environment, Minefield, War Weary and Clear Conditions.

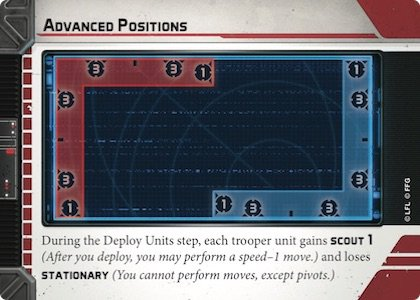

Ollie being Blue with over 150 games of Blizzard force is more than happy to play any combination but also knows I don’t want to play Bombing Run and so he bans Advanced Positions, making it so he has an advantage if we play either of the other missions. This was well planned from him since I instantly banned Bombing Run giving him an advantage if we played either of the next two objectives. Olly then decided to pass and make me pick the objective.
I don’t have force push so playing Key Positions against Vader would put me at a disadvantage, I decided to play Hostage Exchange due to me having Palp’s two pip to make it so I can control which unit activates first forcing him not to be able to use Vader’s might straight away and giving me time to move my own hostage away.
What I do have to consider for both objectives are the deployment zones. If I didn’t want to give him an advantage for Key Positions but have one in one of my deployments is that a good trade for me? If we do play Hostage, am I okay with him being able to score two victory points from turn 1? For this game and match up I was happy he could score two because I was confident due to my plan, I would also have my hostage and then the game would come down to kill points and I just hopped my list could handle the incoming damage while outputting enough.
Example 2
In this example since we have no bid, we are going to go through what my thought process is when we have won the roll off and chosen to be Blue player.
In this matchup we are facing off against Anakin and the 501st.
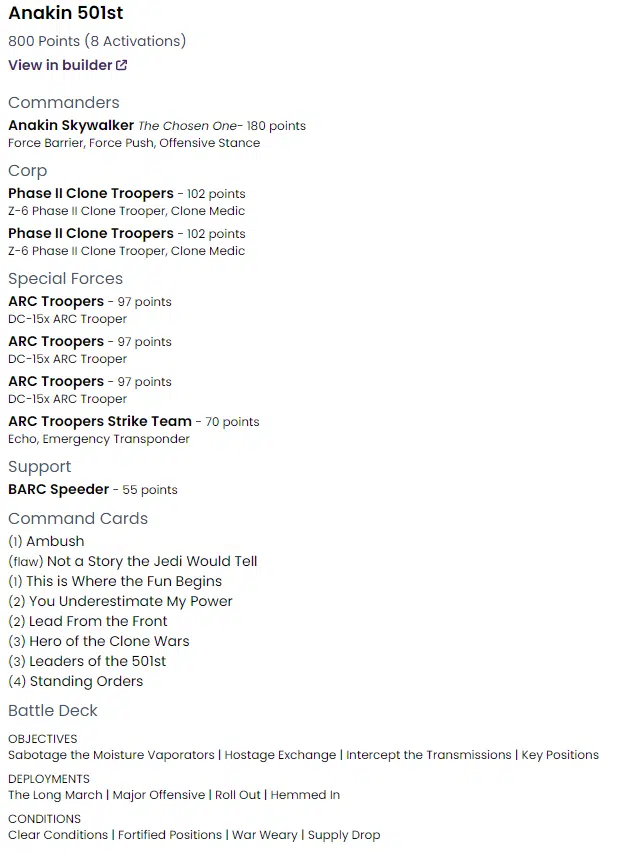
The first thing I’m looking to do is force the best mission scenario. The conditions in my deck are favourable for me but I don’t think I want to waste a ban on any of these. The Objective and Deployment are a perfect start and is probably what I would have liked to finish on. So based on what we have available I want to have a deployment that is not to far from my opponent since he is running 501st with a lot of ranged pierce and I can only barrier one of them.


My opponent’s list is not running Force Push so Key Positions or Payload with Hemmed In is the best-case scenario we want to aim for.
Although I want Hemmed In I’m going to assume and guess my opponent does not want to play hostage since Anakin does not have enough time to power up. This then makes me think about what the follow up ban would be which would be Hemmed In. With me doing nothing my opponent will force us to play Sab’s and Roll out which is a great scenario for them.
To counter this theoretical scenario, I banned Hemmed In.
My opponent as expected did ban Hostage exchange. With our final option we can try and push for Key Positions and hope our opponent does not pick to play payload since Red Player has the final say on the mission.
If we do play Sabotage then I can try and score the bounty to make sure the game does not go to kill points. To help me with this scenario we are both 800 points so if neither of us kill anything it is a draw and neither of us can go on to win the tournament. I will want to play more aggressive to either try and get the Bounty on Anakin with IG-88 or get ahead on kill points.
I spend my last ban to give me Major Offensive. The downside to this is that if my opponent wants to play Sabotage they can now ban to play Long March which leaves us in not much of a difference scenario to the last deployment. The only benefit is I have the whole of the short edge and stops his BARC from being able to have a deployment advantage.
To my surprise my opponent decided to that he wanted to play Key Positions. I can only think he wanted to play an objective where it scored at the end after he has withered my list down with his long-range pierce. With neither of us having Force Push it would lead to an interesting turn 6 game play.
Example 3
For this example, I want to talk through a recent game I watched at MK:GT between a Tempest Force list and General Grievous.

The General Grievous list is blue player and with the best deployment for him in the first slot and the best deployment for Tempest Force being in the last slot makes for a potential interesting set of deployments if either of them try and ban anything. The objectives are more favourable to Tempest Force in the two earlier spots while the two objectives at the end are more advantageous for the droids.
The conditions don’t seem to benefit or hinder any player as much as what the objective or deployment potentially could.
If I was playing as Tempest Force I would want to try and have either Long March or Roll Out so that I can use my long range guns on the AT-ST’s to weaken the B1 squads ready to clean them up on the later turns.
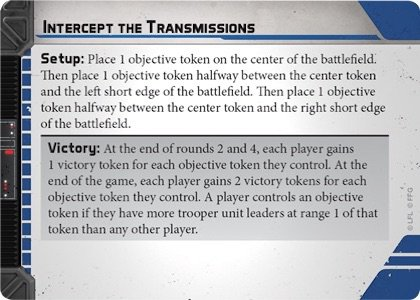
To help with this as the Tempest Force player I would want an objective where I can score later in the game. Looking for Key Positions or Payload. I want to avoid at all costs avoid Intercept since I only have 3 trooper units that can score but with that being in the 3rd position and being Red player we will never play this objective.
Now let’s look at it from the droid players point of view. I would want the deployments that keep me at range 3 of my opponent since it gives me the best dice pools for my B1’s and close enough that Grievous can start moving and shooting with his pistol and the BX’s squads can use the big dice pools to fish for some crits. Also, by being deployed close you can try and kill the trooper units to give them fewer options of scoring in the later part of the game.
The best objective here would be Intercept but with being blue player I don’t have a chance of forcing this mission, so want to try and force something like Breakthrough since we have the unit advantage and if we can kill a few units on the way while conceding as little as possible. This will give us the advantage on objectives like Key Positions and Breakthrough. The objective to try and avoid would be Payload since those AT-ST’s can be used as big roadblocks stopping me from scoring while Tempest Force is still able to move and score their own objective.
I would imagine this turn zero would go with Blue player banning Key positions, Red banning Advance Positions followed by blue banning Payload for Red to do the final ban to make the game of Long March, Breakthrough and Clear Conditions.
What actually happened was both players banned everything on the conditions line with one of them passing, leading to a game of Advance Positions, Key Positions and Minefield.
Conclusion
Across all three games examples you could have the same flops and the same lists but every player will approach this a bit (or a lot) differently. The third example demonstrates this best. In theory you can better consider the best and easiest way to win but you can only speculate as to what your opponent is going to do. Therefore, it’s worth ensuring you don’t get your heart set on it as they may do the completely opposite of what you expect, throwing a spanner in your plan!
My last bit of advice for Blue player is to try and force Red player to have to choose between two choices where only one gives them an advantage and the other one leaves you with an advantage as well.
For Red, my advice is that you always have control over what the actual game you play is. That final ban can be incredibly important, and if it’s used well you can use it to wipe out that famous Blue player advantage completely.


1 Response
Good stuff. I believe where I struggle the most is in deployment. I have a hard time “seeing” the board and how my opponent will play the game, and how I react to their deployments.